
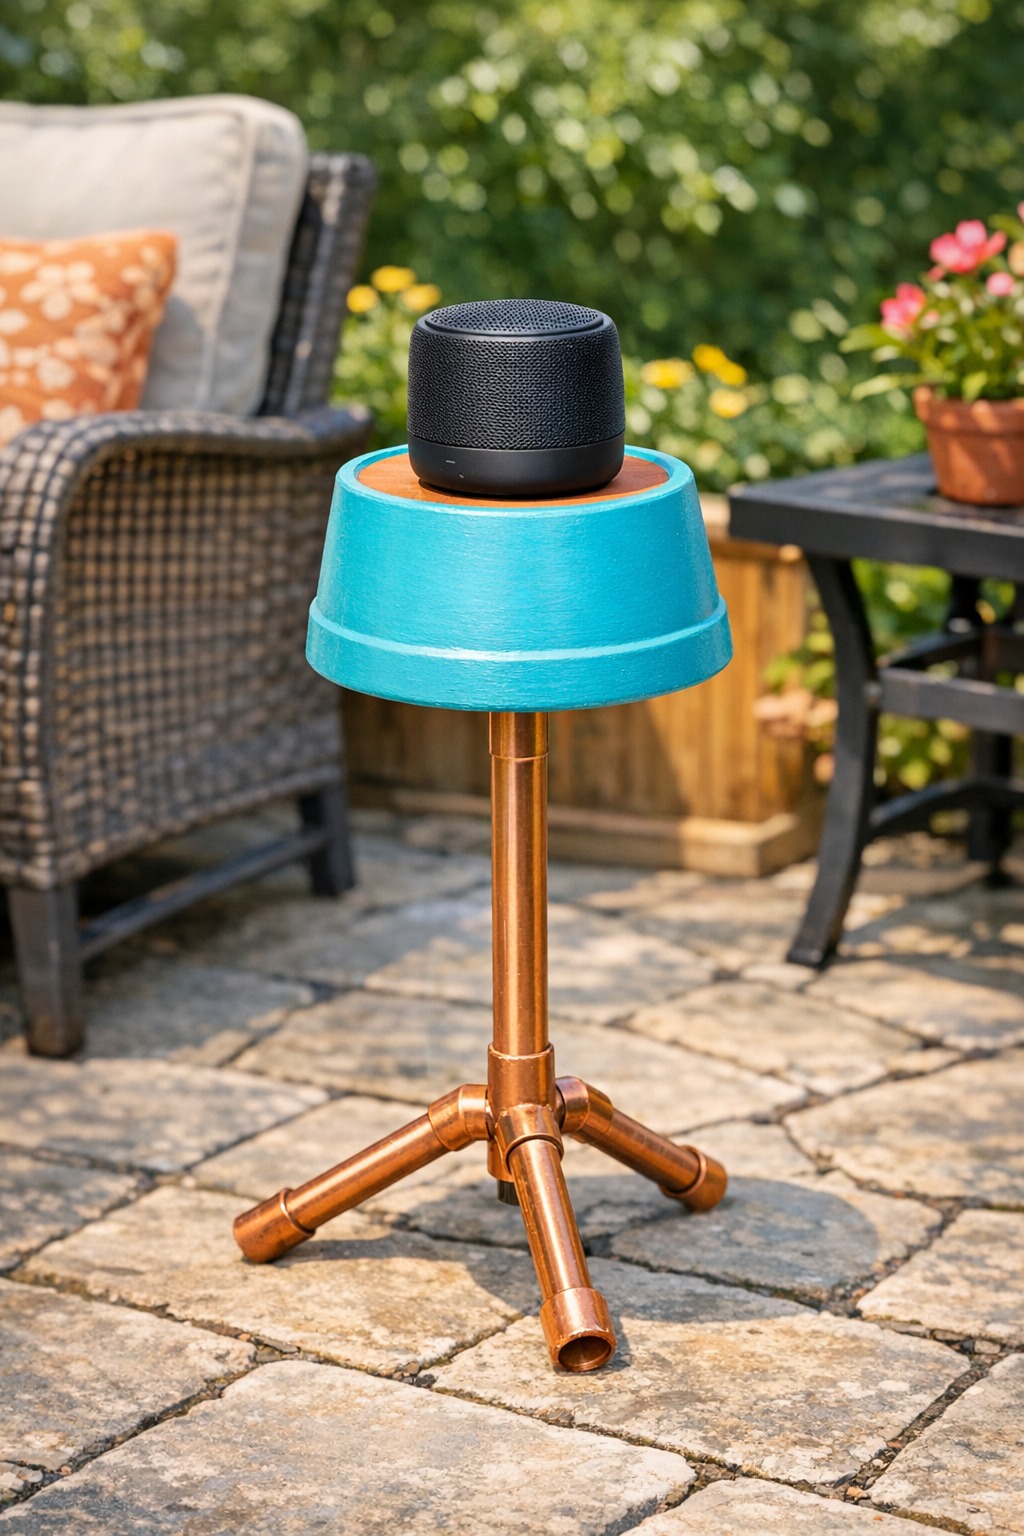
This little backyard project turns a small Bluetooth speaker into something that looks intentional, tidy, and honestly a lot cuter than setting it on a patio table and hoping nobody splashes it. By threading the speaker cord and support through a painted terracotta pot and mounting it on a simple copper pipe base, you get a raised outdoor speaker stand that blends right into a porch, garden, or cookout setup.
I love projects like this because they make entertaining easier without feeling fussy. If you enjoy having music going while you grill, garden, or sit outside with family, this is a practical afternoon build that uses easy-to-find materials and doesn’t require fancy tools.
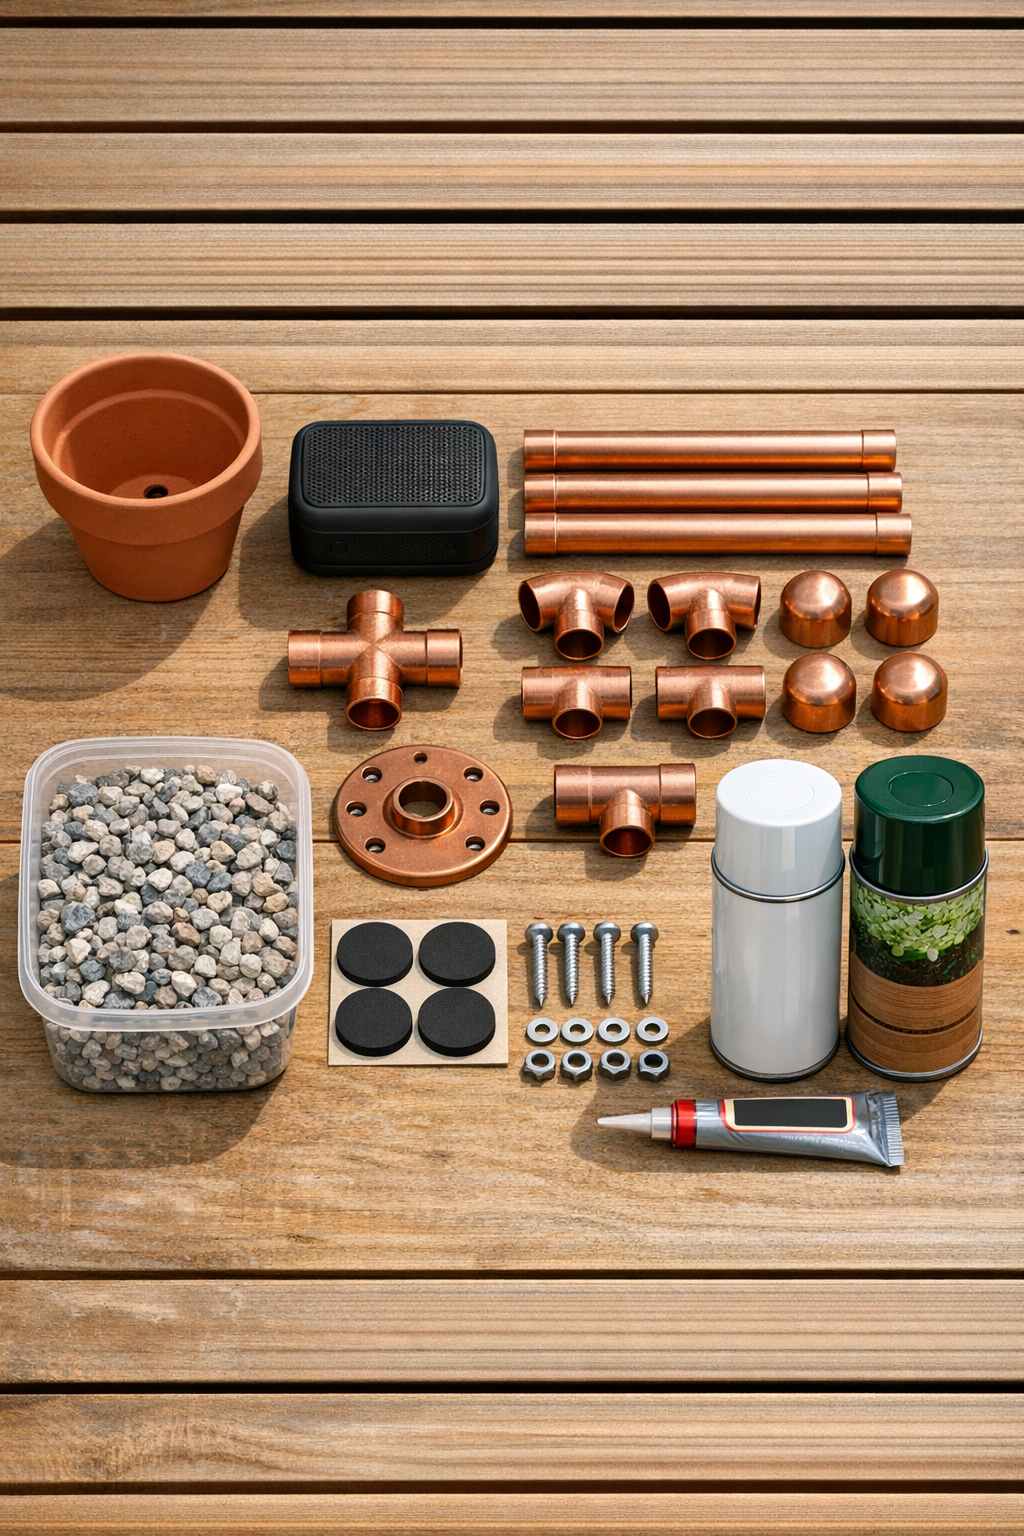
Materials
1 small terracotta pot, 6-inch diameter with drain hole
Instructions
1. Wipe the terracotta pot and copper pieces clean, then lightly sand the outside of the pot with 120-grit sandpaper so the paint grips well.
2. Smooth any rough spots with 220-grit sandpaper, then wipe away all dust from the pot and copper with a clean cloth and a little rubbing alcohol.
3. Spray the terracotta pot with 2 light coats of outdoor paint, letting each coat dry according to the can directions.
4. Seal the painted pot with 1 to 2 light coats of clear outdoor sealer and let it dry fully before assembly.
5. Build the copper base by fitting the 24-inch pipe vertically into the center of the tee fitting, then insert the two 8-inch pipes into the side openings to form a T-shaped foot.
6. Press the copper end caps onto the ends of the 8-inch pipes and check that the base sits flat and steady on the ground.
7. Add a bead of waterproof construction adhesive around the top 1 inch of the vertical copper pipe if you want the pot permanently secured.
8. Thread the terracotta pot down over the vertical copper pipe through the drain hole so the pot sits upside down, with the wide opening at the top like a cradle for the speaker.
9. Pour the pea gravel into the inside of the inverted pot around the pipe to add weight and reduce wobble.
10. Stick the 4 adhesive rubber pads evenly around the rim of the pot opening so the speaker has a soft, non-slip place to rest.
11. Set the Bluetooth speaker across the top opening of the pot and center it so it feels balanced and secure.
12. Test the stand on a flat outdoor surface, make any small balance adjustments, and move it to your patio, deck, or backyard seating area for use.
Variations & Tips
Color choice: I like using a soft white, sage green, or matte black paint so the stand blends in with outdoor planters and furniture, but a bright color is fun if you want it to stand out at cookouts.
For picky placement: If your family tends to move things around like mine does, make two matching stands for opposite corners of the patio so you always have flexible spots for music.
Speaker fit: Measure your speaker before you start. The pot opening should be slightly smaller than the speaker’s length or width so the speaker can rest across the rim without slipping through.
Extra stability: If your yard gets windy, use a heavier terracotta pot or add more gravel inside the pot before setting the speaker on top.
No permanent glue: You can skip the construction adhesive if you want to take the stand apart for winter storage.
Weather tip: Even if your speaker is water-resistant, I still bring mine inside after gatherings. It helps everything last longer, and it saves you from replacing a speaker after one surprise rainstorm.