
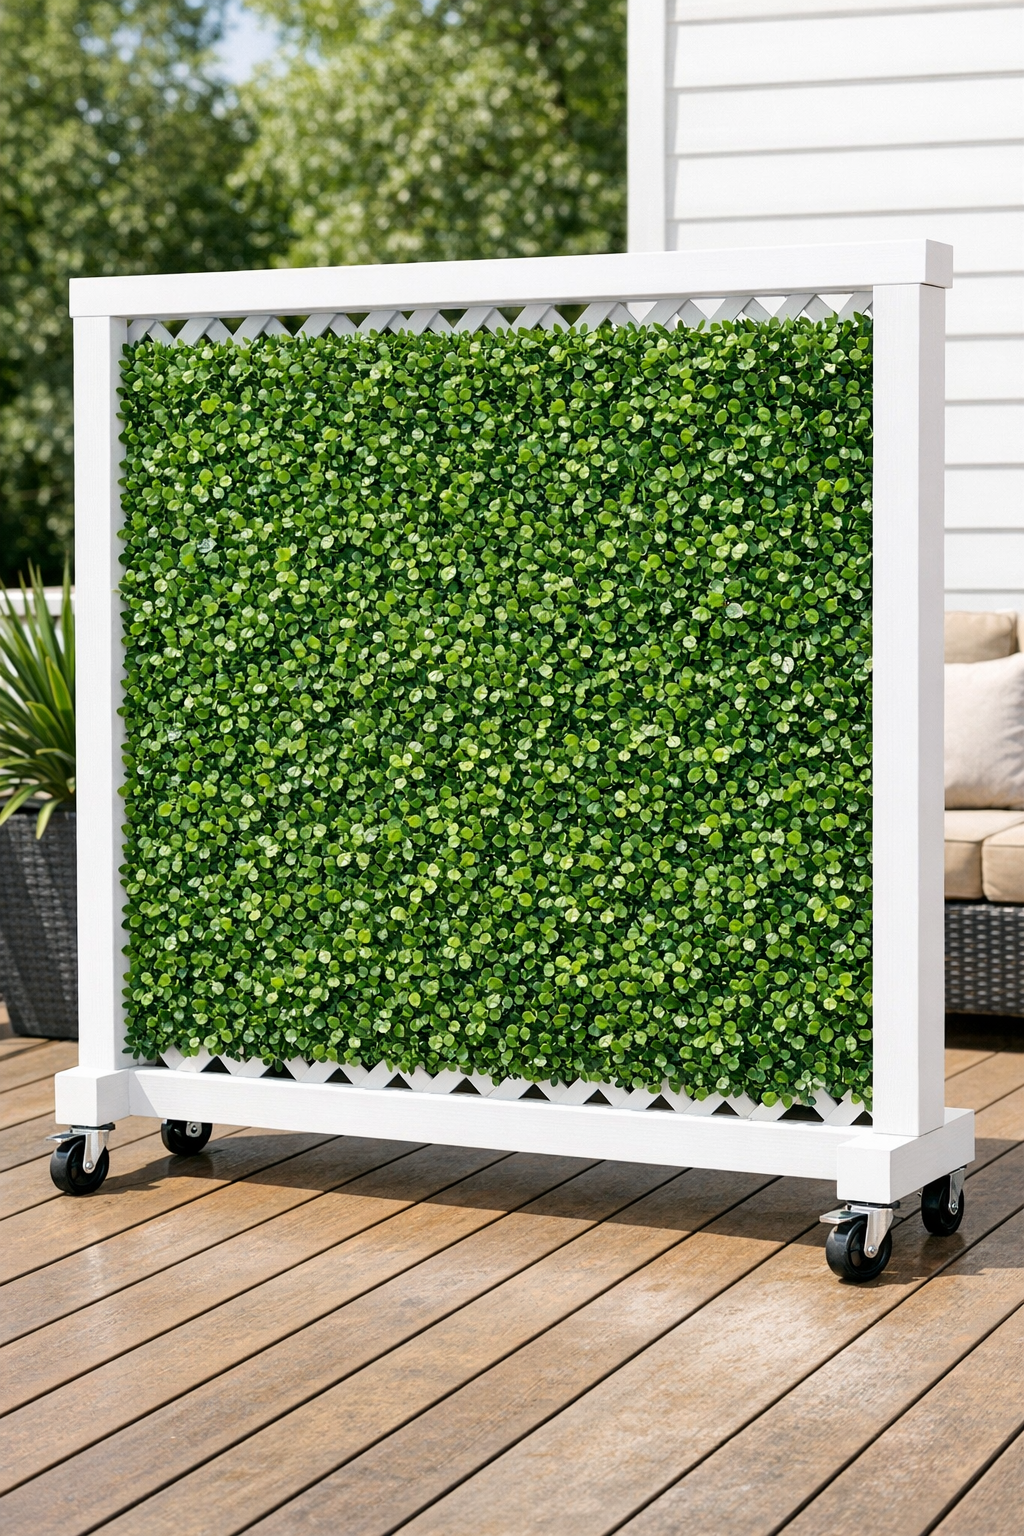
If your deck or patio could use a little more privacy without feeling boxed in, this rolling lattice screen is one of those projects that makes a big difference right away. You get the softness of greenery, the structure of a painted wood frame, and the flexibility to move it wherever you need it most. I love projects like this because they look polished, but they’re still very doable over a weekend with basic tools and a little patience.
As someone who’s always trying to make outdoor spaces feel more welcoming for family dinners, summer drinks, and those quiet moments before everyone wakes up, I really appreciate how practical this build is. It’s a great project for homeowners, renters with permission to personalize a deck, or anyone who wants to block an unlovely view and add a fresh, garden-inspired look.
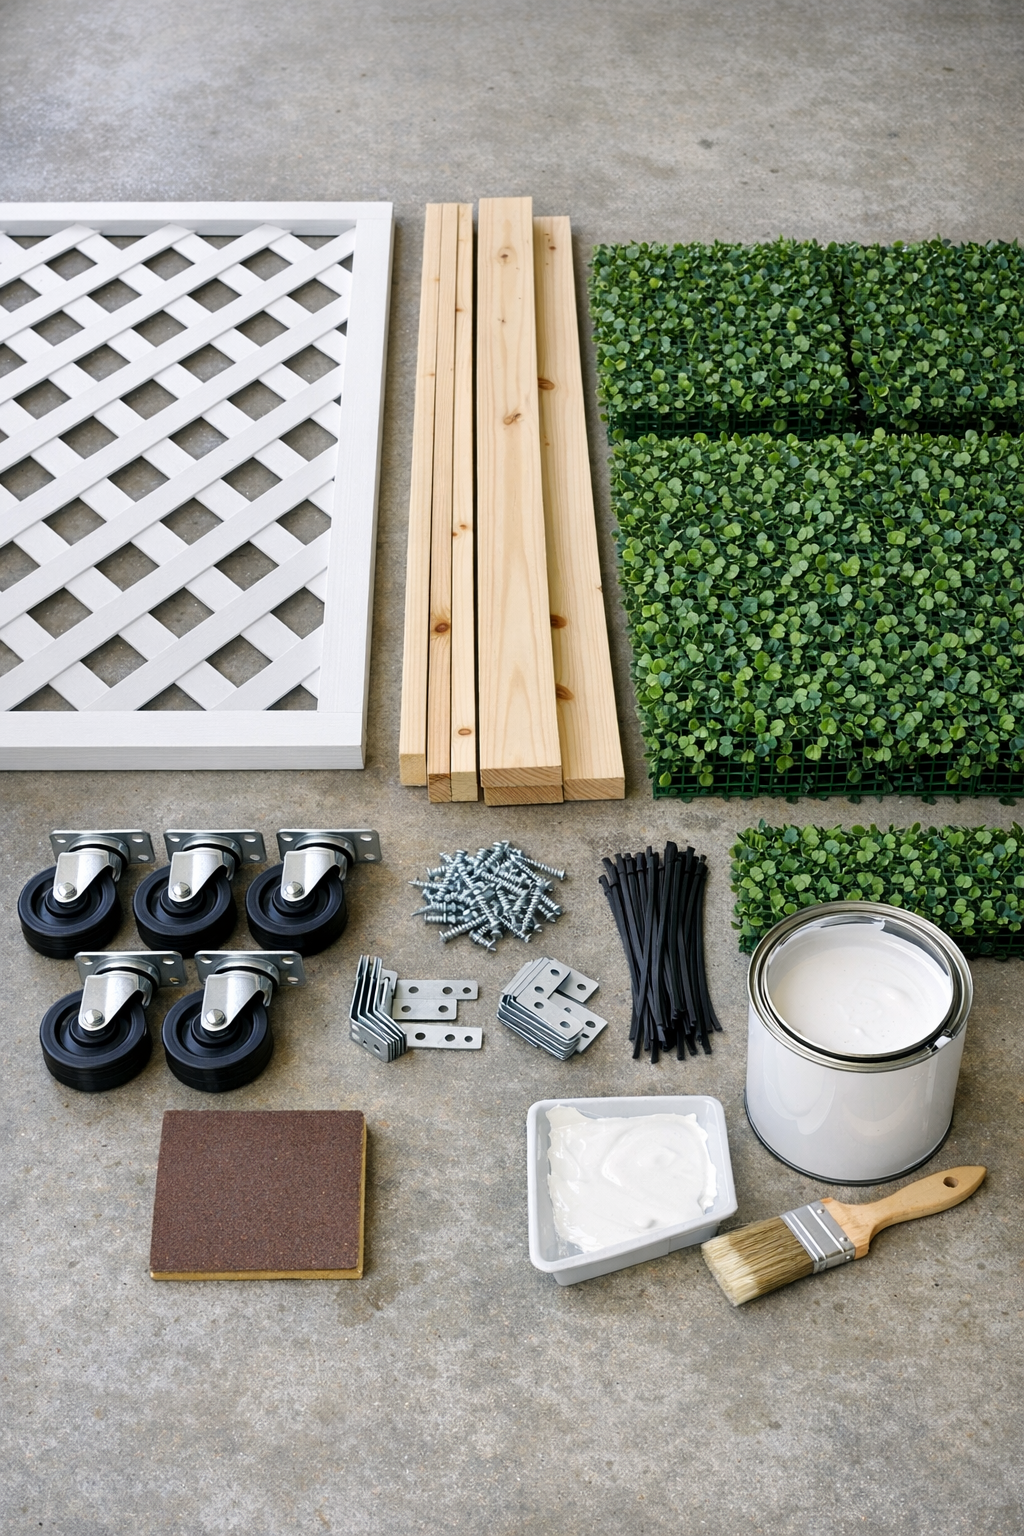
Materials
2 pine boards, 1 in. x 4 in. x 72 in., for the frame sides
Instructions
1. Sand all the wood pieces with 120-grit sandpaper first, then smooth them with 220-grit so the painted finish looks clean and feels nice to the touch.
2. Lay the two 72-inch boards parallel on a flat surface, place the 36-inch boards between them at the top and bottom, and check that the corners are square.
3. Apply exterior wood glue at each corner, then secure the frame with 1 1/4-inch exterior screws and reinforce each inside corner with an L-bracket.
4. Paint the entire frame and the lattice white, covering the front, back, and edges, then let everything dry fully before assembly.
5. Set the lattice inside the back of the frame so it fits snugly, then fasten it to the frame with 1 1/4-inch screws placed around the perimeter, keeping the screw heads flush.
6. Snap the artificial boxwood panels together into a full sheet that matches the size of the lattice opening, trimming edge panels if needed for a neat fit.
7. Starting at one side, weave sections of the boxwood panel sheet through the lattice openings by gently pushing some leafy portions to the front and leaving others behind, creating a fuller, integrated look.
8. Step back every few minutes and adjust the greenery so the coverage looks even across the whole screen, with no obvious gaps at eye level.
9. Secure the boxwood panels to the lattice at the corners and along the edges with zip ties, pulling them tight but not so tight that they crush the greenery.
10. Turn the screen carefully and attach one caster wheel at each bottom corner using 3/4-inch exterior screws, adding washers if the wheel plates need extra support.
11. Stand the screen upright, roll it into place, and test it on your deck or patio to make sure it moves smoothly and feels stable.
Variations & Tips
For extra privacy: Use a second layer of boxwood panels on the back side if you want fuller coverage, especially if your seating area is close to neighboring decks.
For windy spaces: Choose locking casters or place weighted planters beside the base when the screen is in use so it stays put on breezy days.
For a softer look: Mix in a few faux eucalyptus stems or trailing artificial ivy before you tighten the zip ties. I like this when I want the screen to feel a little less formal and a bit more garden-like.
For picky design tastes: If bright white feels too crisp for your space, paint the frame a soft gray, warm beige, or sage green instead. It changes the whole mood without changing the build.
To make it longer lasting: Seal any cut wood edges well and store the screen in a covered area during harsh winter weather. Around my house, anything that can be protected from ice and heavy snow always lasts longer.
If you need a renter-friendly option: Skip permanent deck attachments altogether and let the rolling screen do the work. That’s one of my favorite parts of this project—it gives you privacy without turning into a major construction job.