
If you spend as much time on the deck as my family does once the weather turns nice, you know how handy it is to keep cold drinks within arm’s reach. This outdoor ice bucket stand is one of those projects that looks clever the minute you see it, but it’s also genuinely useful for cookouts, family get-togethers, and those long summer evenings when nobody wants to keep running inside.
What I love most about this build is that it gives an old wooden stool frame a brand-new purpose. By bolting a galvanized bucket right through the frame, you get a sturdy raised drink station that feels rustic, practical, and just plain fun. It’s a great beginner-friendly project if you’re comfortable with basic drilling and bolting, and it’s easy to customize for your own patio or deck style.
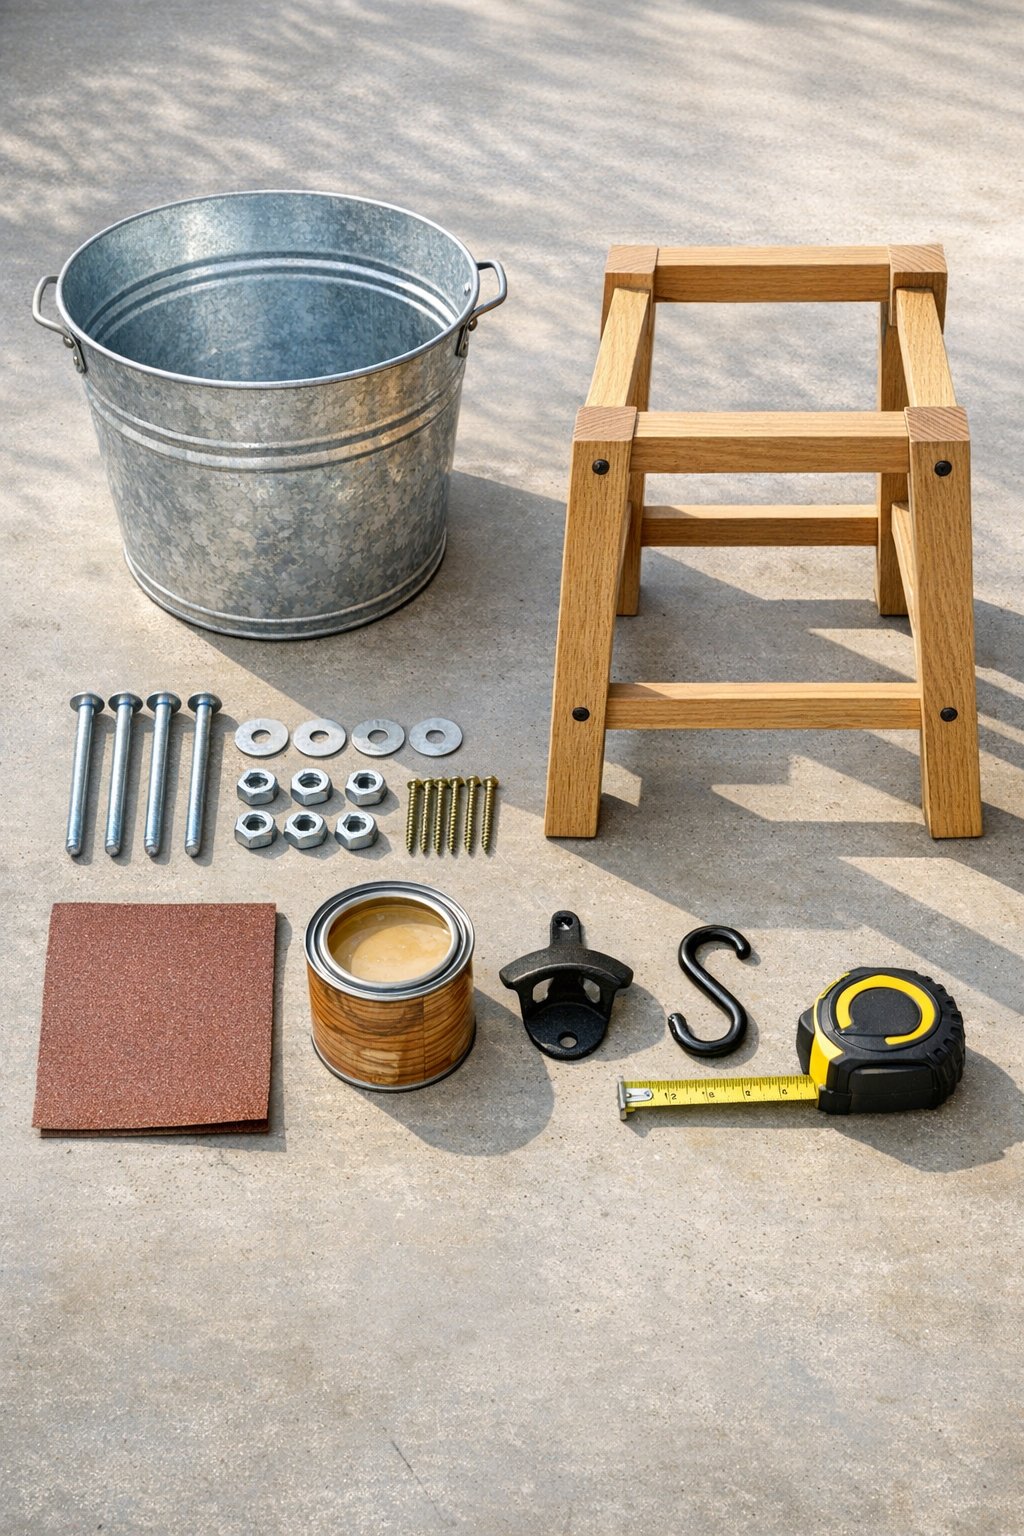
Materials
Instructions
1. Remove the stool seat if it’s still attached, and inspect the wooden frame for wobble, cracks, or loose joints. Tighten anything that moves now, because a stable base is what makes this project work safely outdoors.
2. Sand the entire stool frame with 120-grit sandpaper, then smooth it with 220-grit. I always take a little extra time on the top ring and legs, since those are the spots hands and feet brush against most.
3. Reinforce any weak joints with exterior screws and a little exterior construction adhesive if needed. Let the frame sit until it feels solid and level on the floor.
4. Apply your exterior stain or paint if you want a finished color, then seal the wood with clear outdoor sealer. Let it dry completely according to the product directions before installing the bucket.
5. Set the galvanized bucket down into the stool’s top opening and center it so it sits evenly. The bucket should drop in far enough to feel secure, with the rim or upper sides supported by the frame.
6. Mark four evenly spaced bolt locations around the bucket and stool frame, keeping them just below the bucket rim where the metal is strongest. Make sure each mark lines up through both the bucket wall and the wooden frame for clean, straight bolts.
7. Drill the four holes through the bucket and the stool frame using a bit sized for your 1/4-inch bolts. Work slowly so the metal doesn’t bend, and support the bucket firmly while drilling.
8. Insert each carriage bolt through the bucket and wood frame, then add a washer, lock washer, and nut on the outside. Tighten all four bolts evenly until the bucket feels snug and doesn’t shift, but don’t over-tighten and crush the wood.
9. Attach the bottle opener to one stool leg or apron rail at a comfortable height using the short exterior screws. Add the metal hook just below or beside it so there’s a handy spot for a towel or to catch caps.
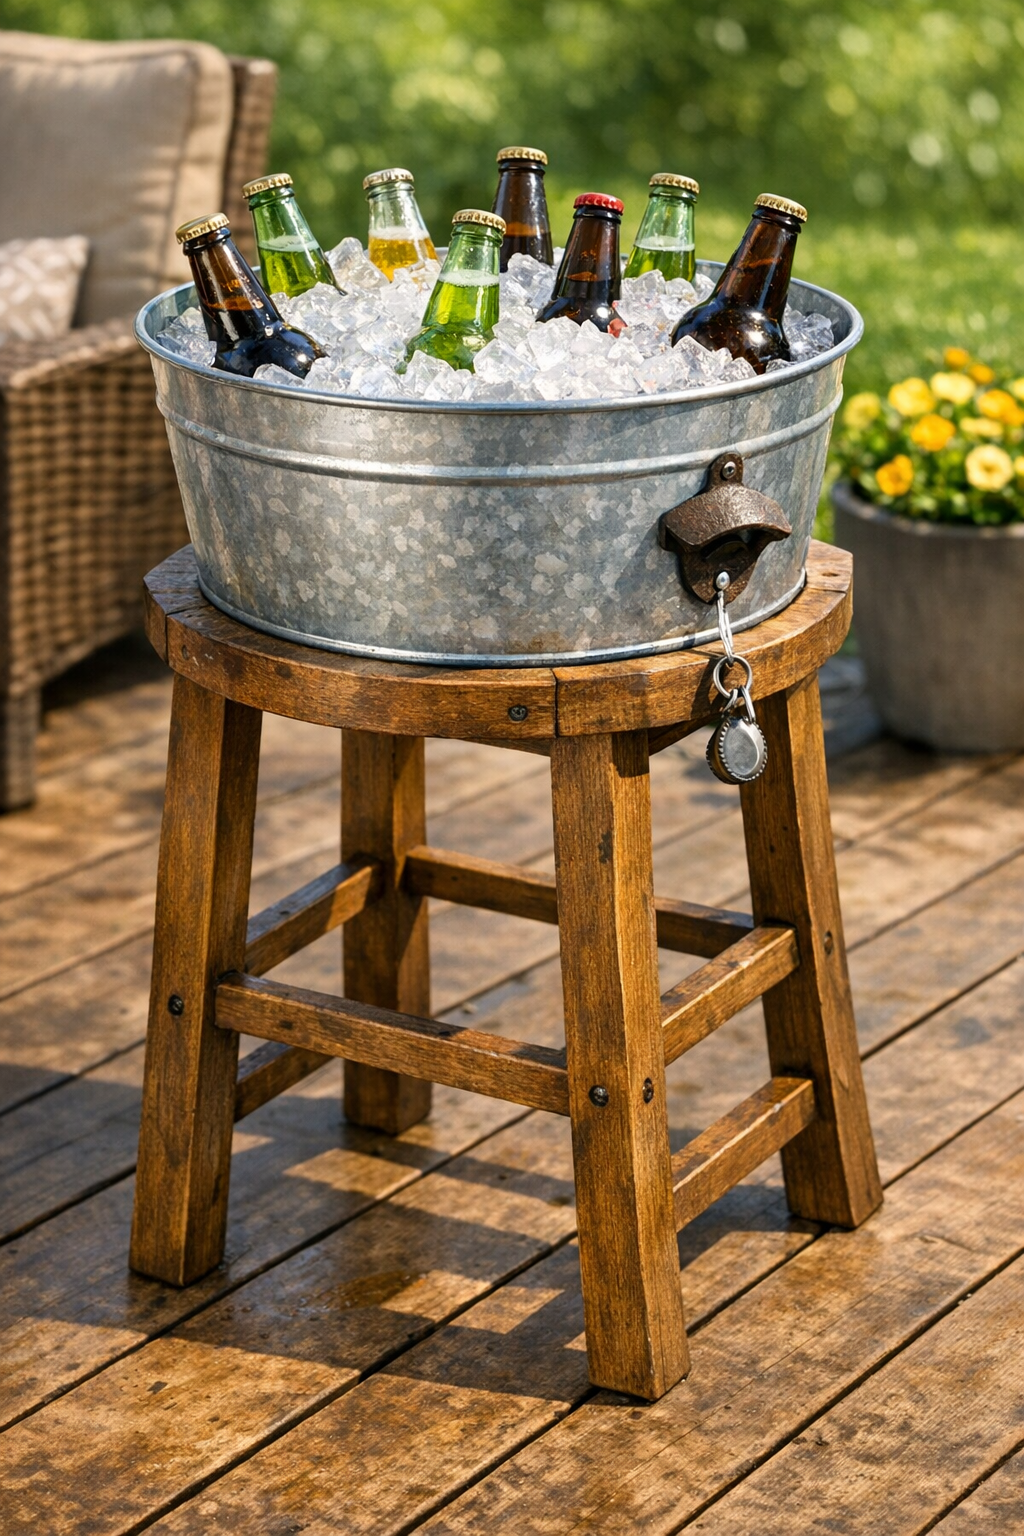
10. Test the stand on a flat surface, then fill the bucket partway with ice to make sure the frame stays balanced and sturdy. Once it passes the wobble test, fill it with ice and drinks and move it out to the deck.
Variations & Tips
For picky drink preferences: At my house, it helps to separate drinks by crowd, so you can make one stand just for sparkling water or juice bottles and another for grown-up drinks. It keeps everybody from digging around in the ice too long.
Use a drain option: If you want easier cleanup, drill a small drain hole near the bottom side of the bucket and plug it with a rubber stopper when in use. That makes melting ice much less of a chore after a party.
Choose the right stool: A wider bar stool frame is usually the easiest to work with because it gives the bucket more support. If the opening is too small, you’ll fight the fit the whole way through.
Add a bottom shelf: If your stool design allows it, attach a small wood shelf between the lower stretchers for cups, napkins, or a towel. That little extra storage makes the stand even more deck-friendly.
Protect the wood well: Outdoor projects last so much longer with two good coats of exterior sealer, especially on leg bottoms and around drilled holes. Those are the places moisture sneaks in first.
Try a different finish: For a farmhouse look, use a warm medium stain; for something crisp and summery, paint the frame white, navy, or black. I like finishes that can handle a little family wear without showing every scuff.
Keep it steady: If your deck boards are uneven, add adhesive rubber furniture pads under the stool legs. It’s a simple fix that helps the stand sit more securely when the bucket is full.