
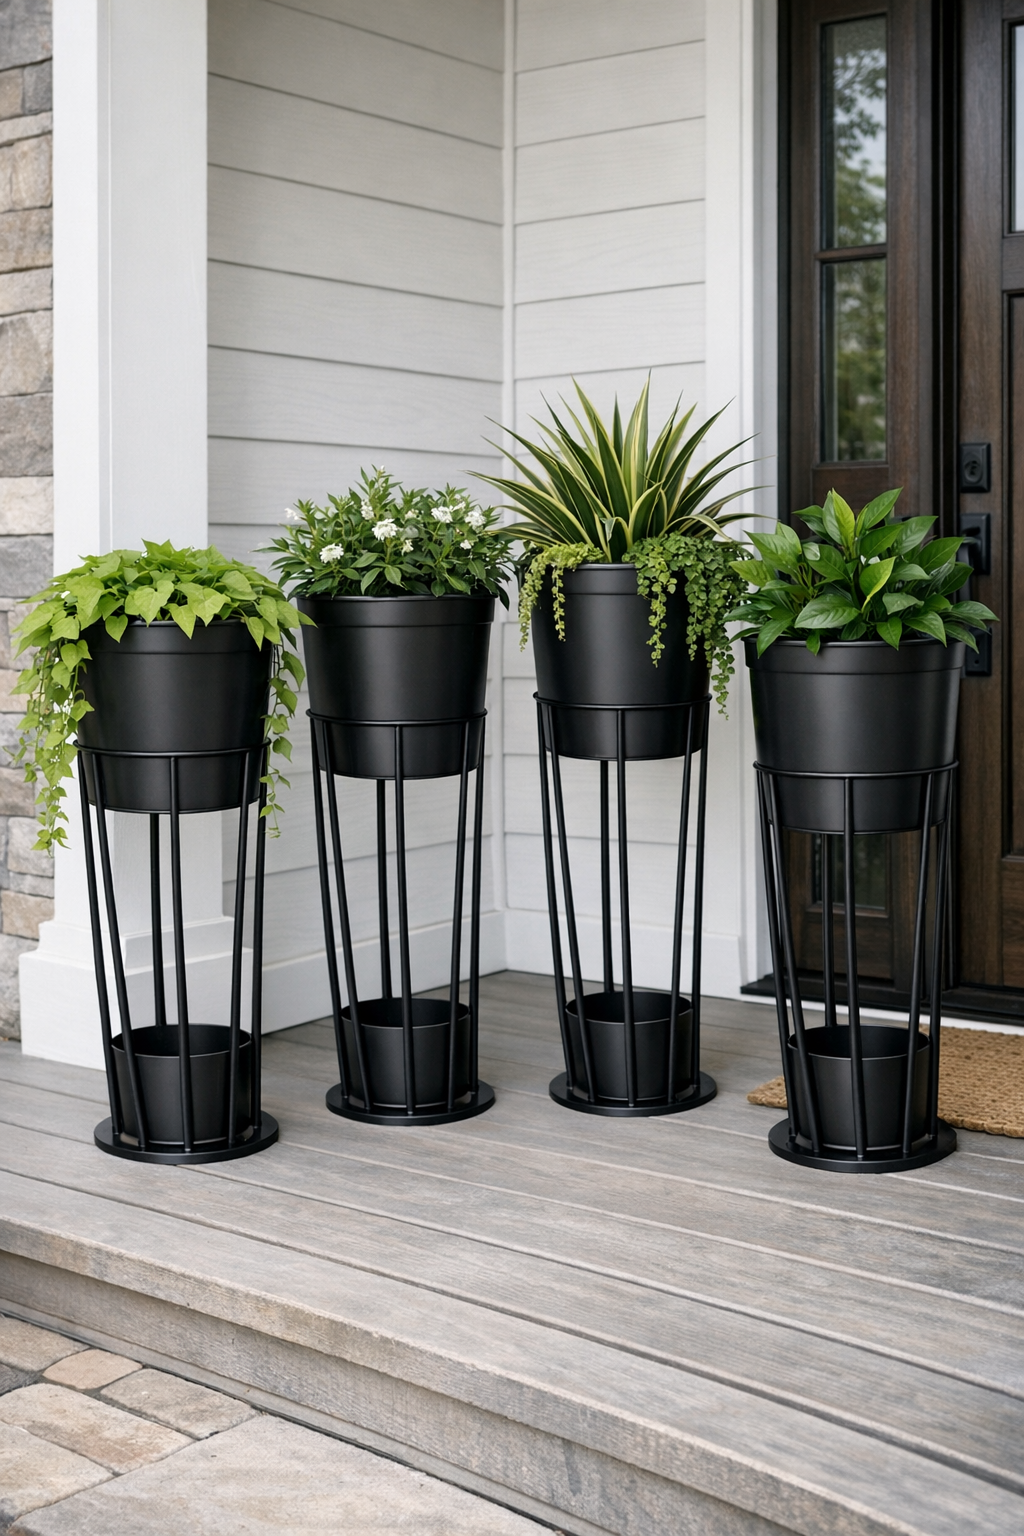
I love a porch project that looks high-end but starts with the kind of supplies you can toss into your cart at a big-box store in under ten minutes. These tall modern porch planters are made from inexpensive plastic sand buckets and basic metal tomato cages, but once everything is spray-painted matte black and stacked together, the finished look is surprisingly sleek and architectural.
This is a great weekend DIY if you want to dress up a front porch, patio, or entryway without building planter boxes from scratch. I’m always looking for projects that give me that “I cannot believe that used to be a toy bucket” feeling, and this one absolutely does. If you’re busy like I am, you’ll also appreciate that it’s simple, fast, and easy to repeat so you can make a matching set.
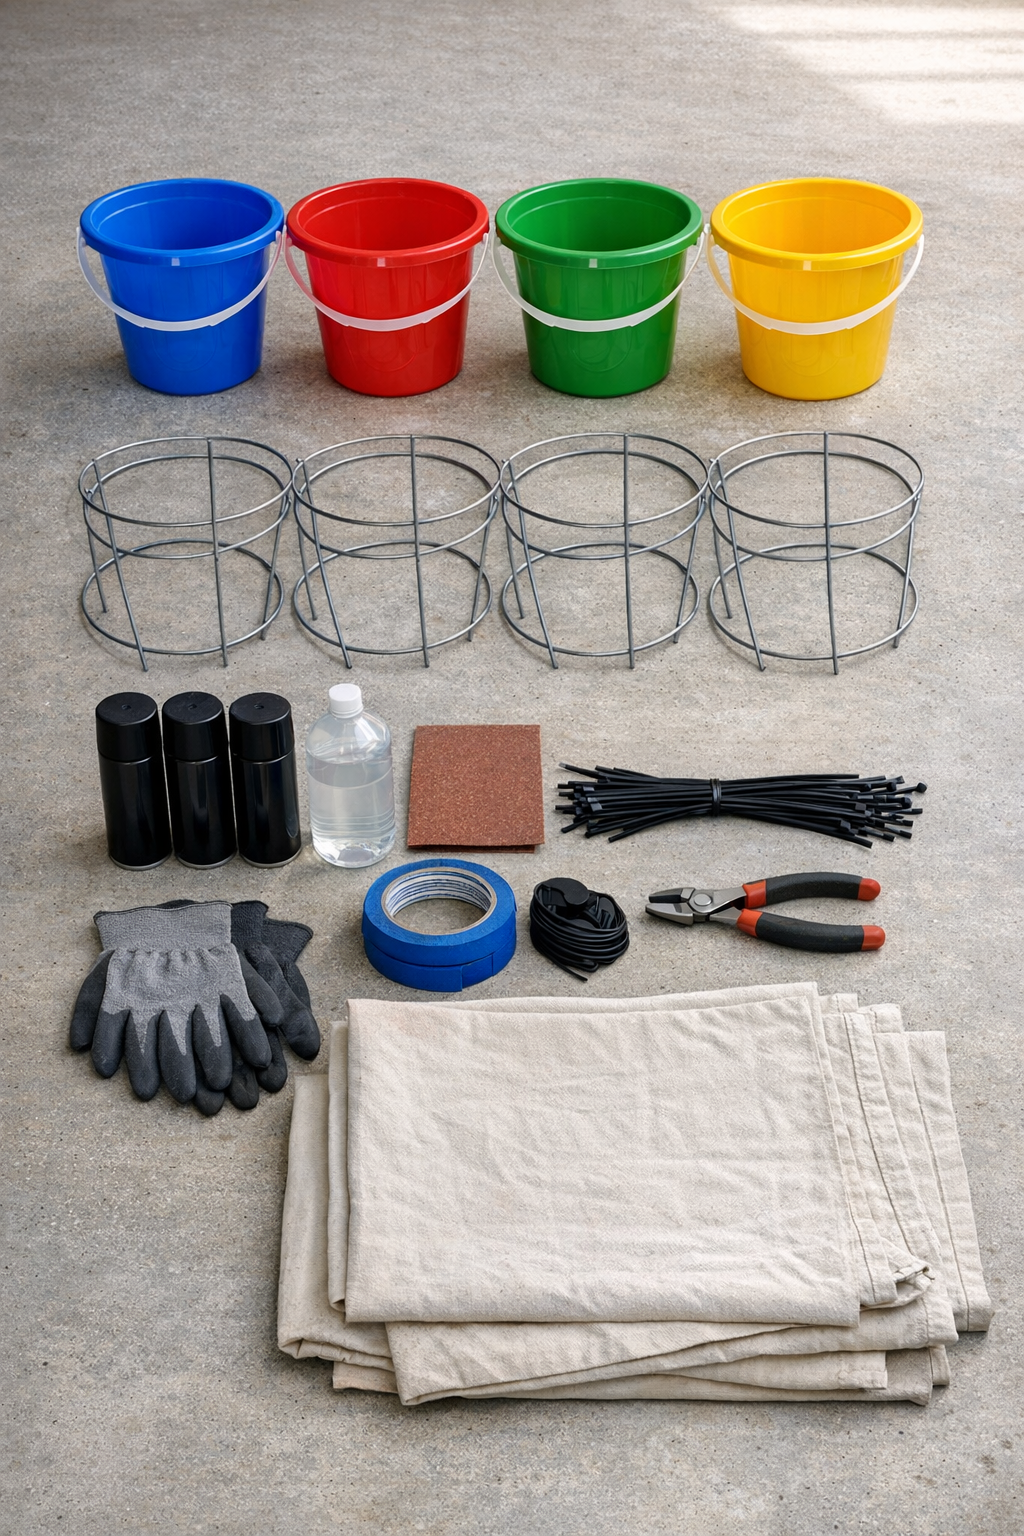
Materials
4 cheap plastic sand buckets, 8 to 10 inches wide and about 9 inches tall
Instructions
1. Wash the buckets and tomato cages with soap and water, then let them dry completely so the paint sticks well.
2. Lightly scuff the outside of each plastic bucket with 220-grit sandpaper, then wipe the buckets and cages down with rubbing alcohol to remove dust and oils.
3. Cover your work surface with a drop cloth or cardboard and tape off any bucket areas you do not want painted, such as the inside rim if you want a cleaner planting edge.
4. Spray-paint the buckets with light, even coats of matte black paint, rotating them as you go to avoid drips; let the first coat dry before adding a second or third coat if needed.
5. Spray-paint the tomato cages matte black as well, coating all sides and the wire legs evenly so the buckets and stands match.
6. Let all painted pieces cure fully according to the spray paint directions; if I have the time, I like to leave them overnight for a tougher finish.
7. Turn each tomato cage upside down so the wide circular end sits on the ground and the narrower wire end points upward to create a tall planter stand.
8. Set one painted bucket into the top opening of each inverted tomato cage and adjust it until the bucket sits centered and level.
9. Secure each bucket to its cage with 2 to 3 black zip ties, threading them around the bucket handle mounts or through existing openings near the top and around the cage wires.
10. Trim the zip tie tails neatly with wire cutters and check that each planter stands steady on a flat surface; bend the cage feet slightly if needed to level them.
11. Add a nursery pot inside each bucket for easy seasonal swaps, or place a little gravel in the bottom and fill with potting soil if you want to plant directly inside.
12. Add your plants and place the finished planters on the porch in pairs or evenly spaced along the entry for the best tall, modern look.
Variations & Tips
Use liner pots: I really like dropping nursery pots inside the buckets because it makes watering easier and lets me swap plants with the seasons without rebuilding the planters.
Add drainage carefully: If your buckets don’t already have holes and you’re planting directly in them, drill a few small drainage holes in the bottom before assembly so roots don’t sit in water.
Try a different finish: Matte black gives the most modern look, but satin black, charcoal, or even warm white can work if you want something softer for your porch style.
Weight the base: If your porch gets windy, add a little gravel at the bottom of the bucket or place a heavier potted plant inside to make each stand feel more secure.
Pick upright plants: Tall grasses, ferns, snake plants, or trailing ivy combinations all look great in these because the elevated stand gives them extra presence near a front door.
Check paint cure time: This is one of those steps that’s tempting to rush, but I’ve learned the hard way that letting spray paint fully cure helps prevent scratches when you fit the buckets into the cages.