
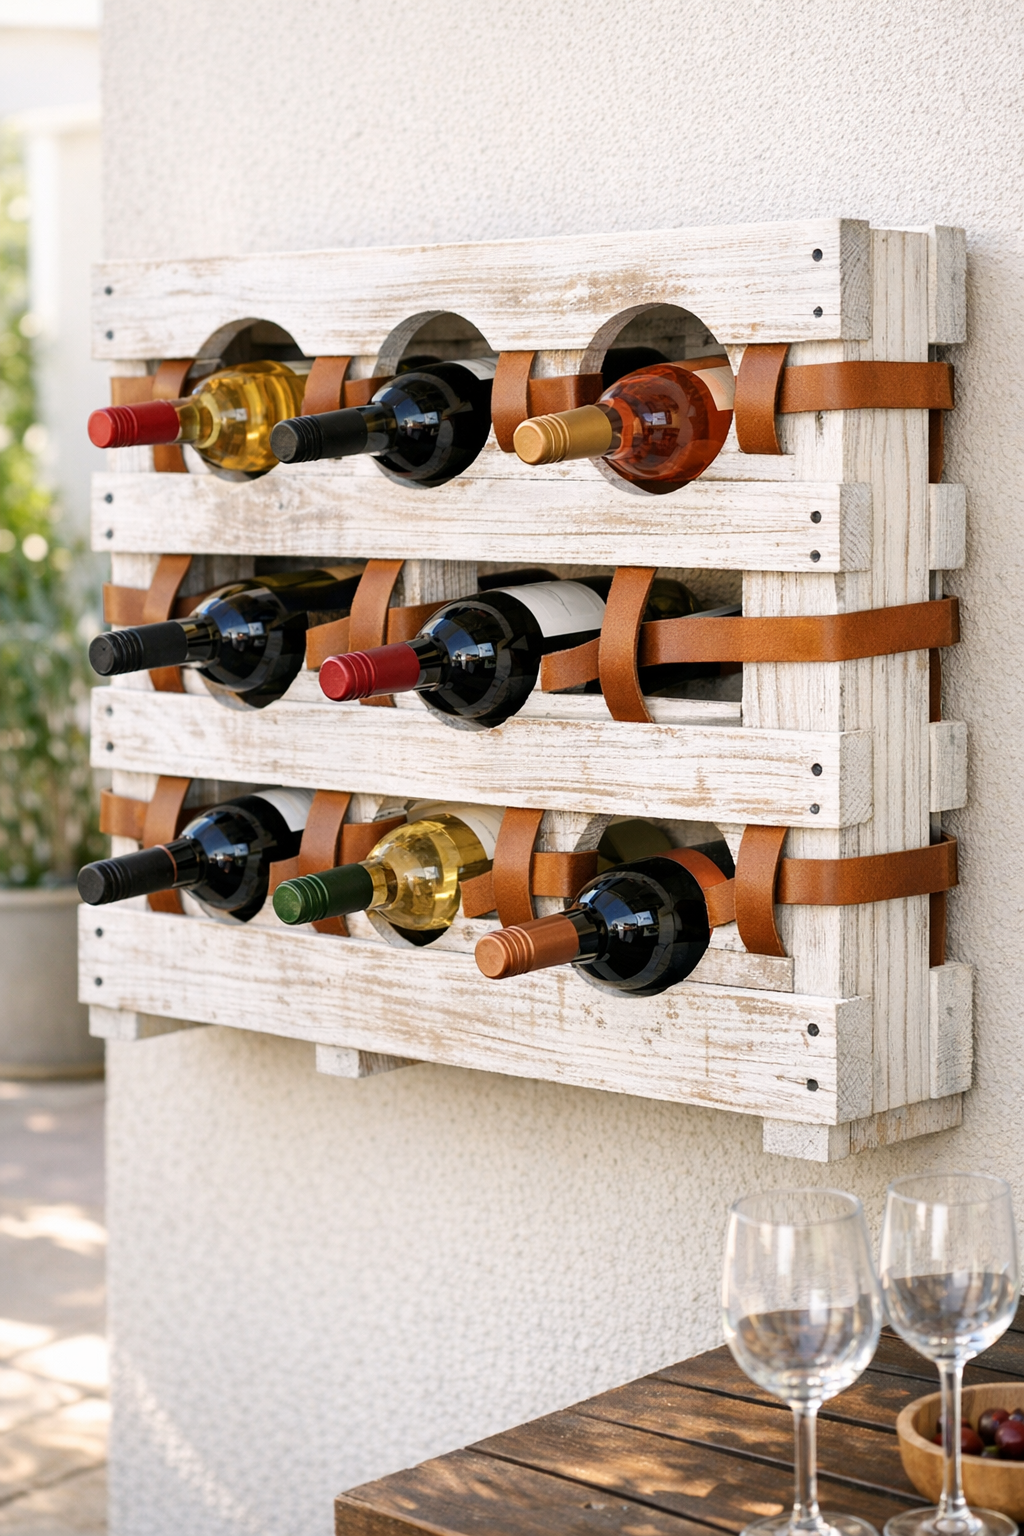
An outdoor wine rack like this is one of those projects I love because it lands right at the intersection of practical and charming. You get a sturdy place to store bottles for patio dinners, and you also end up with a piece that looks custom-made for the space. In this version, painted pallet wood gets circular bottle cutouts, then brown leather straps are threaded through drilled holes to cradle the bottles securely.
I’m especially fond of projects like this for anyone who entertains outdoors, has a small deck or balcony, or simply wants to dress up a blank wall with something useful. If you’re comfortable measuring, drilling, and doing a bit of sanding, this is a very manageable weekend build.
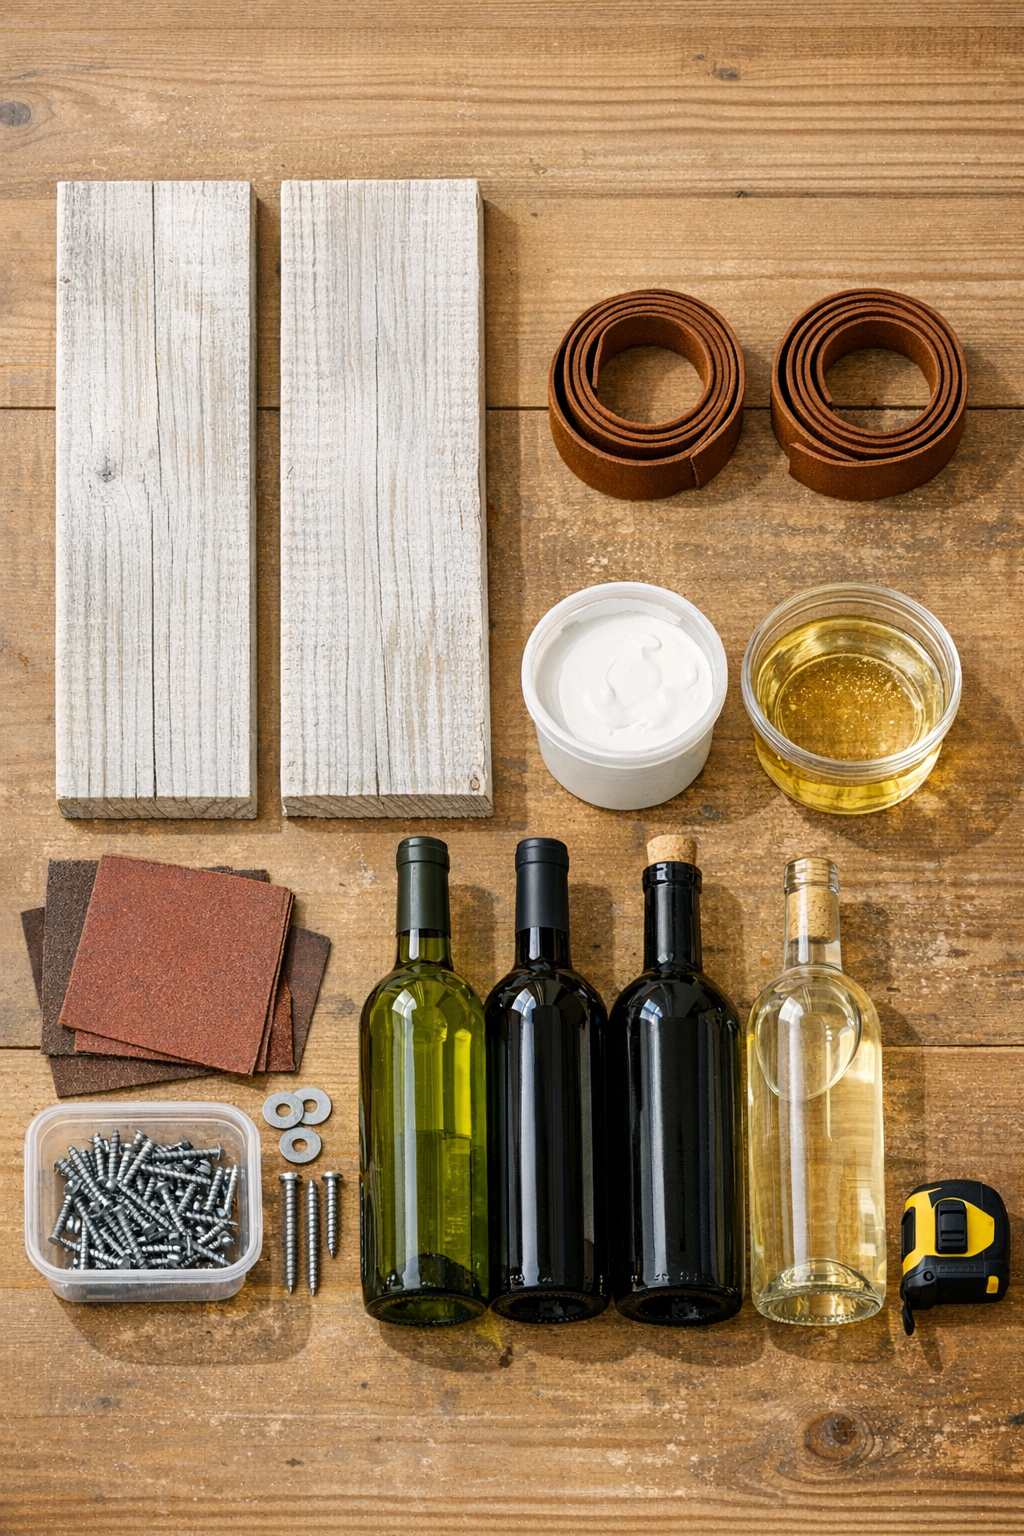
Materials
Instructions
1. Inspect your pallet wood and remove any loose nails, staples, or splintered pieces. Sand every surface first with 120-grit and then with 220-grit so the rack is smooth enough for hands and labels.
2. Assemble the pallet boards into two matching panels if needed, using wood glue and the 1 x 2 support strips across the back. Let the glue set, then secure each support strip with wood screws.
3. Fill deep cracks or nail holes with exterior wood filler and let it dry completely. Sand the patched spots flush so the painted finish looks even.
4. Paint the front, sides, and visible back edges with a thin whitewash or exterior white paint, letting some wood grain show through if you like that weathered look. Allow the first coat to dry and add a second light coat where needed.
5. Mark the bottle openings on the front panel, spacing them evenly in two vertical columns of three. Draw 3 1/2-inch circles for standard wine bottle bodies, keeping at least 2 inches between each opening and the panel edges.
6. Drill a starter hole inside each circle, then cut out the circular openings with a jigsaw or hole saw. Sand the inside edges carefully so the bottle openings are clean and comfortable to handle.
7. On both side edges of the front panel, mark pairs of small strap holes beside each bottle opening. Drill 3/8-inch holes straight through so the leather can weave in and out cleanly.
8. Seal all wood surfaces, especially the cut edges inside the circles and the drilled strap holes, with clear exterior sealer. Let it dry fully before assembly so the rack holds up better on a covered patio.
9. Thread the cognac leather straps through the drilled side holes in a woven pattern, creating a cradle behind each bottle opening. Pull each pass snug but not tight, leaving enough depth for the bottle body to rest securely.
10. Test each opening with a 750 ml wine bottle and adjust the leather tension so the bottle slides in easily but does not sag. If needed, knot, rivet, or screw the strap ends on the back side to keep them from shifting.
11. Mount the finished rack to a solid exterior wall, fence post backing, or masonry surface using appropriate anchors and 2 1/2-inch screws. Keep it level and high enough that the bottom bottles stay clear of splashing rainwater.
Variations & Tips
For smaller patios: Make a single-column version with three bottle openings on one narrow panel. It takes up much less wall space and still gives you that custom outdoor-serving-station feel.
Leather alternative: If the rack will live in a more exposed area, use outdoor-rated faux leather or heavy polypropylene strapping instead of natural leather. I like real leather for warmth and character, but synthetic strapping handles repeated moisture better.
Paint finish: A whitewash keeps the project light and summery, but sage green, charcoal, or navy also work beautifully outdoors. In my experience, slightly muted colors age more gracefully on patio furniture and accessories.
Bottle sizing: Standard 750 ml bottles fit best with 3 1/2-inch openings, but always test with the bottles you actually use most. Some pinot noir and sparkling wine bottles run wider and may need larger cutouts and deeper strap cradles.
Weather protection: This rack is best for a covered patio or porch rather than a fully exposed wall. A fresh coat of exterior sealer once a year will help the wood stay crisp and the finish last longer.
Mounting tip: Don’t rely on pallet boards alone to carry the weight of filled bottles. Fasten through the reinforced back supports into studs or a properly anchored masonry surface for a much safer installation.