
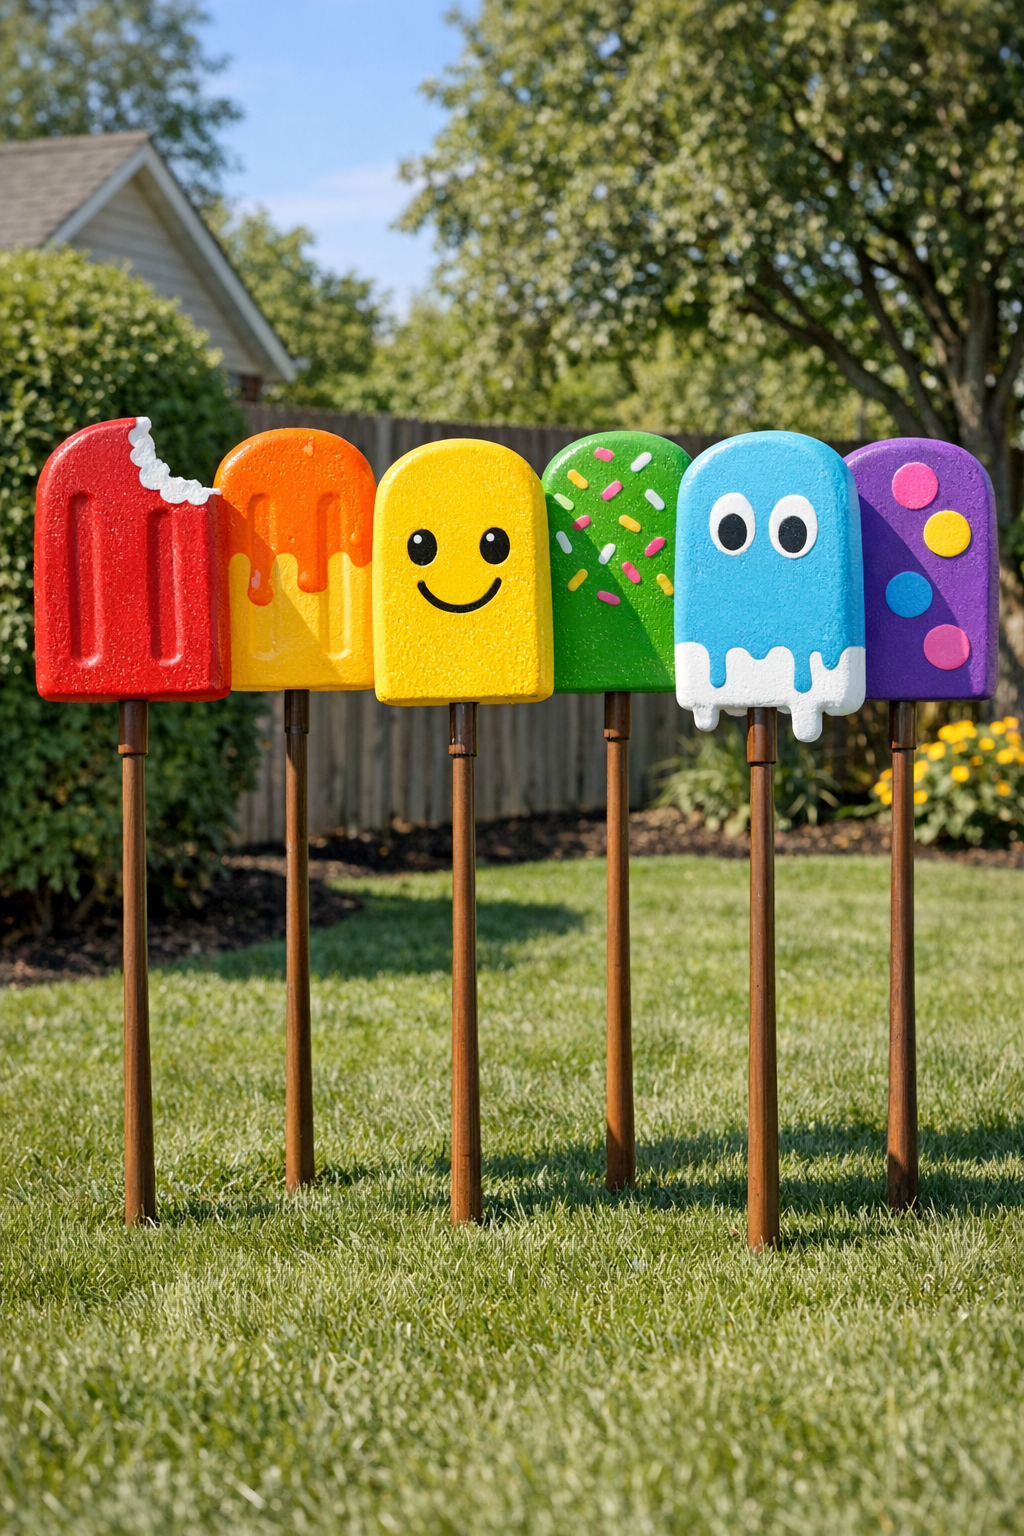
If you want a quick backyard project that looks playful, oversized, and surprisingly photo-ready, these giant popsicles are such a fun one to make. The basic idea is simple: paint inexpensive white foam kickboards in bright popsicle colors, then attach them to tall brown wooden broom handles so they look like extra-large frozen treats planted around your yard, patio, or party space.
I love projects like this because they give you a big visual payoff without asking for advanced DIY skills. As someone who is usually squeezing creative projects in between work and everything else, I appreciate that this one can be done in an afternoon, and it is perfect for summer parties, poolside decorating, or just making the backyard feel a little more cheerful.
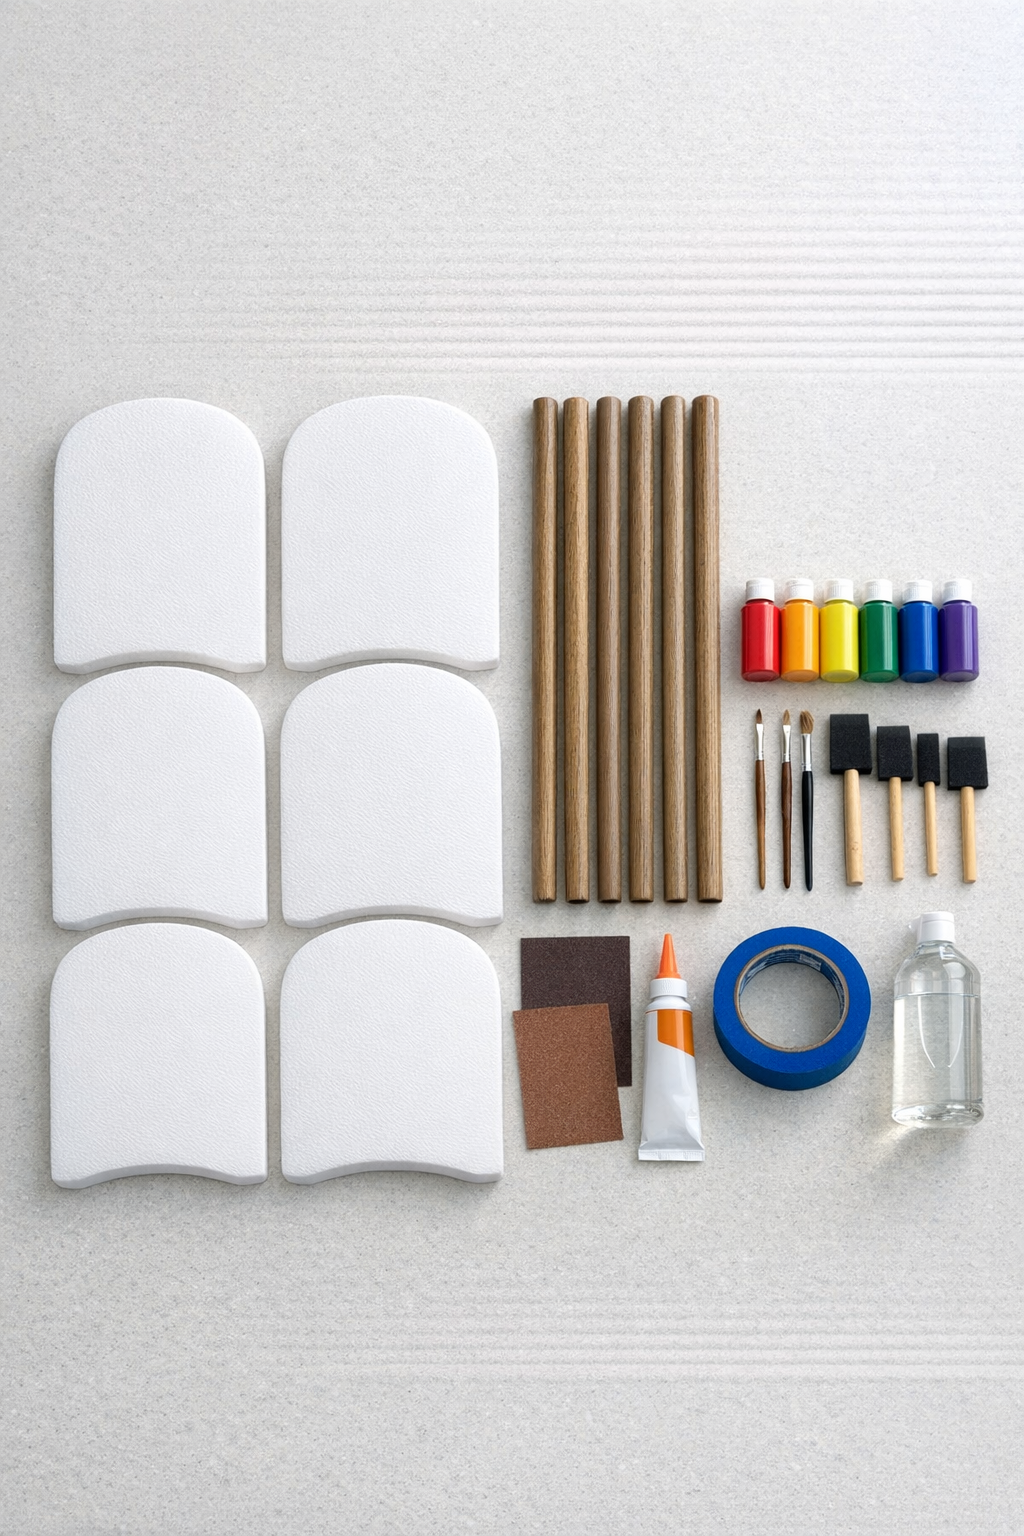
Materials
6 white foam kickboards, standard size about 11 x 17 inches each
Instructions
1. Cover your work area with a drop cloth and lay out all 6 kickboards and broom handles. Wipe off any dust so the paint and adhesive stick better.
2. Lightly sand the surface of each foam kickboard, especially the front and edges, using medium-grit sandpaper. This gives the paint a little more grip without damaging the foam.
3. Choose a color for each popsicle and sketch any simple drip, stripe, or layered design with pencil. I like to decide the whole set before painting so the colors feel coordinated when they are all in the yard.
4. Paint the front of each kickboard in its main color using a foam brush or wide paintbrush. Let the first coat dry fully, then add a second coat for a solid finish.
5. Paint the edges of each kickboard to match the front so the finished popsicles look complete from every angle. If you want a cleaner look, leave the backs plain or paint them too.
6. Add details like white drips, fruit-inspired color blocking, or a dipped-top effect once the base coat is dry. Keep the designs bold and simple since these read best from a distance.
7. Let all paint dry completely, then apply a clear outdoor-safe sealer over the painted surfaces. This extra step is worth it if your backyard gets strong sun or if you plan to reuse them for parties.
8. Mark the center bottom of each kickboard and the top end of each broom handle. If you are using reinforcement, poke two pilot holes into the foam and test-fit the short skewer or dowel pieces.
9. Add construction adhesive to the top of a broom handle and press it firmly onto the bottom center of one kickboard. Insert two short skewers or dowel pieces across the joint if needed, then hold everything in place with painter’s tape while it sets.
10. Repeat the assembly for the remaining 5 popsicles and let them cure flat or propped securely according to the adhesive directions. Do not rush this part or the handles can shift before the bond is strong.
11. Once cured, gently test each handle for stability and touch up any paint around the joint if needed. If the handles will go directly into the ground, make sure the bottom ends are clean and dry.
12. Place the finished giant popsicles in the yard by pushing the broom-handle ends into soft ground or securing them in heavy planters. Space them in a group for the biggest impact, almost like a little backyard candy garden.
Variations & Tips
Color theme: Try a matching palette instead of rainbow colors if you are decorating for a specific party. Citrus shades, pastel tones, or red-white-and-blue all work really well.
Extra stability: If your foam is very lightweight, glue a small scrap of thin wood or sturdy plastic to the back where the handle meets the board. That spreads out the stress and helps the popsicle last longer outdoors.
Weather tip: These hold up best for temporary outdoor decor rather than all-season display. I would bring them into the garage after an event or before heavy rain and wind.
Easy placement: If your soil is hard, set the broom handles inside weighted buckets or large flower pots filled with sand, gravel, or extra soil. It makes setup much easier and keeps the display movable.
Kid-friendly designs: Simple polka dots, smiley faces, or dipped “chocolate” tops are fun if you are making these for a family party. I would keep the details oversized and high-contrast so they show up from across the yard.
Finish tip: Matte paint gives a cute chalky look, while gloss or a glitter topcoat makes them feel more whimsical. If I am making party decor quickly after work, I usually stick with bold flat colors and one simple drip detail because it still looks great with less drying time.