
I love a project that gives you the look of custom outdoor décor without the custom price tag, and this patio wall art does exactly that. By pairing inexpensive rubber welcome mats with oversized square picture frames and a coat of antique gold spray paint, you can create a set of ornate faux metal panels that read like something pulled from a boutique garden shop.
This is a great weekend project for anyone who wants to dress up a bare fence, porch wall, sunroom, or patio seating area. The process is straightforward, the materials are easy to source, and the finished pieces have that old-world ironwork feel I’m always drawn to when I’m styling outdoor spaces.
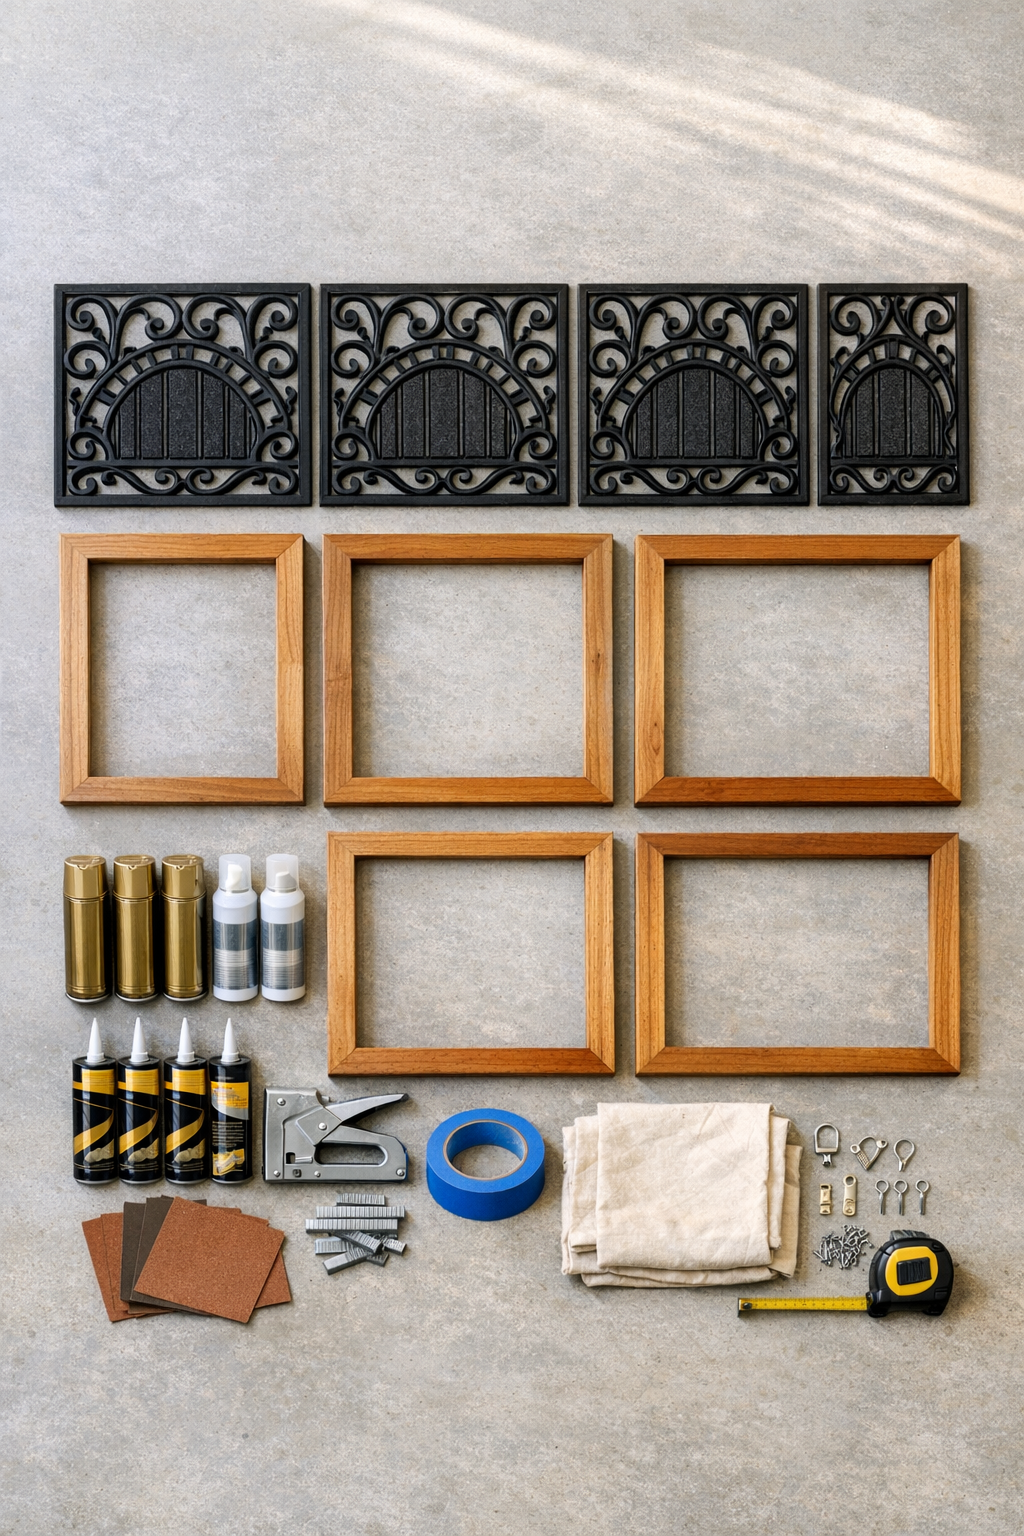
Materials
Instructions
1. Check that each rubber mat fits inside its frame opening, and trim only if needed. I like to dry-fit everything first so there are no surprises once the paint is on.
2. Lightly sand the wooden frames to remove any glossy finish and smooth rough edges. Wipe away the dust with a dry rag.
3. Clean the rubber mats with rubbing alcohol or a degreasing cleaner to remove residue, then let them dry completely. Spray paint adheres much better when the mats are clean and dry.
4. Lay out the frames and mats on a drop cloth in a well-ventilated outdoor area. Tape off any frame sections you do not want painted, or plan to paint the entire frame for a unified faux-metal look.
5. Apply the first light coat of antique gold spray paint to the rubber mats using slow, even passes from about 8 to 10 inches away. Focus on thin coats so the open pattern stays crisp and doesn’t get clogged.
6. Spray the wooden frames with antique gold paint in the same way, coating the front, inner edges, and visible sides. Let everything dry according to the paint can directions, then add a second coat for full coverage.
7. Inspect both mats and frames after the second coat dries, and touch up thin spots with more spray paint or metallic craft paint. If you want an aged finish, lightly brush a little black paint into corners and wipe most of it back off.
8. Once the paint is fully dry, apply a coat of clear outdoor sealer to the mats and frames. This extra layer helps the finish hold up better on a covered patio or porch.
9. Place one mat behind each frame opening and center the pattern so it looks balanced on all sides. Turn the piece over carefully and confirm the mat sits flat against the back of the frame.
10. Run a bead of exterior construction adhesive along the back inner edge of the frame where the rubber mat will rest. Press the mat into the adhesive and hold it in place for a minute or two.
11. Reinforce the back with staples, frame clips, or small mending plates if your frame construction allows it. I prefer using both adhesive and a mechanical hold outdoors because temperature changes can work pieces loose over time.
12. Let the assembled panels cure flat for the full adhesive drying time. Don’t rush this part; a firm bond makes hanging much easier later.
13. Attach D-ring hangers to the backs of the frames with short screws, positioning them evenly on opposite sides. If the pieces are lightweight, you can also hang them directly from the frame with outdoor-rated screws or hooks.
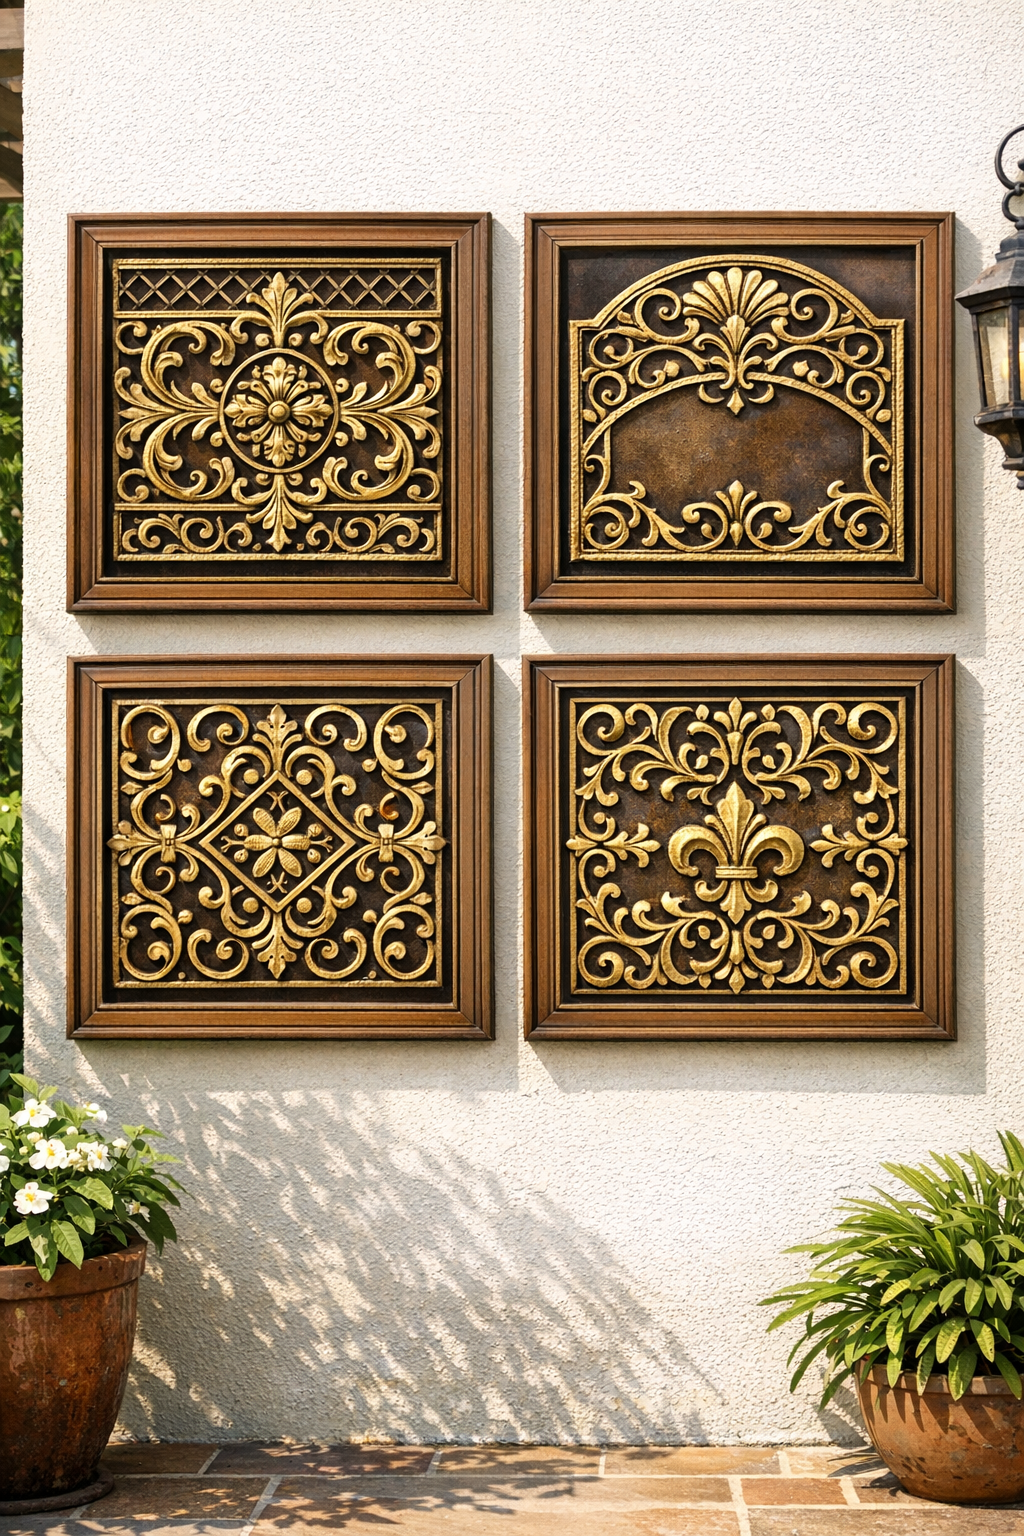
14. Arrange the four panels on the ground first to decide on spacing before mounting them on your patio wall. A 2- to 4-inch gap between frames usually gives the set a clean, intentional look.
15. Hang the panels on a fence, brick wall with anchors, porch wall, or other stable surface, then step back and adjust until the set looks square. The repeating pattern is what makes this hack feel polished, so even spacing matters.
Variations & Tips
Color option: If antique gold isn’t your style, try matte black, oil-rubbed bronze, or aged copper spray paint. Darker finishes can look especially convincing if your patio furniture has wrought-iron details.
Frame finish: You can stain the wooden frames instead of painting them if you want more contrast between the frame and the ornate insert. I’d keep the mat metallic so you still get that faux ironwork effect.
Weather placement: These hold up best in a covered outdoor space rather than direct, constant rain. If you’re decorating an exposed fence, use extra sealer and check the finish seasonally.
Sizing tip: Bring one mat with you when shopping for frames, or measure the inner frame opening carefully. A slightly oversized mat is easier to trim than one that leaves visible gaps.
Mounting advice: If your frames are thin or lightweight, add a wood backing strip across the rear for extra rigidity before hanging. That small reinforcement can prevent twisting over time.
Budget trick: Thrifted frames work beautifully here as long as all four match in size. I’ve found that a quick sanding and one good metallic coat can make even very dated frames look surprisingly elegant.