
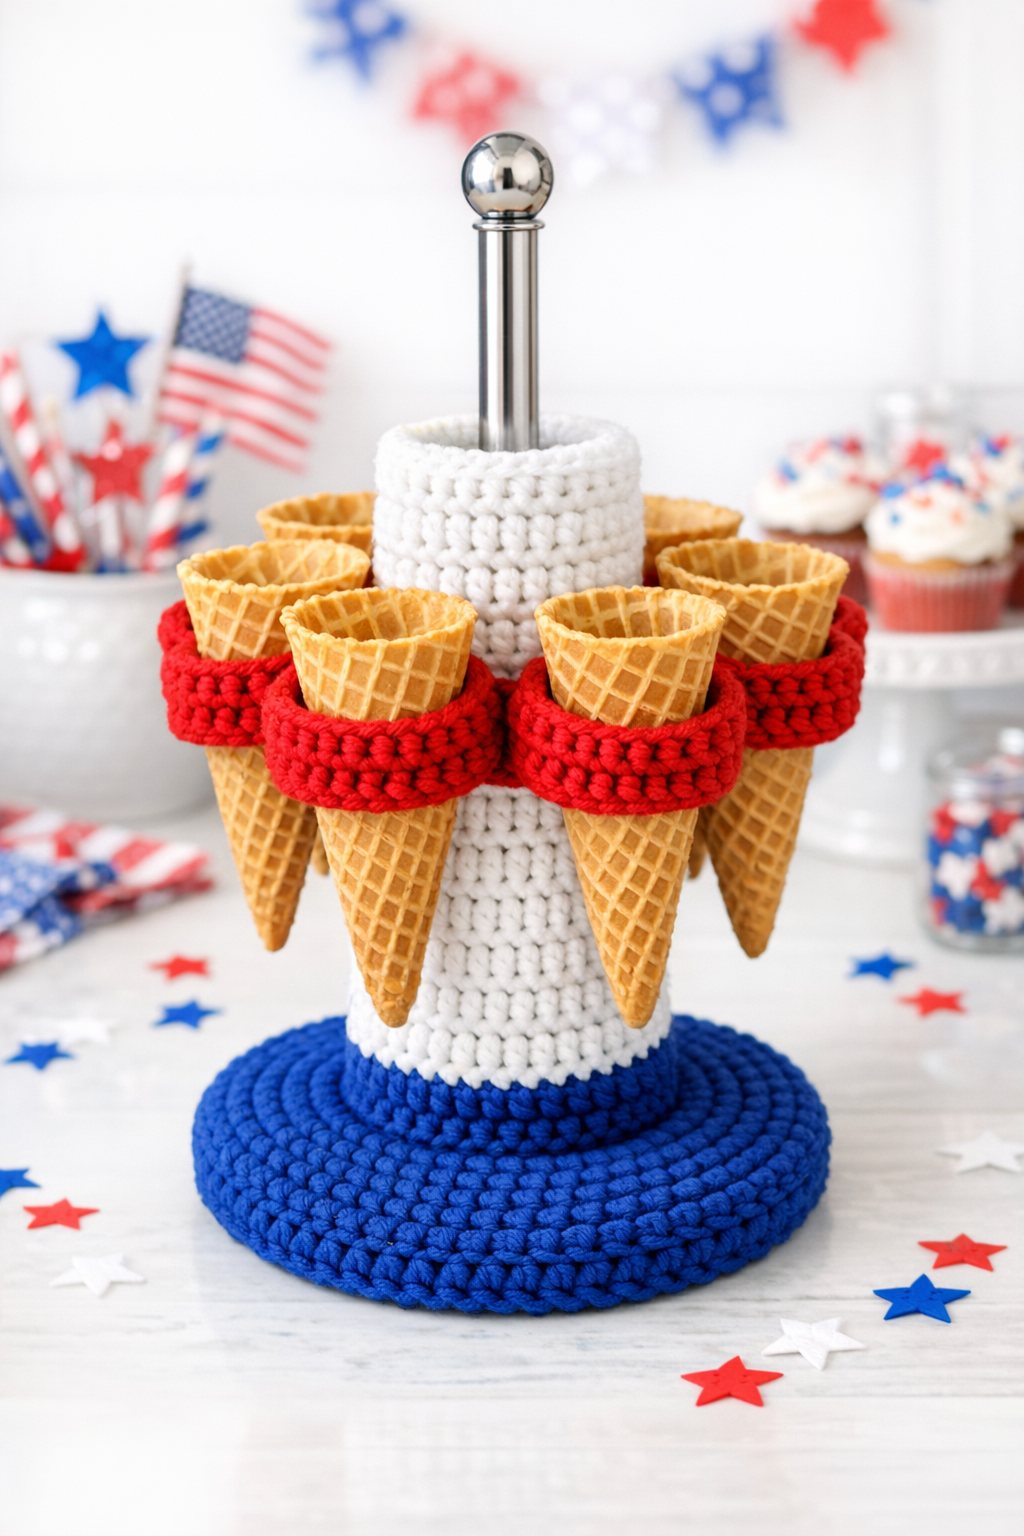
This patriotic ice cream cone holder is one of those clever little projects I love because it looks festive, keeps dessert night less chaotic, and uses a basic paper towel holder in a totally unexpected way. By crocheting a red, white, and blue cotton cover directly onto a metal stand, you end up with a sturdy centerpiece-style holder that can keep cones upright for filling, serving, or topping at a 4th of July party.
As someone who is usually juggling dinner, cleanup, and whatever holiday gathering I agreed to host, I appreciate projects that are cute but also genuinely useful. This one is great if you know a few basic crochet stitches and want a fast seasonal make that feels a little extra without taking over your whole weekend.
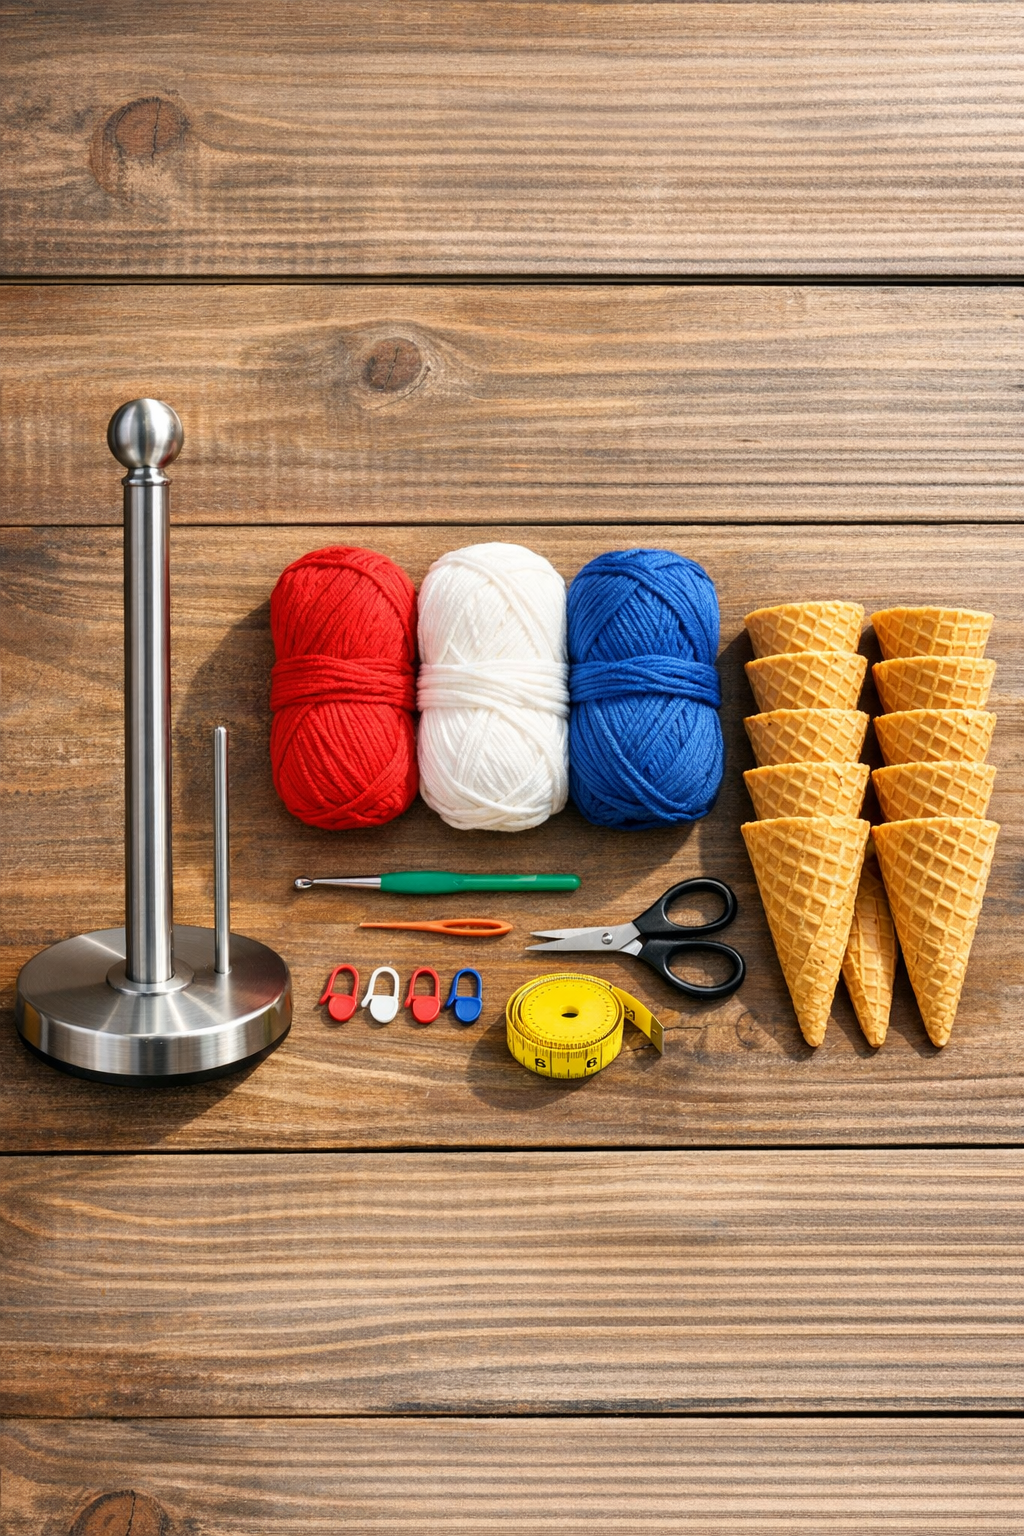
Materials
Instructions
1. Wipe the paper towel holder clean and measure the height of the center rod and the diameter of the round base so your crochet pieces fit snugly. Set 1 ice cream cone next to the stand to help you visualize spacing as you work.
2. With blue cotton yarn, crochet a flat circle for the base cover by making 6 single crochet into a magic ring, then increasing evenly each round until the circle matches the base diameter. Test it on the base every couple of rounds and stop when it just reaches the edge without ruffling.
3. Work 1 round in the back loops only to create a crisp edge, then single crochet even for 2 to 4 more rounds to form a shallow basket that hugs the base. Fasten off and weave in the ends.
4. With white yarn, crochet a narrow sleeve for the center rod by chaining enough stitches to wrap snugly around it, then join into a ring without twisting. Work single crochet in joined rounds until the sleeve is the same height as the exposed rod.
5. Slide or stitch the white sleeve onto the rod, depending on whether the top of your stand unscrews; if it does not, seam the sleeve closed neatly around the rod with a yarn needle. Keep the stitches firm so the cover does not sag.
6. With red yarn, crochet 6 to 8 cone loops by chaining 10 to 14 stitches, depending on the width of your cones, then joining each chain into a loop. Single crochet around each loop once to strengthen it, and make all loops the same size.
7. Pin the red loops evenly around the upper area of the white rod sleeve, spacing them so the cones will not bump into each other. Stitch each loop securely to the sleeve, anchoring the top and bottom of each loop so they stay open.
8. Add a second round of stitching where needed to reinforce the loops, then test each one by sliding in an empty cone. Adjust any loop that feels too loose by taking a tighter seam before weaving in all remaining ends.
9. Place the finished holder on a level surface and fill the cones right before serving to keep them crisp. If you want a more decorative look, rotate the loops slightly so the cones fan outward evenly.
Variations & Tips
Make it removable: If your paper towel holder has a screw-off top, crochet the rod sleeve as a closed tube so you can slide it off later for washing or storage.
Use stars instead of plain loops: Add small blue or white crocheted stars between the red loops if you want a more decorative holiday look. I’d still keep the actual cone supports simple and sturdy.
Check cone size first: Not all waffle cones are the same width, and I learned that the hard way once when party prep was already underway. Make one test loop first, fit a cone into it, and then copy that size for the rest.
Keep it food-party practical: This holder is best for dry cones rather than melting, pre-filled cones that sit too long. I like to set out the stand, cones, and toppings first, then scoop ice cream at the last minute.
Try different color placement: You can swap the color order and do a red base, blue center sleeve, and white loops if that better matches your party setup. Cotton yarn works best here because it has a clean shape and does not get fuzzy as quickly.
Stability tip: If your stand feels lightweight, place a small non-slip pad under the base before serving. That extra bit of grip helps a lot when kids are excitedly grabbing cones from every direction.