
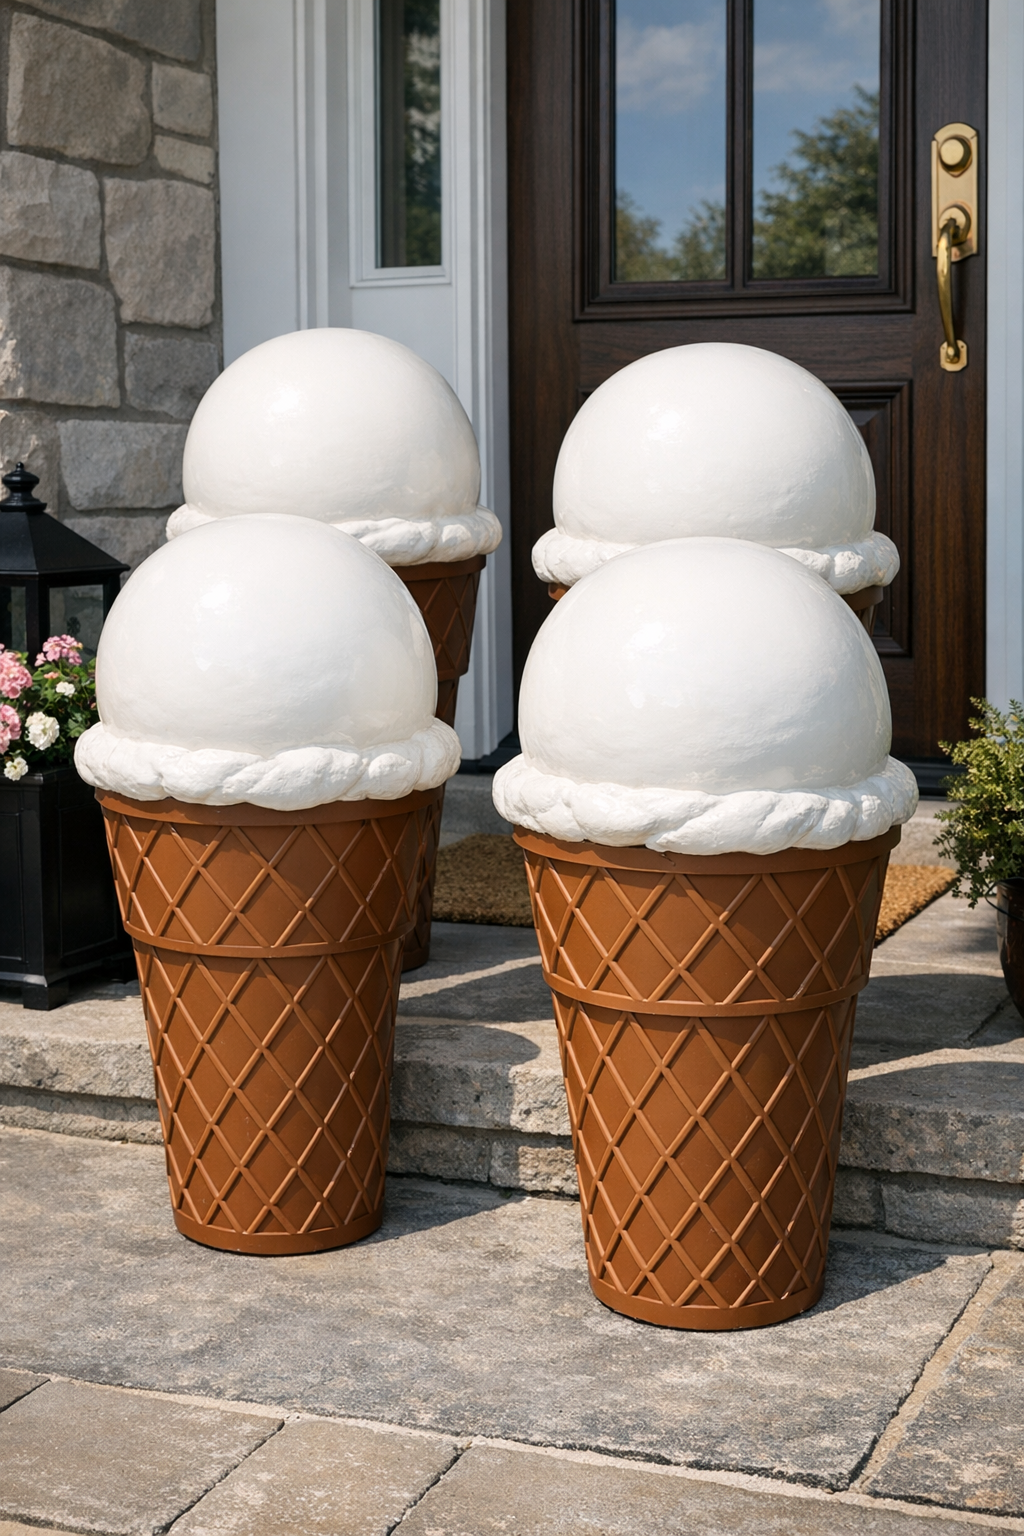
I love a porch project that reads from the street in an instant, and these giant ice cream cones do exactly that. You’re essentially turning simple planter pots and oversized foam balls into playful, oversized decorations that look like scoops perched on waffle cones. It’s a clever idea for summer decorating, party entrances, ice cream social themes, or just adding a little whimsy to a front porch that needs some personality.
What makes this project especially appealing to me is that it uses easy-to-find materials and doesn’t require advanced crafting skills. If you can paint, let things dry, and use strong glue carefully, you can make these. I also appreciate projects like this because, much like a good recipe, they rely on a few basic components used thoughtfully for a big visual payoff.
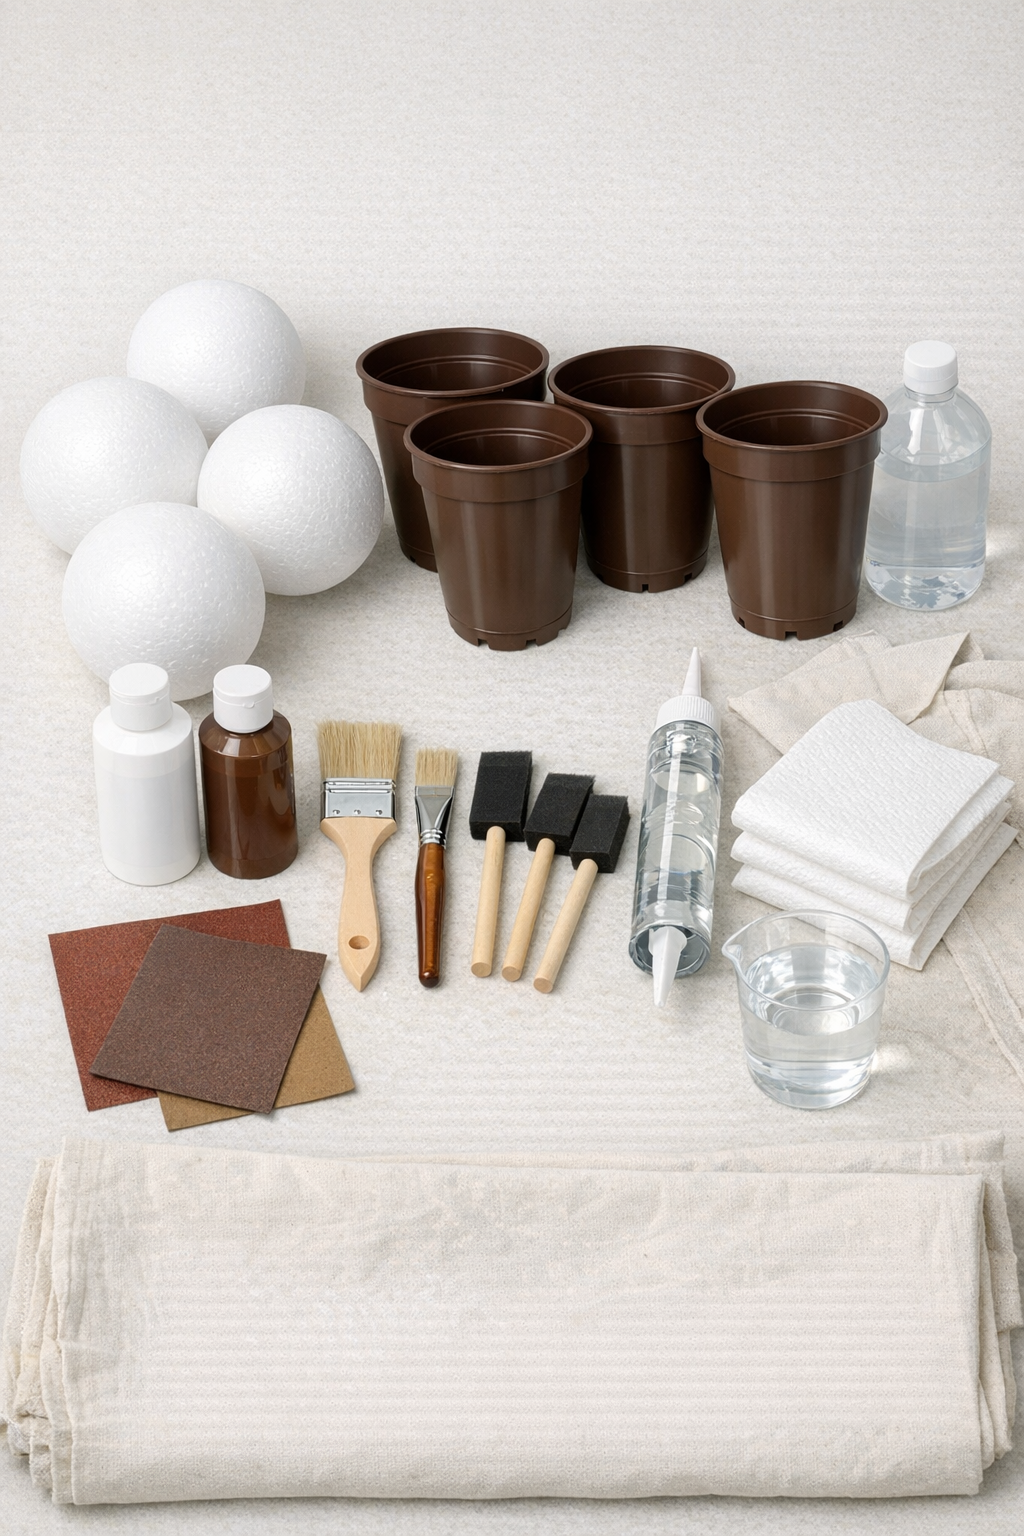
Materials
4 large white styrofoam balls, 10 to 12 inches in diameter each
Instructions
1. Spread out your drop cloth in a well-ventilated work area, and set the four pots upside down so the narrow ends point up like cone tips. Wipe the pots clean with rubbing alcohol and a paper towel so the paint and glue will adhere better.
2. Lightly sand the outside of each plastic pot to dull any glossy finish, then wipe away the dust. This small prep step makes a real difference, the same way proper preheating matters in the kitchen.
3. Paint each styrofoam ball with white paint using a foam brush, working in thin coats to avoid pitting the foam surface. Let the first coat dry fully, then add a second coat anywhere the foam still shows through.
4. If the brown pots are not already the exact color you want, paint the outside of each pot with light brown paint and let them dry. Add a second coat for even coverage, especially around the rim and any molded texture.
5. Create a waffle-cone look by brushing or lightly dragging darker brown paint in diagonal lines across each pot, then crossing them in the opposite direction. Keep the lines loose and evenly spaced so the pattern reads clearly from a distance.
6. Test-fit one painted styrofoam ball on the wide opening of each upside-down pot to make sure it sits centered and stable. If needed, gently flatten a small area on the bottom of the foam ball so it nests more securely on the pot rim.
7. For extra stability, insert a short skewer or dowel into the top center of each upside-down pot and press the ball onto it before gluing. Keep the support centered so the scoop doesn’t lean.
8. Apply a generous ring of construction adhesive around the rim of one pot, then set one styrofoam ball on top and press gently. Repeat with the remaining three pots and balls, checking from all sides that each scoop is centered.
9. Let the adhesive cure according to the package directions without moving the pieces. Once dry, gently lift each one to check the bond before taking it outside.
10. Arrange the finished giant ice cream cones on your porch, steps, or entry area where they’re protected from strong wind and heavy rain. If you want them grouped like a display, vary the spacing slightly so they look intentional and playful rather than rigid.
Variations & Tips
Chocolate scoop version: Paint the foam balls medium brown instead of white for a chocolate ice cream look. This is especially cute if your porch décor already leans warm and earthy.
Sprinkles finish: Add colorful sprinkle-like dashes with outdoor paint markers or a small detail brush after the white paint dries. I’d keep them sparse so the scoops still read clearly from the curb.
Weather resistance: Seal both the painted pots and foam balls with a clear exterior sealer compatible with foam once everything is fully dry. It adds a little insurance if your porch gets afternoon humidity or occasional splashes.
Better balance: If your pots feel too light, add a small bag of sand or a few stones inside each pot before turning it upside down. A weighted base helps the decorations stay put outdoors.
Different scoop colors: Try pale pink, mint green, soft yellow, or light lavender for a strawberry, mint, lemon, or berry-parlor effect. A coordinated set of four colors can look charming for summer parties.
Storage tip: Store the cones upright in a dry area where the foam scoops won’t be crushed. I like seasonal projects that earn their keep more than once, and these are easy to bring back out year after year.