
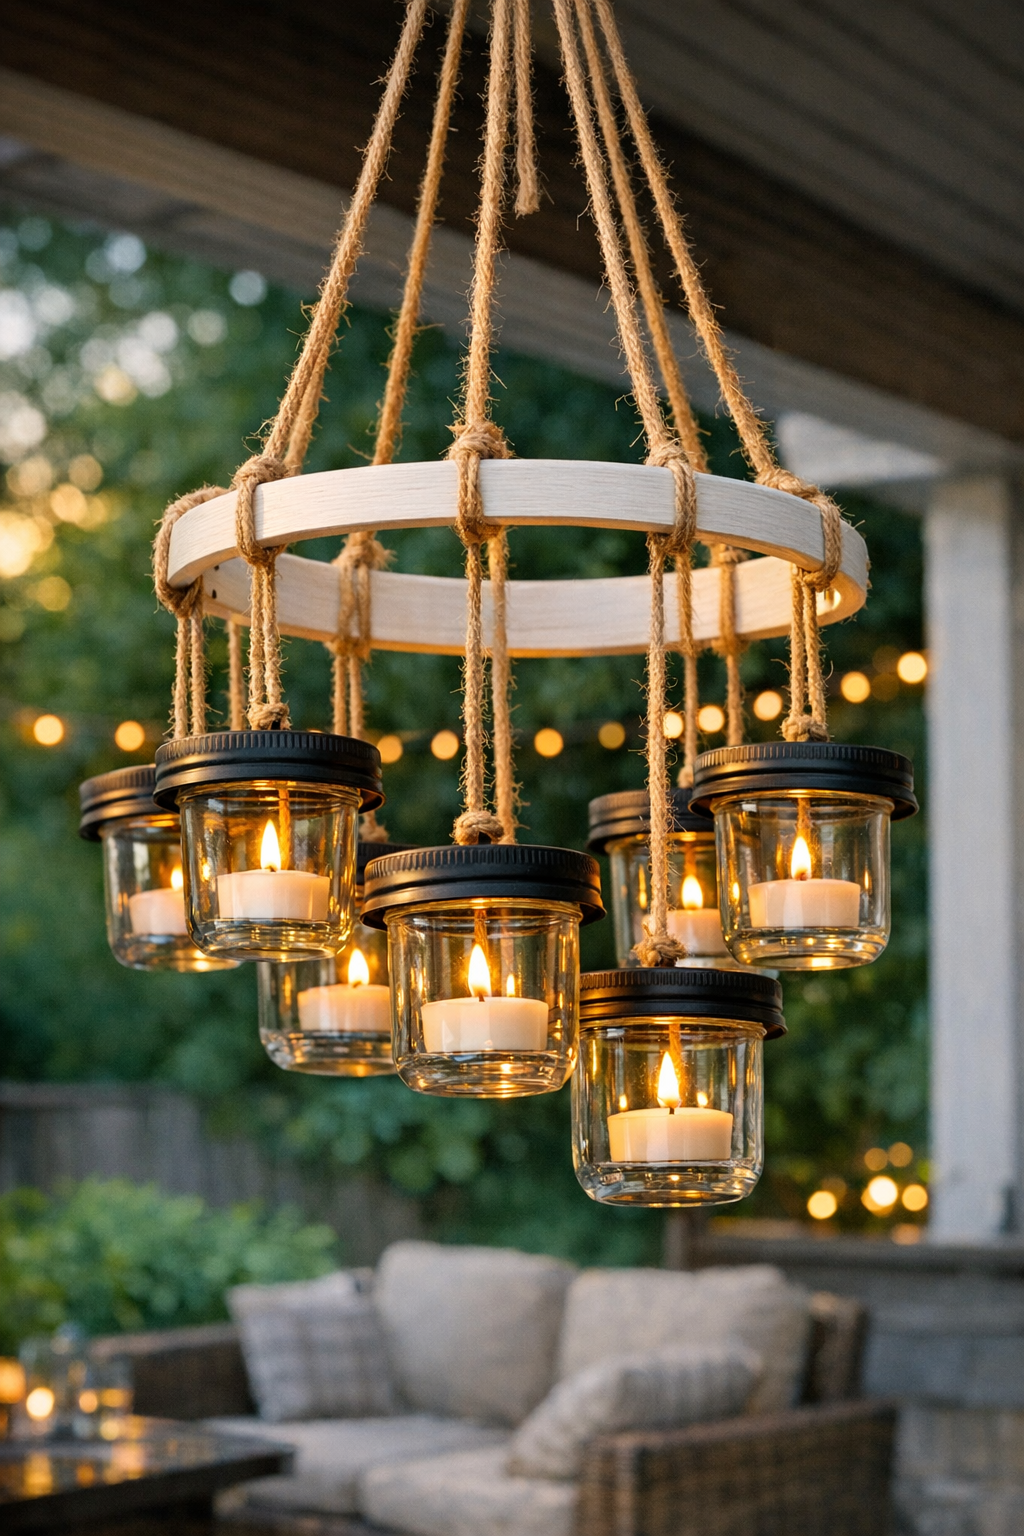
This outdoor candle chandelier looks much fancier than it is, which is honestly my favorite kind of project. You’re taking a simple wooden embroidery hoop, a handful of mason jar lids, some twine, and a little paint, then turning them into a patio piece that adds a warm glow over a table or in a quiet corner of the yard. It has that cozy, handmade look I’m always drawn to when I’m trying to make an outdoor space feel a little more inviting without spending a fortune.
I especially love projects like this because they fit into real life. You can make it over a weekend, it doesn’t require a full workshop, and it’s easy to customize to your own style. If you like simple décor projects with a big visual payoff, this one is a very doable place to start.
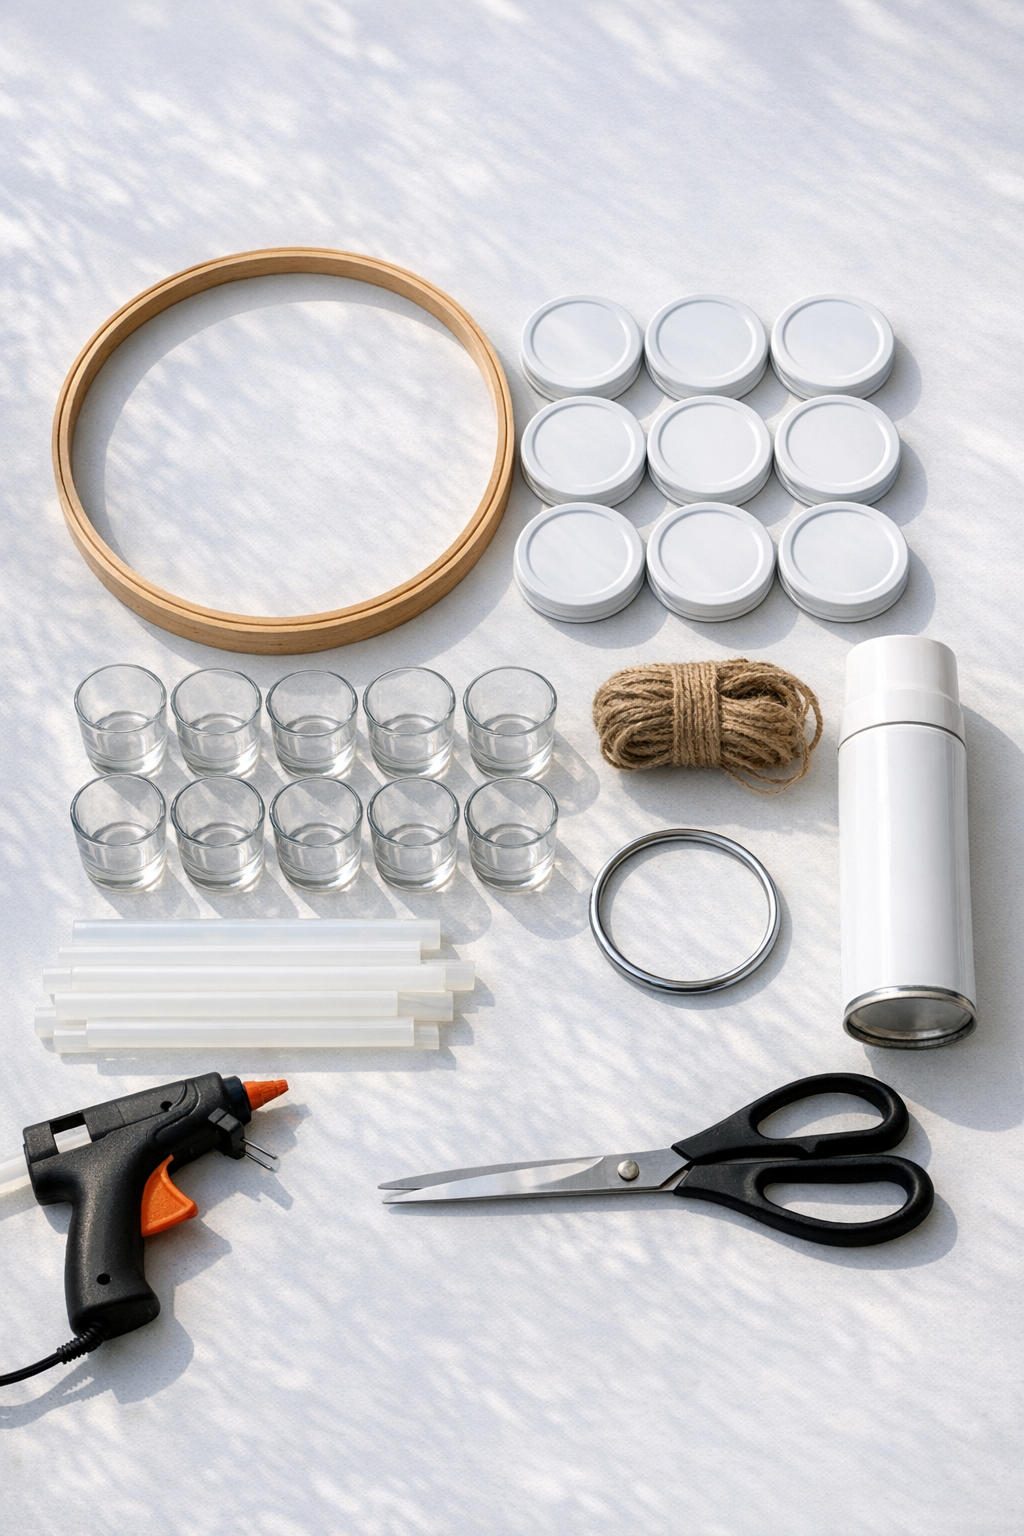
Materials
1 wooden embroidery hoop, 12 inches in diameter
Instructions
1. Separate the embroidery hoop and use the inner wooden ring for the chandelier base. Lightly sand the wood and the mason jar lids so the paint will stick better.
2. Lay out a drop cloth and spray paint the hoop, the flat lids, and the screw bands in thin, even coats. Let everything dry fully, then add a second coat if needed and finish with a clear sealer.
3. Measure and mark 12 evenly spaced points around the hoop for the hanging jars. Keep the spacing consistent so the chandelier hangs balanced.
4. Cut 12 pieces of twine, each 18 inches long, for the jar hangers. Cut 3 more pieces of twine, each 30 inches long, for the main hanging support.
5. Thread one 18-inch twine piece through opposite sides of a painted mason jar screw band and knot it securely to create a hanger loop. Repeat with the remaining screw bands.
6. Tie each twine hanger onto the marked spots around the hoop, double-knotting each one so it will not slip. Trim the ends neatly, leaving about 1/2 inch for a tidy handmade look.
7. Set a glass votive holder into each screw band and secure it with a small bead of strong glue if the fit is loose. Place the painted flat lid beneath or behind the band as a decorative backing, gluing it in place if you want a more finished look.
8. Space the three eye screws evenly around the top edge of the hoop and twist them in securely. Clip one S-hook to each eye screw.
9. Tie the three 30-inch twine pieces to the S-hooks, then bring the top ends together at the metal ring. Adjust the lengths until the hoop hangs level, then knot the twine tightly at the ring.
10. Add one tea light or LED tea light to each votive holder and hang the chandelier from a sturdy covered patio hook or pergola beam. Check that it is balanced before lighting or switching on the candles.
Variations & Tips
Safer outdoor option: If your chandelier will hang in a breezy spot, use LED tea lights instead of real candles. I do this anytime I know I won’t be hovering nearby, and it still gives that soft evening glow.
Paint finish: Matte black looks modern, while white or sage green gives it more of a cottage feel. I like choosing a color that ties into my patio cushions or planters so it looks intentional.
Weather durability: Use an outdoor-rated paint and sealer if this will stay outside for more than a weekend party. Even under a covered patio, that extra protection helps the finish last longer through humidity.
Jar fit tip: Test your votive holders inside the screw bands before painting everything. A snug fit makes assembly much easier and keeps you from relying too much on glue.
Size adjustment: For a fuller chandelier, use a 14- or 16-inch hoop and add more lids spaced evenly around the ring. Just keep the weight balanced by distributing each hanging holder carefully.
Hanging advice: Always hang this from a solid hook anchored into a beam or other sturdy support. Once the glass holders and candles are added, it can get heavier than it looks.