
This crochet wind chime is one of those wonderfully scrappy projects that looks charming on a porch and sounds surprisingly lovely when the breeze picks up. By weaving red, white, and blue yarn between metal measuring cups and hanging everything from a bent wire coat hanger, you get a patriotic piece of porch décor that feels equal parts crafty and clever.
I love projects like this because they use simple materials and don’t ask for a huge time commitment. If you crochet a little already, this is very approachable, and even if you’re newer to yarn crafts, the stitches are forgiving since the design is rustic by nature. It’s a great weekend project for anyone who likes handmade outdoor décor, upcycling, or adding a festive touch for summer holidays.
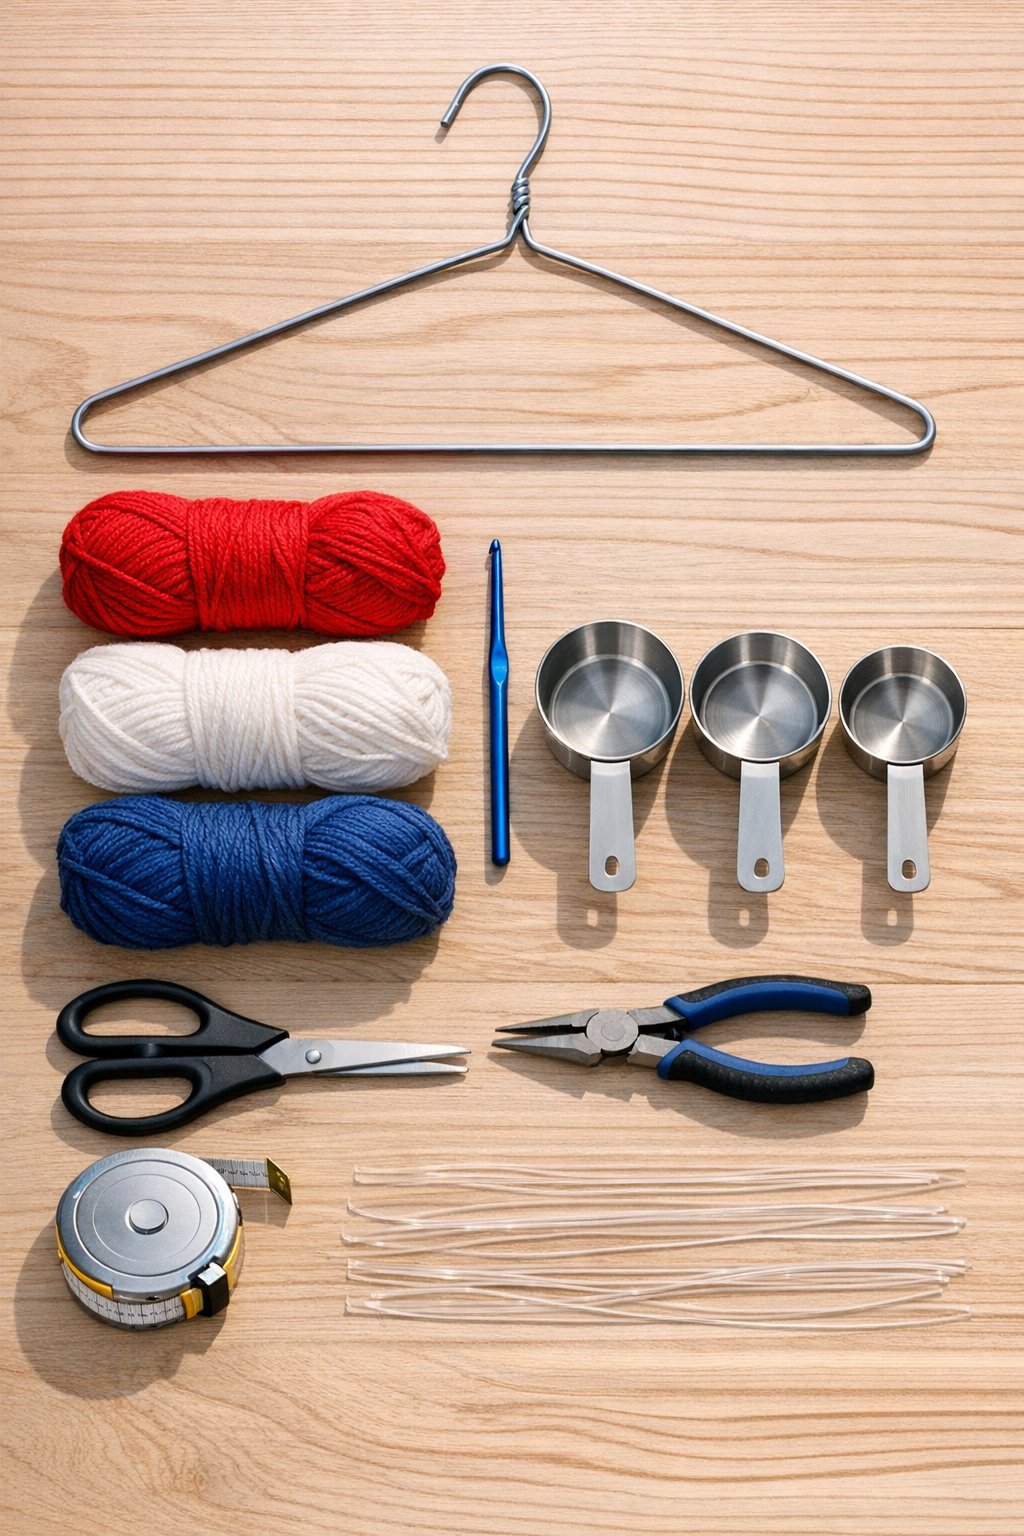
Materials
Instructions
1. Use the needle-nose pliers to bend the bottom of the wire coat hanger into a wide, gentle arc, keeping the top hook intact for hanging. Straighten any sharp kinks so the hanger will support the cups evenly.
2. Cut eight 18-inch lengths of fishing line or nylon cord. You’ll use two lengths for each measuring cup so the cups hang securely and sit fairly level.
3. Tie or loop two lengths of fishing line through the handle of each measuring cup, spacing the knots so the cup hangs straight. If your cup handles are narrow, use small jump rings first and tie the line to those.
4. Hang the measuring cups from the curved bottom of the hanger, arranging the largest cup near the center and smaller ones toward the sides. Adjust the lengths so the cups hang at staggered heights, with at least 1 to 2 inches between them for movement and sound.
5. With blue yarn, crochet a foundation chain about 10 to 12 inches long, or long enough to span between the two outer hanging points on the hanger. Check the fit as you go so it drapes slightly instead of pulling tight.
6. Work one row of single crochet back across the chain, then fasten it to one side of the hanger with a tight wrap and knot. Anchor the other end to the opposite side so you create the first soft yarn bridge above the cups.
7. Crochet a second strand in white and a third in red, making each one a slightly different length. Tie or stitch these strands across the hanger at different points so they crisscross gently between the cup hanging lines.
8. Add shorter crocheted chains between the fishing lines or cup handles to connect the cups visually. Keep these connectors loose enough that the cups can still sway and tap each other in the breeze.
9. Wrap sections of the hanger with leftover red, white, and blue yarn to cover the bare wire and make the top look finished. Knot the ends tightly and weave in loose tails with the yarn needle.
10. Lift the wind chime and test the balance by holding the top hook and gently shaking it. Shift cup positions or retie any hanging lines until the cups move freely and make a clear, light clinking sound.
Variations & Tips
Add more sound: If you want a fuller chime, add one or two extra metal measuring spoons or a small bell to the center. I’d keep them lightweight so they don’t overpower the cups.
Use weather-friendly yarn: Acrylic yarn is my pick for this project because it handles outdoor humidity better than cotton and dries faster after summer rain.
Adjust for your space: For a smaller apartment balcony, use just three cups and shorten the hanger curve a bit. For a bigger porch, spread the cups wider and add a few more crocheted strands.
Keep it balanced: If one side dips lower, shorten that cup’s fishing line by about 1/2 inch instead of rebending the whole hanger. That little tweak usually fixes it.
Make it holiday-specific: The red, white, and blue palette is perfect for Memorial Day, the Fourth of July, or Labor Day, but you can swap the yarn colors for any season and keep the same structure.
Hang it in the right spot: I like placing wind chimes where they catch a gentle side breeze instead of strong direct wind. You’ll get a nicer sound, and the yarn details stay looking tidy longer.