
When our Midwest summers get thick and sticky, my patio turns into the place everyone wants to be for about ten minutes before the heat wins. This DIY outdoor misting fan is my practical fix: it combines an old oscillating fan with a simple loop of copper tubing and brass misting nozzles, so you get moving air and a light cooling mist at the same time.
I love this project because it feels like a smart weekend upgrade instead of a huge build. If you’re comfortable measuring, drilling a few small holes, and tightening fittings, you can absolutely make this. It’s especially great if you already have an older outdoor-safe fan sitting in the garage and want to give it a second life for patio dinners, cookouts, or just surviving a humid afternoon with an iced coffee.
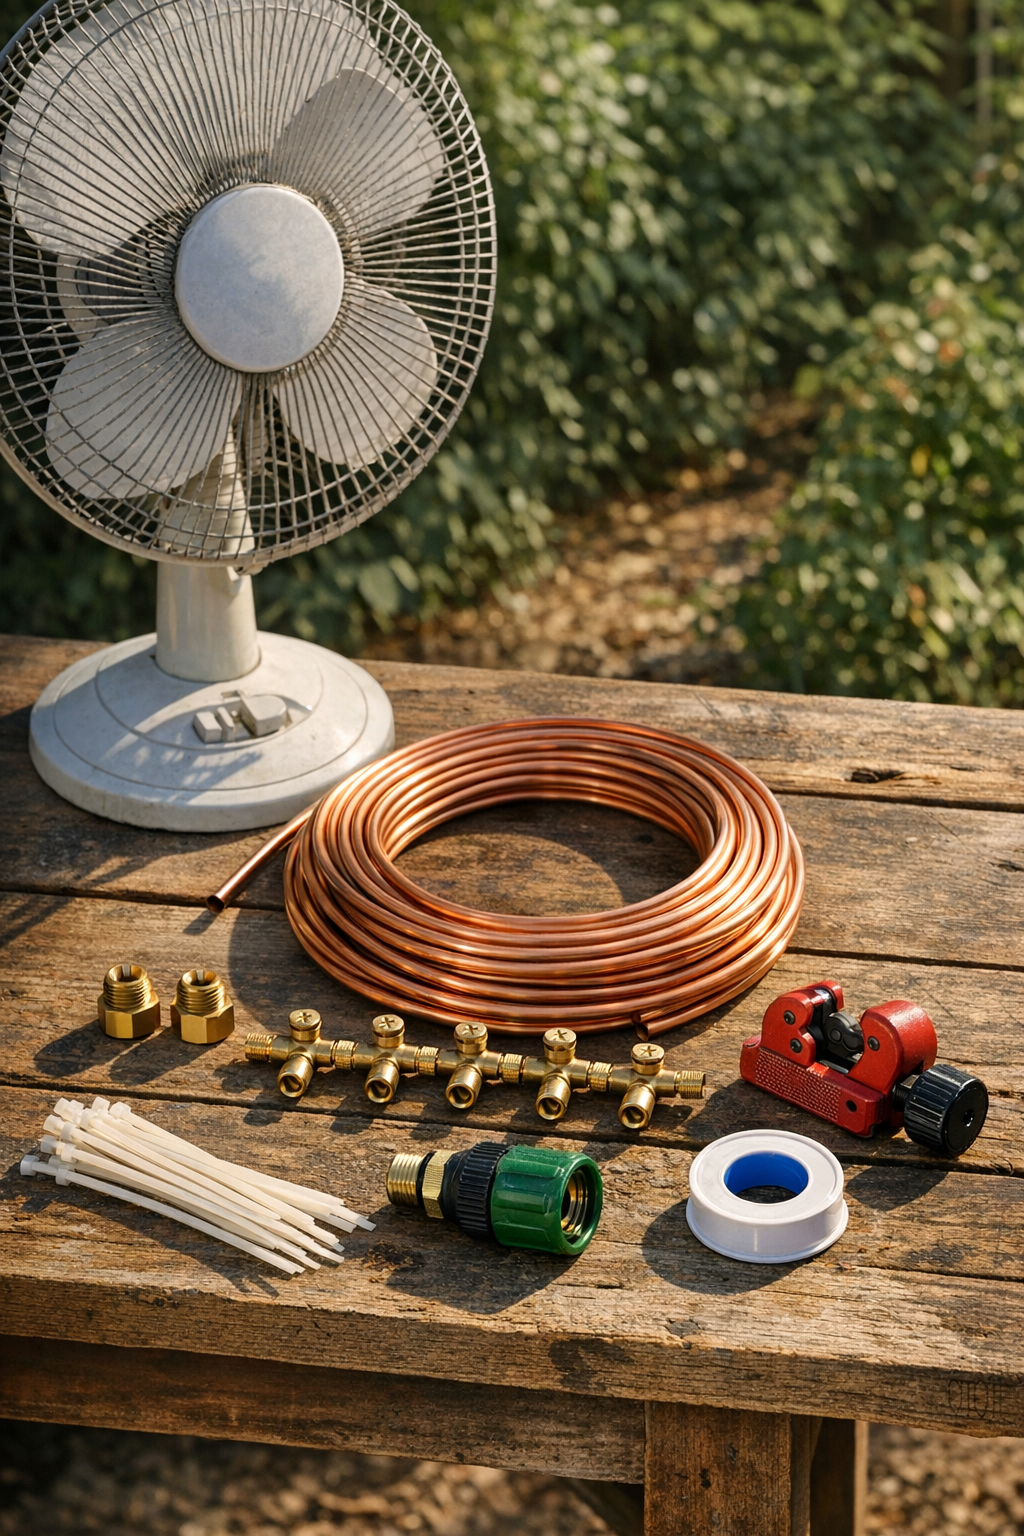
Materials
1 old oscillating fan with wire front cage, 16-inch to 20-inch diameter, outdoor use preferred
Instructions
1. Unplug the fan, clean the cage thoroughly, and make sure the fan runs properly before adding anything to it. If the grille is bent, straighten it now so the copper tubing will sit evenly around the front cage.
2. Measure the outer ring of the fan cage and sketch a simple tubing path that follows the circular shape without crossing the fan blades. Plan for the water inlet to sit low on one side so the hose connection stays easy to reach.
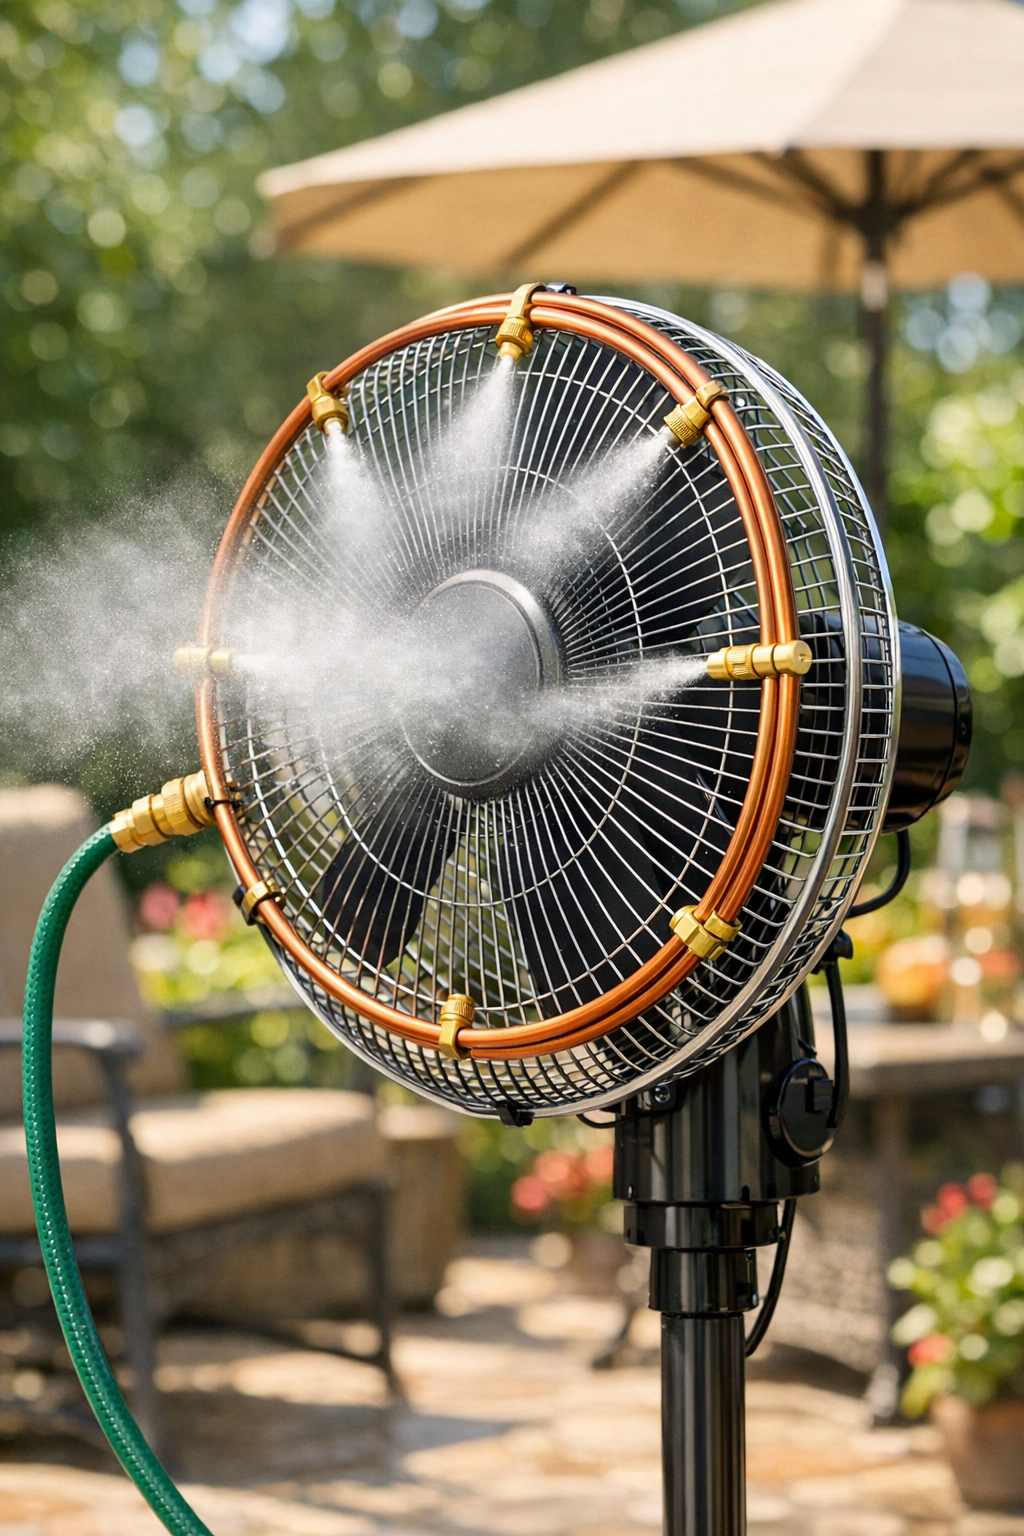
3. Uncoil the copper tubing slowly and gently hand-bend it around the front fan cage, following the outer wire ring. Leave a 2-inch to 3-inch gap between the tubing and the spinning blade path so nothing can contact the blades.
4. Mark six evenly spaced nozzle locations across the top and sides of the tubing loop, avoiding the very bottom where water can drip more heavily. Keep each nozzle about 6 to 8 inches apart for balanced mist coverage.
5. Cut the tubing at your marked nozzle points and install the brass compression tee fittings with nozzle ports, tightening them firmly with a wrench. Wrap PTFE tape on the nozzle threads, then screw a brass misting nozzle into each tee.
6. Complete the tubing loop or horseshoe shape based on your fan size, then add the end fitting and inline ball valve at the lower side of the cage. Attach the garden hose adapter after the valve so you can control water flow right at the fan.
7. Secure the copper tubing to the fan cage using zip ties or cushioned clamps at regular intervals, usually every 4 to 6 inches. Tighten them enough to hold the tubing steady, but do not crush the copper or distort the fan grille.
8. Check that the oscillating function can still move freely and that the fan head can tilt without pulling on the tubing or hose connection. If needed, reposition the inlet side lower and closer to the fan’s pivot point to reduce strain.
9. Connect the garden hose with the fan still unplugged, place a towel or tray underneath, and slowly turn on the water. Inspect every fitting for leaks and tighten any compression nuts or threaded nozzles as needed.
10. Once the line is leak-free, plug in the fan and test the mist pattern on the lowest water flow first. Open the valve gradually until you get a fine mist instead of heavy droplets, then aim the fan where you want cooling airflow across the patio.
Variations & Tips
Use fewer nozzles for lower pressure: If your hose pressure is average or on the weaker side, start with four nozzles instead of six. You can always add more later if the mist is too light.
Choose the right fan: I prefer a metal-cage pedestal fan for this because it gives you more room to secure the tubing. A box fan is trickier for this exact wraparound method and usually needs a different layout.
Keep water away from the motor: Angle the nozzles slightly outward and forward so the mist blows past the fan instead of back into the motor housing. That little adjustment makes a big difference.
Test outdoors only: This is a patio project, not something I’d run indoors or on a covered porch with limited airflow. I always test mine outside with a GFCI-protected outlet for extra peace of mind.
Flush the line occasionally: If the nozzles start sputtering, remove them and run water through the copper line for a minute. Mineral buildup happens fast in summer, especially if you use hard water.
Swap copper for nylon misting line: If you want an easier bend and a lighter setup, outdoor misting tubing can work too. I like copper because it holds its shape beautifully and gives the project a more finished look.
Do a dry fit first: Before tightening every fitting, loosely assemble the full ring on the cage and check blade clearance by spinning the fan blades by hand. It takes five extra minutes and can save a full do-over.