
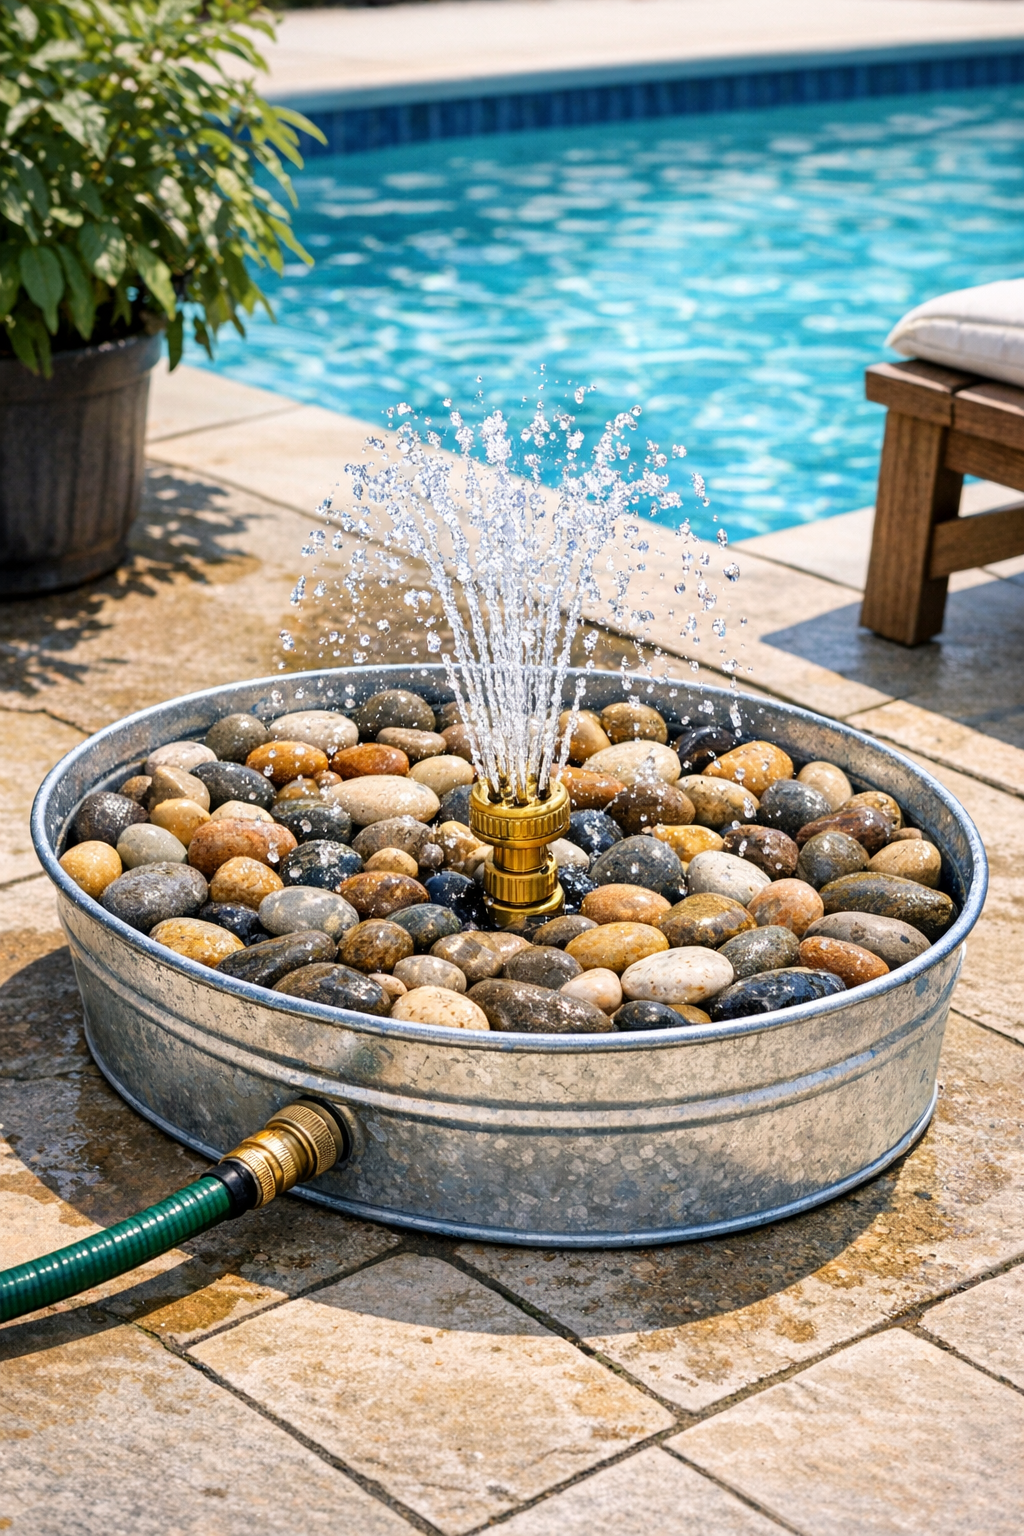
If you’ve ever watched a trail of wet grass, mulch, or poolside grit make its way straight into the house, this little project solves that problem in the simplest way. I love DIYs that feel clever without being fussy, and this outdoor foot wash station is exactly that: a galvanized pan filled with smooth pebbles and fitted with a sprinkler head so you can rinse off dirty feet before walking inside.
As someone who is always trying to keep summer mess under control without adding another big chore to my week, I’m a huge fan of anything that hooks up to a regular garden hose and just works. This is a great weekend project for a pool area, backyard, garden path, lake house, or even the side entrance where kids and dogs seem to collect half the outdoors on their feet.
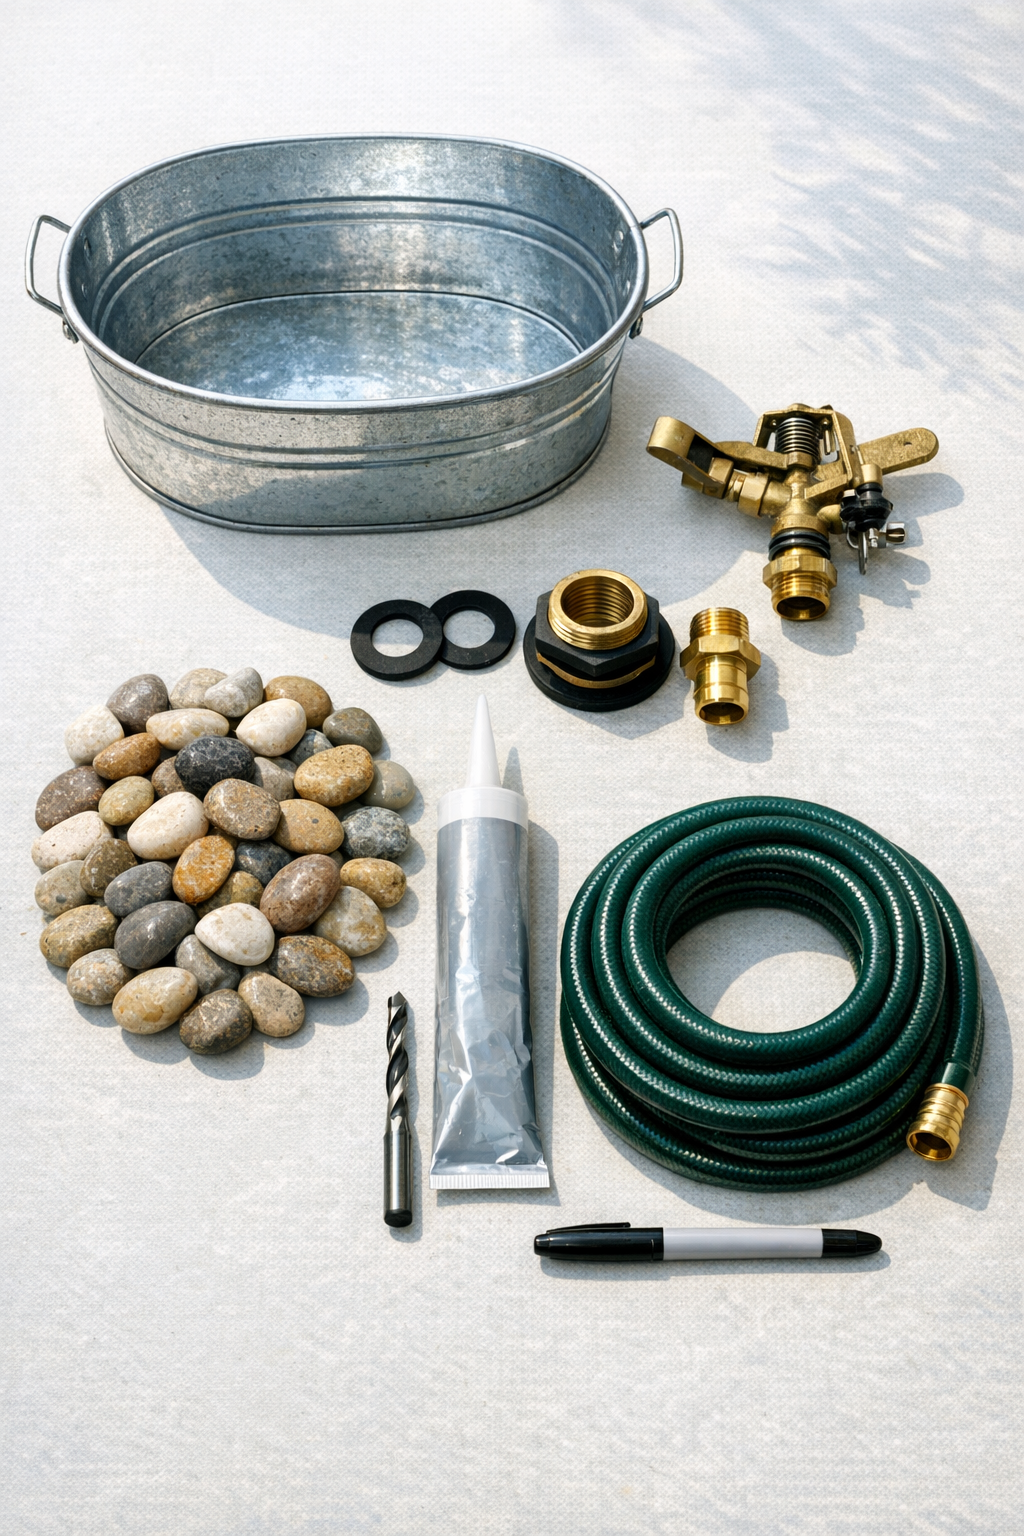
Materials
1 galvanized oval utility pan, approximately 24 inches long x 16 inches wide x 8 inches deep
Instructions
1. Wash the galvanized pan and let it dry completely so the fittings and sealant can bond well. Set it on a sturdy work surface with the bottom facing up.
2. Mark the hole location in the center of the pan bottom, or slightly off-center if you want more room for feet on one side. Place painter’s tape over the mark to help keep the drill bit from wandering.
3. Drill a hole sized for your bulkhead fitting, following the manufacturer’s required diameter exactly. Smooth any sharp metal edges around the hole before moving on.
4. Insert the bulkhead fitting through the hole from the inside of the pan, placing the gasket and rubber washer as directed for a watertight seal. Tighten the nut underneath by hand, then snug it carefully without over-tightening the metal pan.
5. Apply a thin bead of outdoor silicone around the fitting on both sides of the pan for extra leak protection. Let the sealant set according to the package directions before adding weight or water.
6. Wrap plumber’s tape around the threaded end of the sprinkler head, then thread it into the top of the bulkhead fitting from inside the pan. Position it so the spray pattern will rise evenly through the pebbles.
7. Attach the hose-thread adapter to the underside of the bulkhead fitting, using plumber’s tape on threaded connections if needed. Hand-tighten it firmly so a standard garden hose can connect securely.
8. Pour in the washed river pebbles, filling the pan to a depth of about 2 to 3 inches around the sprinkler head. Keep the top of the sprinkler exposed enough that water can spray up through the stones instead of being blocked.
9. Move the pan to its final outdoor spot on a level surface, ideally where runoff can drain safely onto gravel, grass, or a nearby landscape bed. I like placing it near the pool gate or back patio steps so it actually gets used.
10. Connect the garden hose underneath or at the side, depending on your fitting layout, and turn the water on slowly. Adjust the pressure until the spray rinses feet well without splashing water out of the pan too aggressively.
11. Test the station by stepping on the pebbles and rinsing off both feet for a few seconds. If needed, remove a few stones or lower the water pressure until the spray feels comfortable and stays contained.
Variations & Tips
Kid-friendly setup: Use a lower-spray bubbler head instead of a taller sprinkler pattern if small kids will be using it. It makes the rinse gentler and keeps more water inside the pan.
Better drainage placement: Set the pan on a bed of pea gravel or a slatted platform if your patio tends to hold puddles. That small change helps the area dry faster and keeps things less slippery.
Rust prevention: A galvanized pan holds up well outdoors, but I still recommend emptying standing water and storing it under cover in winter if you live somewhere with freezing temperatures like I do in the Midwest.
Pebble choice: Pick smooth river stones in the 1- to 2-inch range so they’re comfortable under bare feet. Avoid sharp decorative rock or very tiny gravel that can shift too much when water is on.
Make it prettier: If the station is going near a pool or entertaining area, use polished black pebbles, white stones, or a copper-tone pan for a more styled look. It’s one of those practical projects that can still feel intentional.
Leak check: Before filling with pebbles, do a quick hose test with just the fitted pan. It’s much easier to tighten or reseal one connection early than to scoop out wet stones later, which I learned the hard way on another backyard project.