
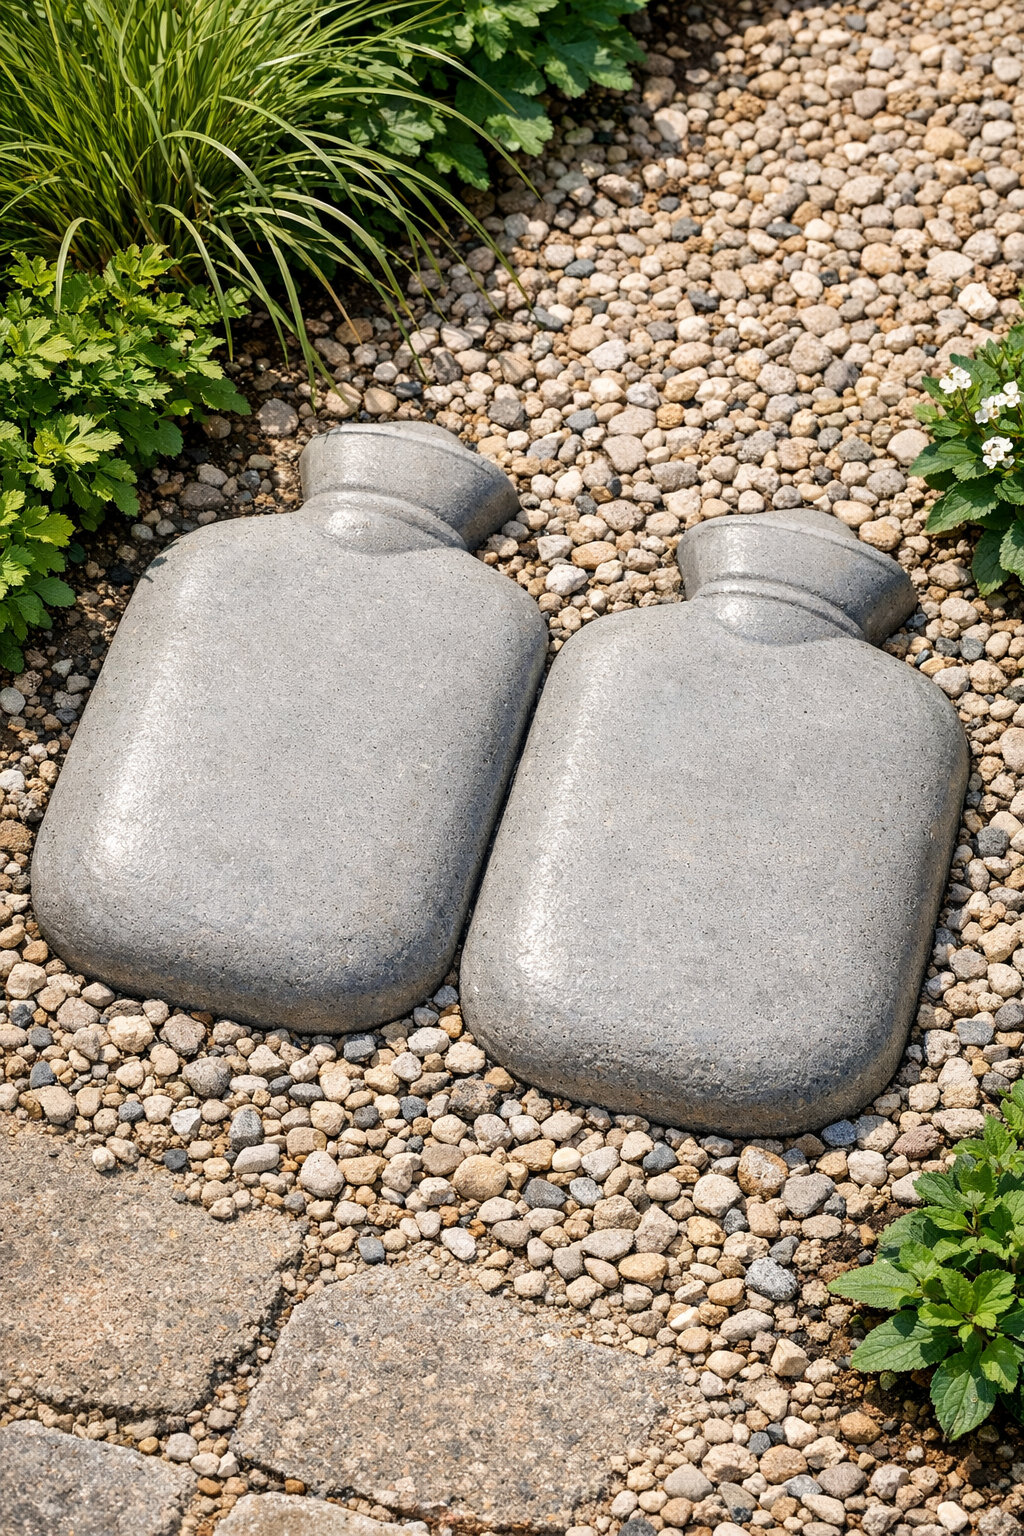
This project turns two ordinary red rubber hot water bottles into surprisingly polished, heavy yard pavers using nothing more complicated than wet cement and a funnel to get the mix where it needs to go. The finished pieces have a smooth, rounded shape that works beautifully as stepping accents in gravel, tucked between garden beds, or set beside a back step where you want a little visual surprise.
As someone who spends plenty of time thinking about texture, weight, and how simple ingredients transform, I find this project especially satisfying. It is a good fit for beginners because the form is built right into the bottles, and it is also appealing if you like practical upcycling with a sculptural result. If you can mix cement to the right consistency and pour patiently, you can make these.
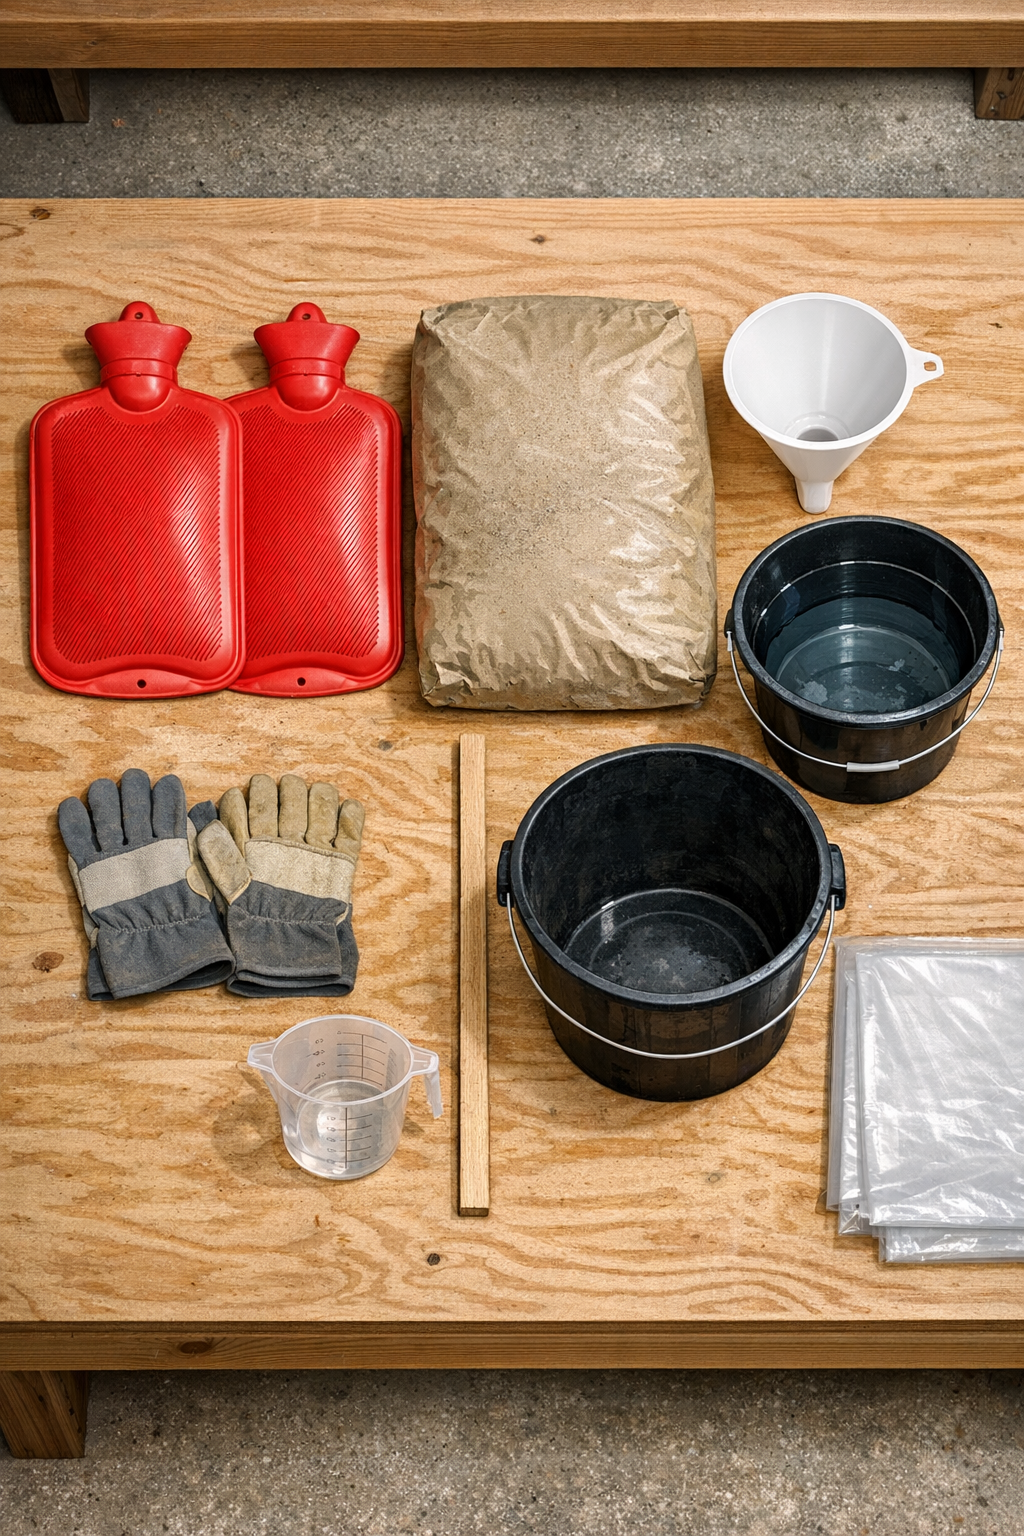
Materials
Instructions
1. Spread the plastic drop cloth over a flat outdoor work area, and set the two hot water bottles on top so they stay clean while you work. Lightly coat the inside neck of each bottle and the funnel stem with a thin film of oil to help the cement slide through more easily.
2. In the mixing bucket, combine the cement mix with water a little at a time until it reaches the texture of thick pancake batter or loose mashed potatoes. It should be wet enough to pour slowly but thick enough that the heavier particles do not separate.
3. Insert the funnel into the opening of the first hot water bottle and slowly add cement in small amounts, pausing between pours so the mix settles into the body of the bottle. Tap the sides gently with your hand to release trapped air pockets as it fills.
4. Fill the bottle until it is full and firm but not stretched to the point of distortion, then screw on the cap tightly. Repeat with the second bottle, keeping both pieces as evenly filled as possible so the finished pavers match in height and weight.
5. Lift and settle each filled bottle gently onto the flat surface, then press lightly to shape the cement evenly into the corners and rounded edges. If needed, smooth the outside with your hands so the bottles rest in a stable, slightly flattened paver shape.
6. Let the filled bottles cure undisturbed for 24 to 48 hours, depending on the cement mix and weather, until they feel completely hard. In cool or damp weather, give them the full 48 hours so the centers set firmly.
7. Use scissors or a utility knife carefully to cut and peel away the rubber bottle from each cured piece. Work slowly around the edges so you do not chip the cement, especially near the neck and ribbed details.
8. Set the uncovered pavers aside for another 2 to 3 days to finish curing before placing them in the yard. Once fully cured, nestle them into soil or gravel so they sit level and do not rock underfoot.
Variations & Tips
Use a stronger mix: For pavers that will handle more foot traffic, choose a high-strength concrete mix rather than a very lightweight craft cement. The denser mix gives a crisper, heavier result.
Add reinforcement: If you want extra durability, push a small piece of galvanized wire mesh or hardware cloth into the center of each bottle once it is half full, then cover it with more cement.
Create a smoother finish: After demolding, rub any rough spots with a damp masonry sponge or fine sanding stone once the paver is mostly cured but not rock-hard. That little bit of timing makes cleanup easier.
Try a tinted surface: You can mix in a small amount of concrete pigment for a warmer stone tone, or brush on masonry stain after full curing if you want the pavers to blend into a garden palette.
Mind the bottle shape: Older rubber bottles sometimes have ridges, seams, or embossed patterns that will transfer to the cement. I actually like that effect; it gives the finished pavers a bit of character without extra work.
Place them safely: These are best used as decorative stepping accents, not structural patio pavers. Set them into compacted soil, sand, or gravel so the weight is supported evenly and the surface stays stable.