
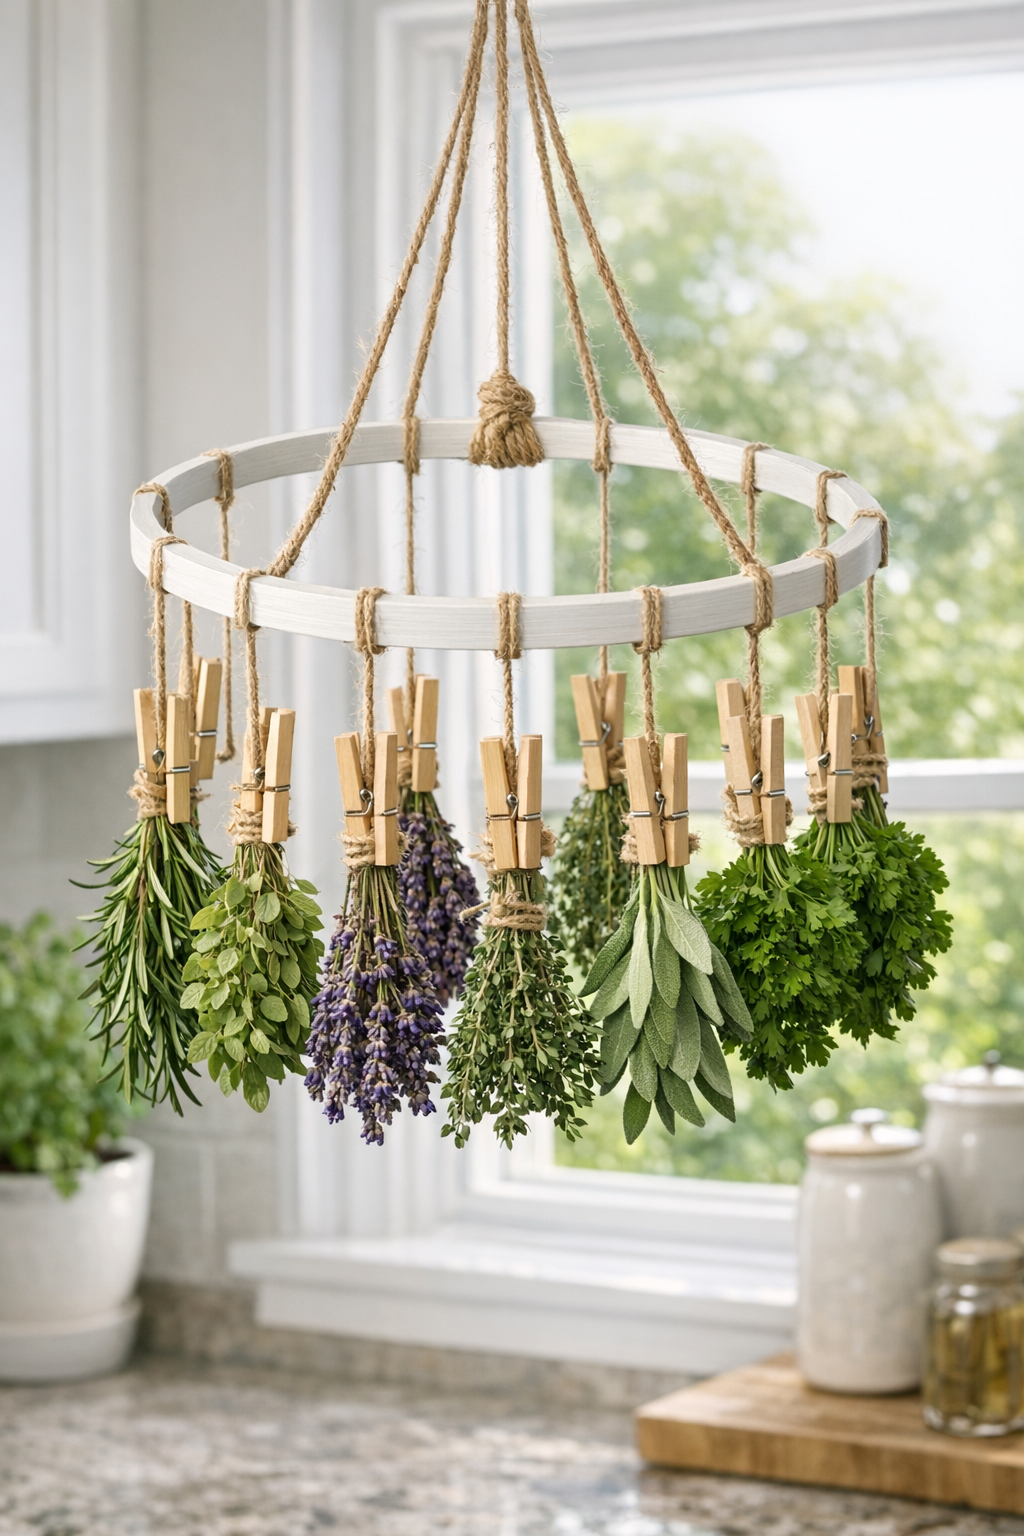
If you grow herbs the way I do—snipping a little basil here, a handful of mint there—this simple drying rack is such a satisfying project. It turns a couple of embroidery hoops, some wooden clothespins, and twine into a pretty hanging rack you can use to air-dry small bundles of herbs near a sunny kitchen window or in a covered outdoor spot with good airflow.
I love projects like this because they’re inexpensive, quick to make, and actually useful right away. If you’re a gardener, a home cook, or just someone who likes making your kitchen feel a little more personal, this is an easy afternoon DIY that looks charming and helps preserve fresh herbs for soups, roasts, teas, and homemade seasoning blends.
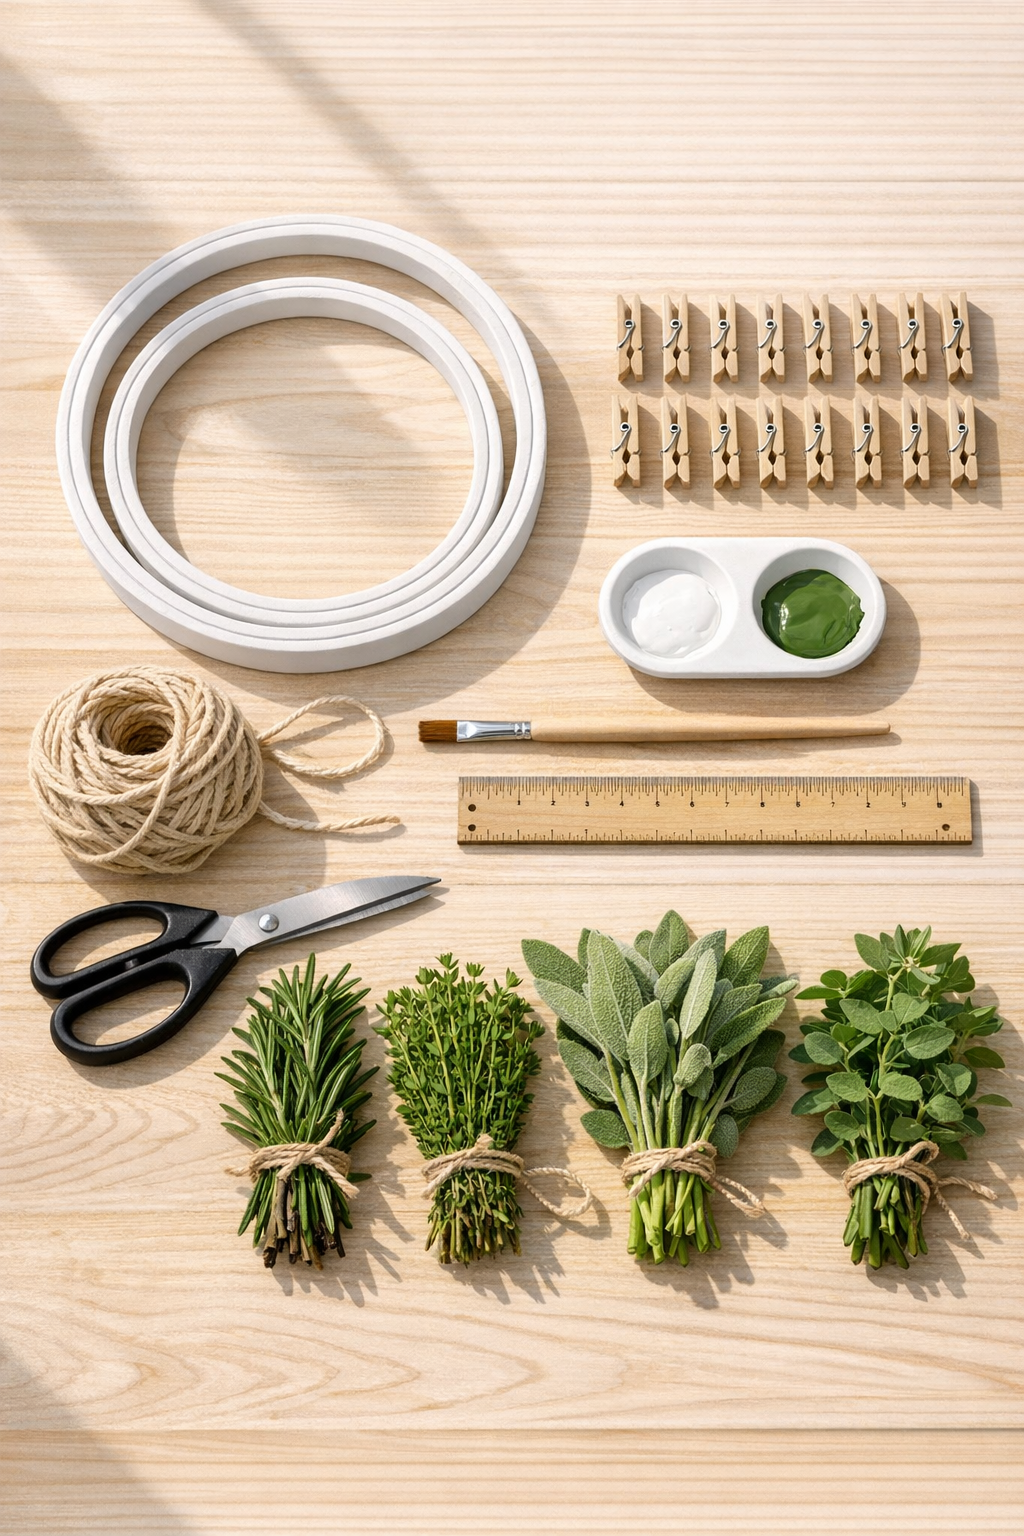
Materials
2 wooden embroidery hoops, 10-inch diameter each
Instructions
1. Lightly sand the embroidery hoops if they feel rough, then wipe away any dust with a dry cloth so the paint goes on smoothly.
2. Paint both hoops in a thin, even coat and let them dry completely; add a second coat if you want fuller coverage.
3. If you’d like a little extra durability for outdoor use in a covered area, brush on a thin coat of clear matte sealer and let it dry fully.
4. Open the clothespins and clip them evenly around one hoop, spacing them about 1 to 1 1/2 inches apart so there’s room for air to move between herb bundles.
5. Cut three pieces of twine, 24 inches long each, and tie them securely to the hoop at three evenly spaced points to create hanging supports.
6. Gather the three twine ends together above the hoop and knot them into a loop, leaving about 6 to 8 inches above the hoop for hanging.
7. Cut one more piece of twine about 30 inches long and tie it across the center of the hoop from one side to the other; repeat with a second 30-inch piece to form a crossbar for extra drying space.
8. If you want a double-tier rack, tie 3 more pieces of twine, 8 inches long each, from the first hoop down to the second hoop, spacing them evenly so the lower hoop hangs level.
9. Add clothespins around the second hoop just as you did on the first, keeping the spacing even and leaving the hoops balanced.
10. Harvest herbs in small bunches, remove damaged leaves, and tie each bundle loosely at the stem end if the stems are very slender.
11. Clip the herb bundles upside down into the clothespins or rest stems over the center twine lines, making sure the bundles do not touch too closely.
12. Hang the rack in a bright, dry, well-ventilated spot out of direct rain, and let the herbs dry for several days to 2 weeks depending on the herb and humidity.
13. Check the herbs every couple of days; when the leaves feel crisp and crumble easily, remove them from the stems and store them in airtight jars.
Variations & Tips
Paint color idea: I like soft white, sage green, or a muted blue for this project because it feels fresh in a kitchen, but natural unfinished wood is lovely too if you prefer a simple farmhouse look.
Best herbs to dry: Rosemary, thyme, oregano, sage, mint, lavender, and dill all work beautifully. Basil can be a little fussier, so I dry it in very small bundles with plenty of airflow.
For humid weather: Keep bundles smaller than you think you need. In my experience, tighter bunches dry too slowly and can lose that nice clean fragrance.
For picky family cooks: If your household is unsure about stronger herbs, dry milder favorites like parsley, dill, or a little mint first. It’s a nice way to build a homemade seasoning shelf without overwhelming anyone at the dinner table.
Window placement tip: A kitchen window is pretty for display, but avoid harsh direct sun all day long because it can fade color and flavor. Bright indirect light with good airflow is the sweet spot.
Outdoor hanging tip: This rack does best on a covered porch or sheltered patio, not in open weather. Rain and heavy dew can slow drying and may warp unsealed wood.
Storage tip: Once the herbs are fully dry, crumble them only when you’re ready to use them or pack them into jars. Keeping the leaves a little more whole helps them hold flavor longer.