
There is something especially satisfying about turning an everyday household item into something truly useful, and this crochet locker organizer does exactly that. By working thick cotton yarn between plastic shower curtain rings, you can make a slim hanging organizer that tucks neatly inside a school locker and holds pencils, note cards, earbuds, lip balm, and all those little odds and ends that usually wind up rattling around at the bottom.
I have always loved a practical project, the sort of thing that saves money and brings a little order to a busy day. This one is simple enough for a confident beginner who knows basic crochet stitches, and it is a fine back-to-school make for teens, parents, grandparents, or anyone who enjoys sending a child off with something handmade and sturdy.
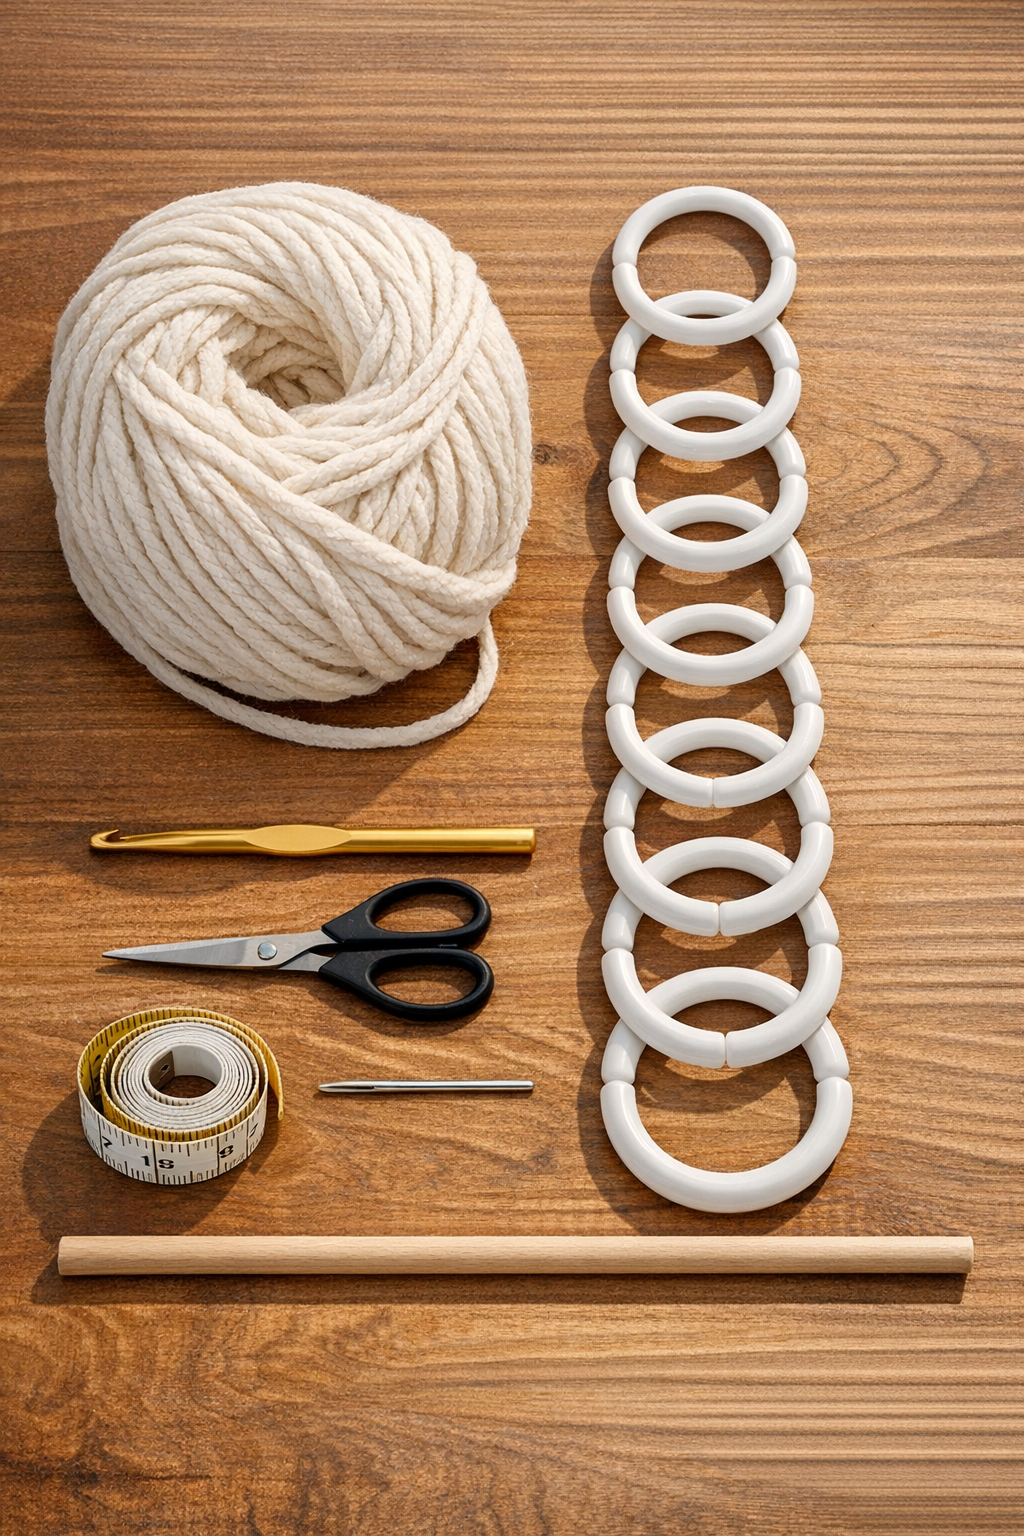
Materials
1 plastic shower curtain ring holder strip or 8 plastic shower curtain rings that can be strung vertically
Instructions
1. String the 8 plastic shower curtain rings onto the dowel or rod and arrange them in a single vertical column so each ring touches the next one.
2. Tie the yarn securely around the top ring with a double knot, leaving a 6-inch tail for weaving in later.
3. Work single crochet stitches tightly around the lower edge of the top ring until you have covered about half the ring, usually 14 to 18 stitches depending on ring size.
4. Continue by crocheting downward between the first and second rings, using chain stitches and slip stitches around the next ring to anchor the yarn and begin forming the first connecting panel.
5. Build the first pocket by crocheting back and forth across the space between the first and second rings, using rows of single crochet until the fabric spans the width neatly and forms a shallow hammock shape.
6. Attach that pocket section to the second ring with slip stitches spaced evenly across the ring so the pouch sits snugly and will not sag too much when filled.
7. Repeat the same process between each pair of rings: chain down, crochet back-and-forth rows to create a pocket, and slip stitch onto the next ring.
8. Check the depth of each pocket as you go; 2 to 3 inches deep is usually enough for pens and school supplies without making the organizer bulky.
9. When you reach the final ring, cover part of the bottom ring with single crochet just as you did on the top ring, then fasten off the yarn with an 8-inch tail.
10. Use the yarn needle to weave in all loose ends through the thick stitches, trimming any excess neatly with scissors.
11. Add a hanging method at the top by knotting sturdy cord through the top ring, attaching a locker hook, or hanging the top ring directly over a locker peg or hook.
12. Test the organizer with a few school supplies in each pocket and adjust any stretched sections by adding an extra slip stitch or tightening a loose anchor point.
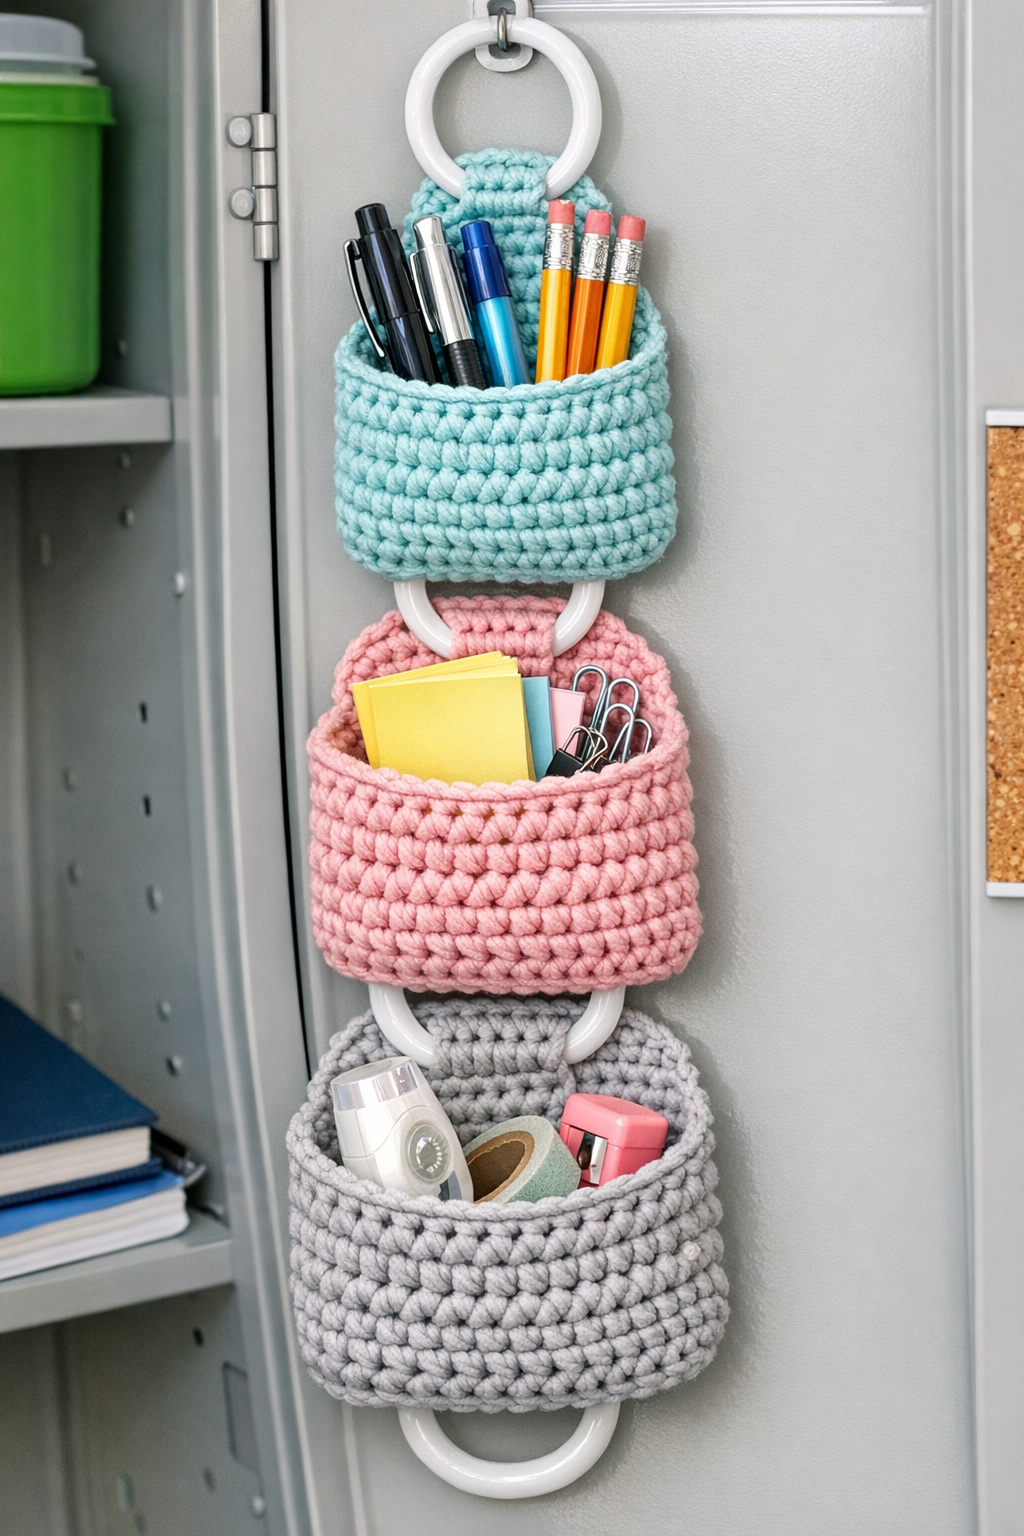
Variations & Tips
Color choice: Use school colors or a favorite bright shade to make the organizer feel personal. In my family, anything made in a child’s own colors always seemed to get used more faithfully.
Beginner shortcut: If crocheting full pocket panels feels fussy, make simple chain-and-single-crochet mesh sections between the rings for lighter storage like notes, hair ties, or flash cards.
Sturdier pockets: Cotton yarn is the best choice here because it holds its shape better than soft acrylic. If you expect heavier items, use tight single crochet stitches and keep the pocket depth shallow.
Locker-friendly sizing: Before you begin, measure the inside height of the locker door or wall space. You can use 6 rings for a shorter organizer or 10 rings for a longer one, as long as you keep the pockets evenly spaced.
Easy hanging fix: If the top ring tips forward once it is loaded, run a second loop of cord through the top two rings to steady the organizer against the locker wall.
Good uses beyond school: This same little project works nicely in a mudroom, craft corner, or sewing nook for holding scissors, seed packets, clothespins, or crochet hooks. I always think the handiest projects are the ones that can do more than one job.