
If you entertain outside even a few times each summer, you know how quickly forks, napkins, straws, and condiment packets can end up scattered all over the patio table. This outdoor utensil caddy solves that in a way that is both practical and honestly pretty cute: a set of small galvanized flower buckets attached to a wooden lazy Susan so everything spins right where you need it. I love projects like this because they make hosting feel easier without requiring a full weekend of work.
As someone who is usually trying to get dinner on the table after work and then magically turn the deck into a functional hangout space, I appreciate anything that keeps outdoor meals organized. This is a great beginner-friendly build if you are comfortable with basic measuring and drilling, and it is especially useful for deck dinners, barbecues, and casual family gatherings.
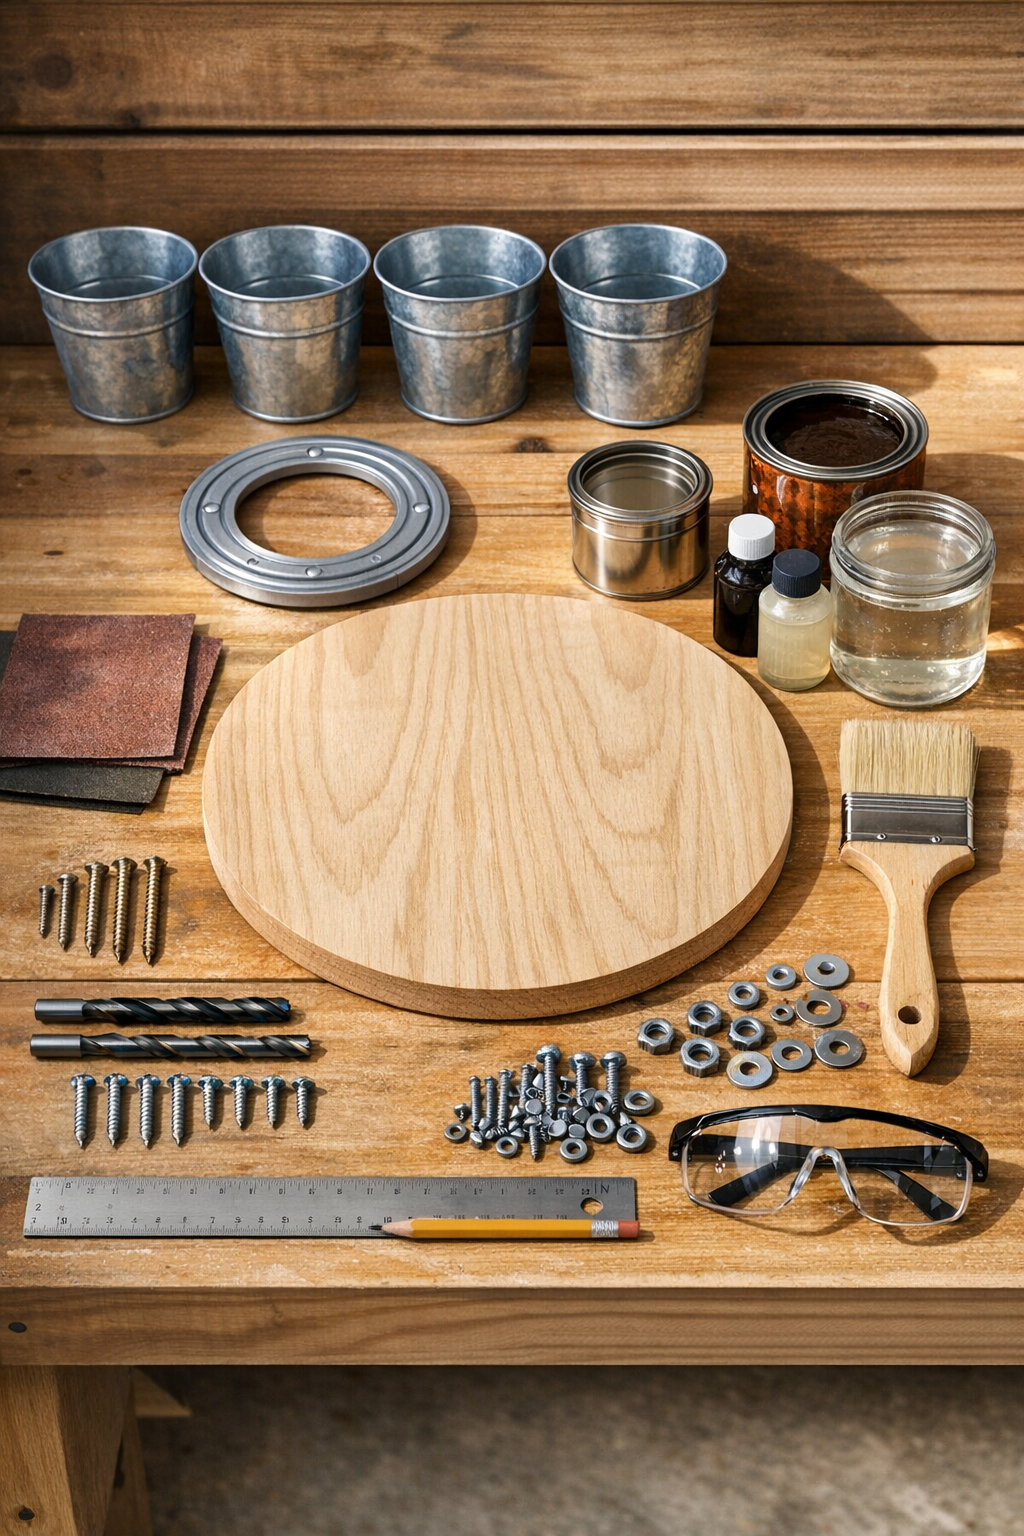
Materials
4 small galvanized flower buckets, 5 to 6 inches tall and about 4 to 5 inches wide
Instructions
1. Lightly sand the wooden round with 120-grit sandpaper, then smooth it with 220-grit so the top and edges are splinter-free.
2. Apply your stain or paint to the wooden round, let it dry fully, then seal it with an outdoor clear coat to help it hold up on the deck.
3. Turn the board upside down and center the lazy Susan bearing on the bottom; mark the screw holes, predrill shallow pilot holes, and fasten it with the 1/2-inch wood screws.
4. Flip the board right side up and arrange the four galvanized buckets evenly around the outer edge, leaving the center clear so the caddy can spin smoothly and still hold a small stack of napkins or condiments.
5. When the spacing looks balanced, trace or mark two attachment points near the upper back side of each bucket where it will meet the wooden base.
6. Place painter’s tape over each drill spot on the buckets, then drill two holes through each bucket carefully and slowly to reduce slipping on the metal.
7. Set each bucket back in position on the board and use the bucket holes as guides to mark the matching holes on the wood.
8. Drill the marked holes through the wooden base, then line up one bucket at a time and attach it with machine screws, using a washer on each side and tightening the nuts snugly by hand or with a screwdriver and small wrench.
9. Check that all four buckets are secure, then test the lazy Susan spin and make sure no screw ends interfere with the turntable hardware underneath.
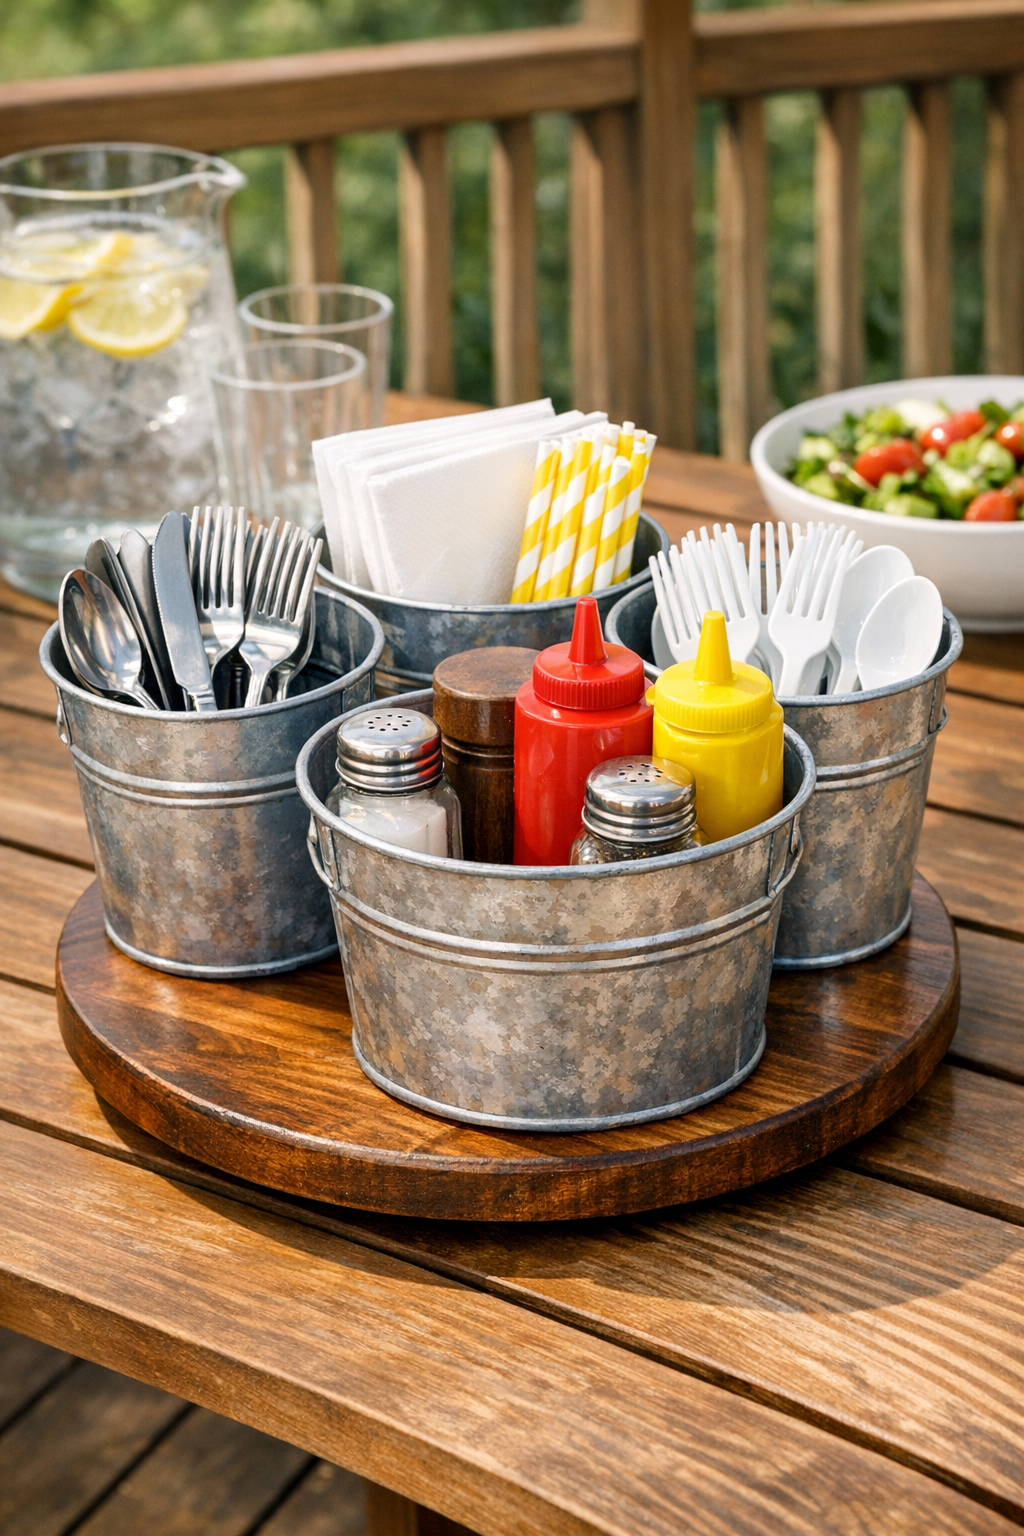
10. Add rubber feet to the underside if you want extra clearance and a little grip on a patio table, then fill the buckets with forks, spoons, knives, straws, or rolled napkins.
Variations & Tips
Add drainage: If your buckets will live outside full-time, drill one or two small drainage holes in the bottom of each bucket so rainwater does not collect inside. I would still bring it under cover when possible, because that always helps metal and wood last longer.
Use fewer or more containers: Three larger buckets work well for a smaller table, while five mini buckets can be fun for party extras like sauce packets, stir sticks, and drink garnishes. Just keep the weight evenly distributed so the base spins smoothly.
Protect utensils: I like dropping in inexpensive mason jars, tin cups, or removable plastic tumblers inside the buckets if I am using this for actual silverware. That makes cleanup much easier after a cookout.
Match your deck style: You can stain the wood dark walnut for a more classic look, paint it white for a cottage style, or use black hardware for a slightly more modern finish. Galvanized metal is forgiving, so it pairs with almost anything already on your patio.
Keep the center useful: The open middle is a great spot for napkins, salt and pepper shakers, or a small potted herb. On busy nights, I love using that center space for a little cup of wipes because outdoor meals with kids always seem to need them.
Make it party-ready: For larger gatherings, set one caddy near the grill for prep tools and another on the table for serving utensils and condiments. It is one of those simple projects that makes hosting feel much more pulled together than the effort it actually takes.