
I love a project that solves a real family problem without costing much, and this homework station organizer does exactly that. By turning a simple plastic dish drying rack on its side and crocheting thick navy yarn through the slots, you can create a sturdy little catch-all for folders, notebooks, pencils, and the papers that somehow always end up spread across the kitchen table.
This is a wonderful back-to-school project for busy parents, grandparents, or anyone helping kids stay organized. I’m especially fond of this one because it feels approachable even if you’re not an advanced crocheter; you’re really using basic stitches to build pockets and structure right onto the rack, and the finished piece is practical enough to use every single day.
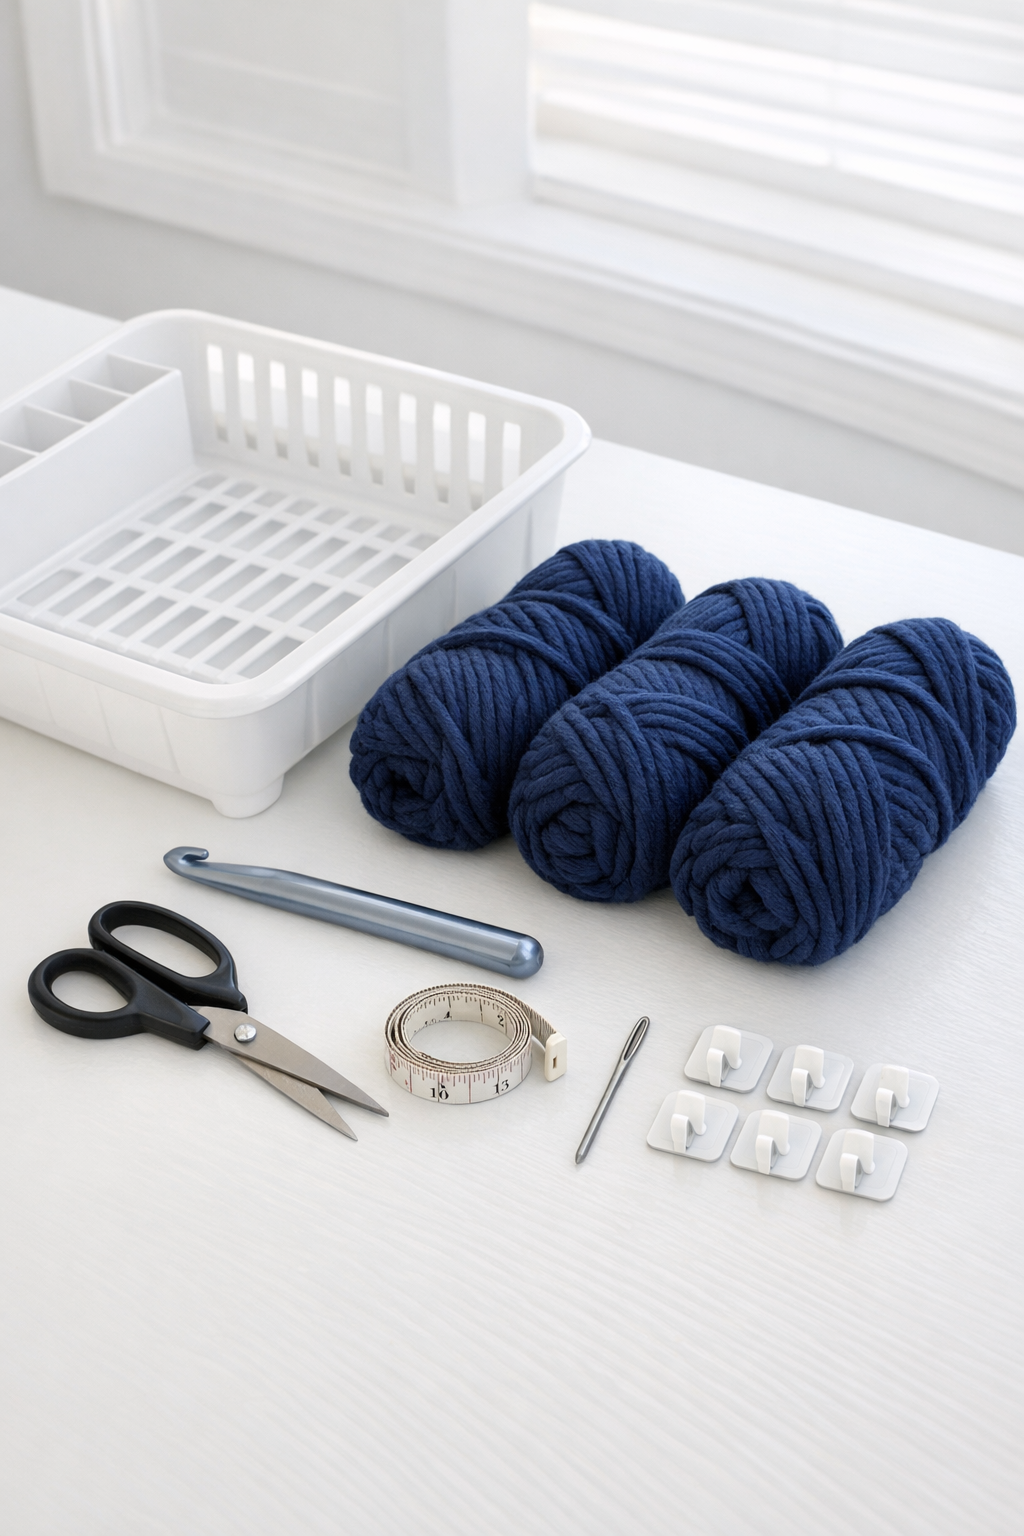
Materials
Instructions
1. Wash and dry the plastic dish rack so the yarn stays clean, then turn the rack on its long side so the open sections face outward like vertical organizer pockets.
2. Measure the side panels and front opening areas of the rack so you know how wide your crocheted sections need to be; this helps keep the pockets snug instead of saggy.
3. Start at one side of the rack by tying the yarn securely to a lower corner slot, then chain enough stitches to span the first side panel width.
4. Work single crochet rows back and forth through the side slots of the rack, feeding the hook through each plastic opening as you go, until the side panel is fully covered.
5. Fasten off that side, weave in the yarn tail with the yarn needle, and repeat on the opposite side so both ends of the organizer feel finished and supportive.
6. Attach yarn to the lower front edge of the sideways rack and crochet a flat panel across the front bottom third, working through every slot to create a strong base that keeps notebooks from sliding out.
7. Build the first pocket by chaining upward from the bottom front panel, then working short rows across the front section through the rack slots until the pocket reaches about 5 inches tall.
8. For a divided organizer, add a second pocket section beside or above the first by reattaching yarn and repeating the same single crochet method through the next set of slots.
9. Reinforce the top edges of each pocket with one final row of slip stitch or single crochet so the openings hold their shape when kids pull folders in and out.
10. Crochet a simple edging around any exposed rim sections of the rack by working one stitch into each slot, which gives the organizer a more finished look and softens the plastic edges.
11. Check for loose areas and add a few extra stitches or optional zip ties at stress points where the pockets meet the frame, especially if you plan to hold heavier workbooks.
12. Set the organizer on a desk, counter, or homework shelf, or mount it with adhesive hooks or screws so it stays within easy reach for after-school papers and supplies.
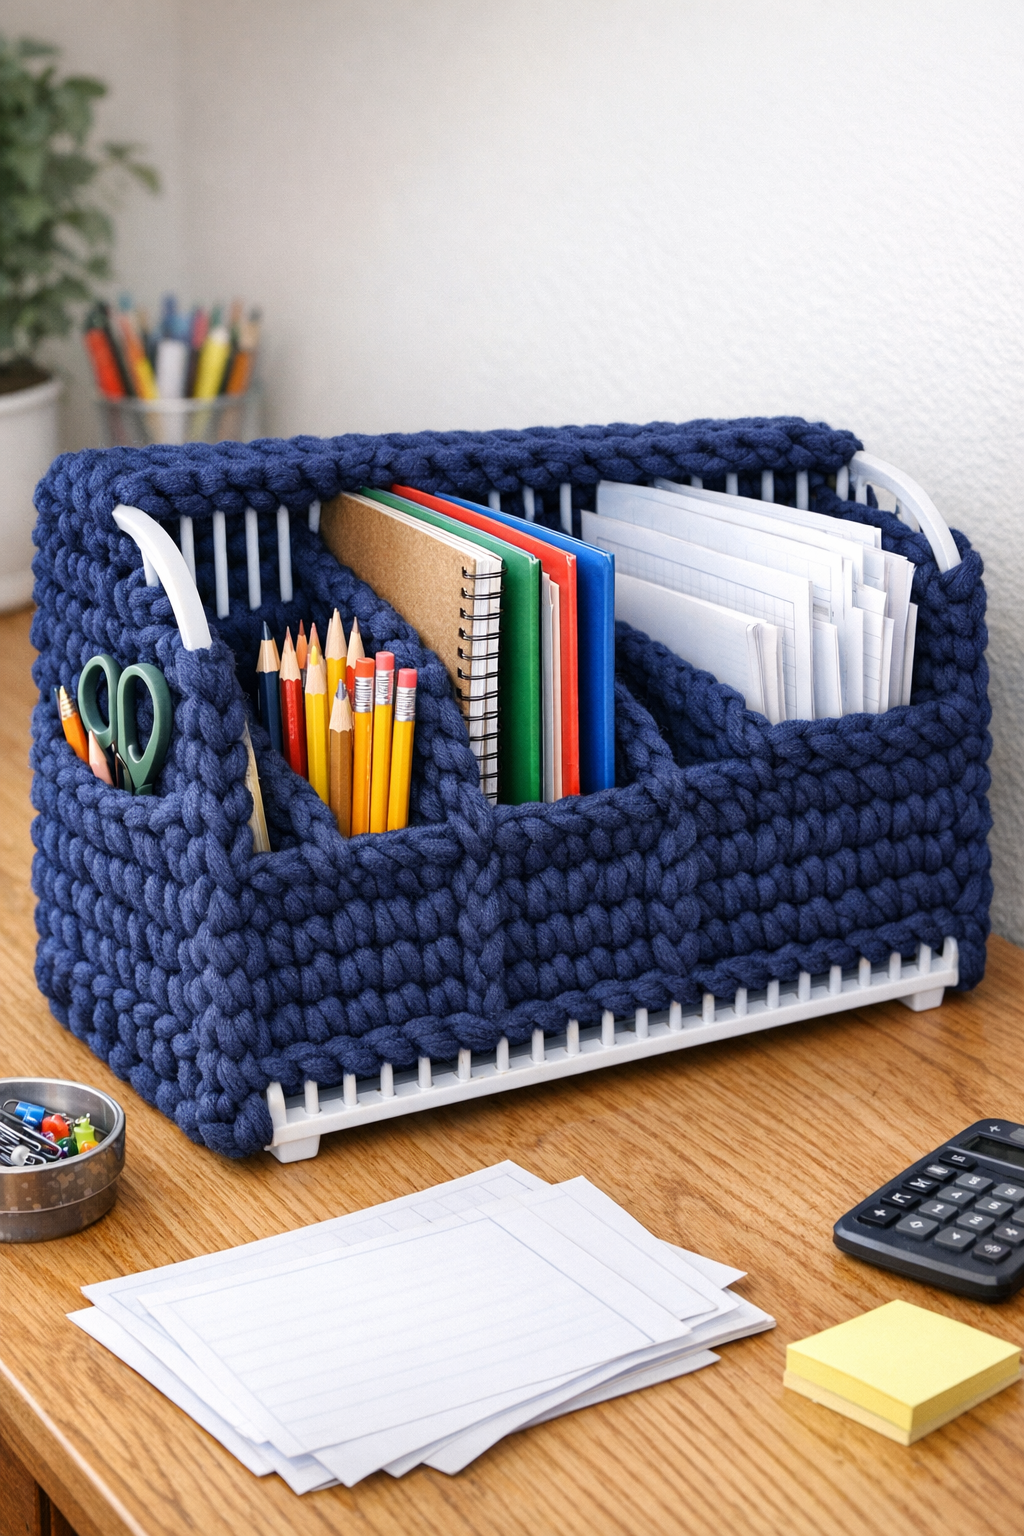
Variations & Tips
Add a pencil section: Crochet one smaller, tighter pocket on one end to hold pencils, markers, or scissors so little supplies do not slip into the larger compartments.
Make it classroom-ready: If you’re using this in a busier space, switch from adhesive hooks to screws and wall anchors for a sturdier mount.
Choose kid-friendly colors: I used navy because it hides everyday wear beautifully, but you can add stripes in your child’s favorite color or school colors to make it feel more personal.
Help picky organizers: Some kids do better when everything has a very obvious spot, so try making one pocket for homework, one for library books, and one for take-home papers.
Keep the stitches firm: Crochet a little tighter than usual on this project; looser stitches can stretch too much once folders and notebooks are added.
Use what you have: If your dish rack is slightly larger or smaller, just adjust your starting chains and row counts to fit the openings instead of worrying about exact stitch numbers.
Test the weight first: Before loading it up for the school week, place a few notebooks inside and check whether any section needs extra reinforcement at the corners or pocket bottoms.