
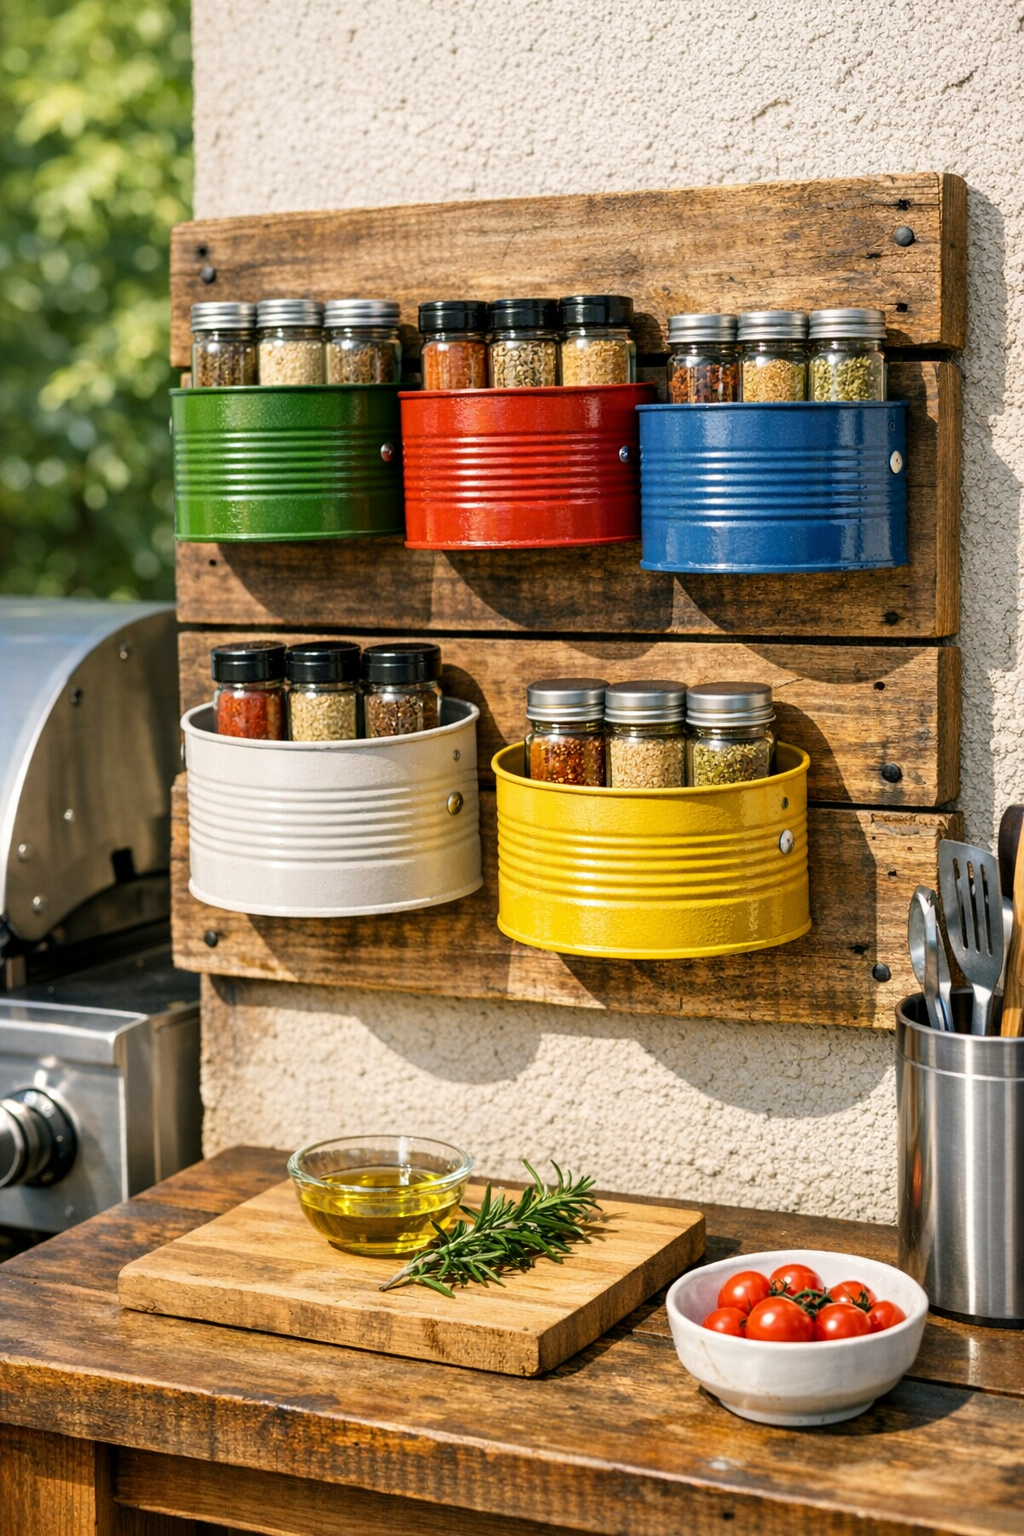
If you cook outside as much as I do once the weather finally cooperates here in the Midwest, you know how fast an outdoor kitchen can turn into a cluttered mess. I wanted a simple way to keep my most-used spices handy without sacrificing counter space, so this DIY outdoor spice rack came together from two things I already love using in projects: reclaimed pallet wood and empty tin cans.
What I like most about this project is that it’s inexpensive, sturdy, and easy to customize for your space. If you’re comfortable with basic sanding, painting, and driving a few screws, you can make this in an afternoon. It’s especially great for anyone who wants their grilling area or patio kitchen to feel a little more organized and a lot more charming.
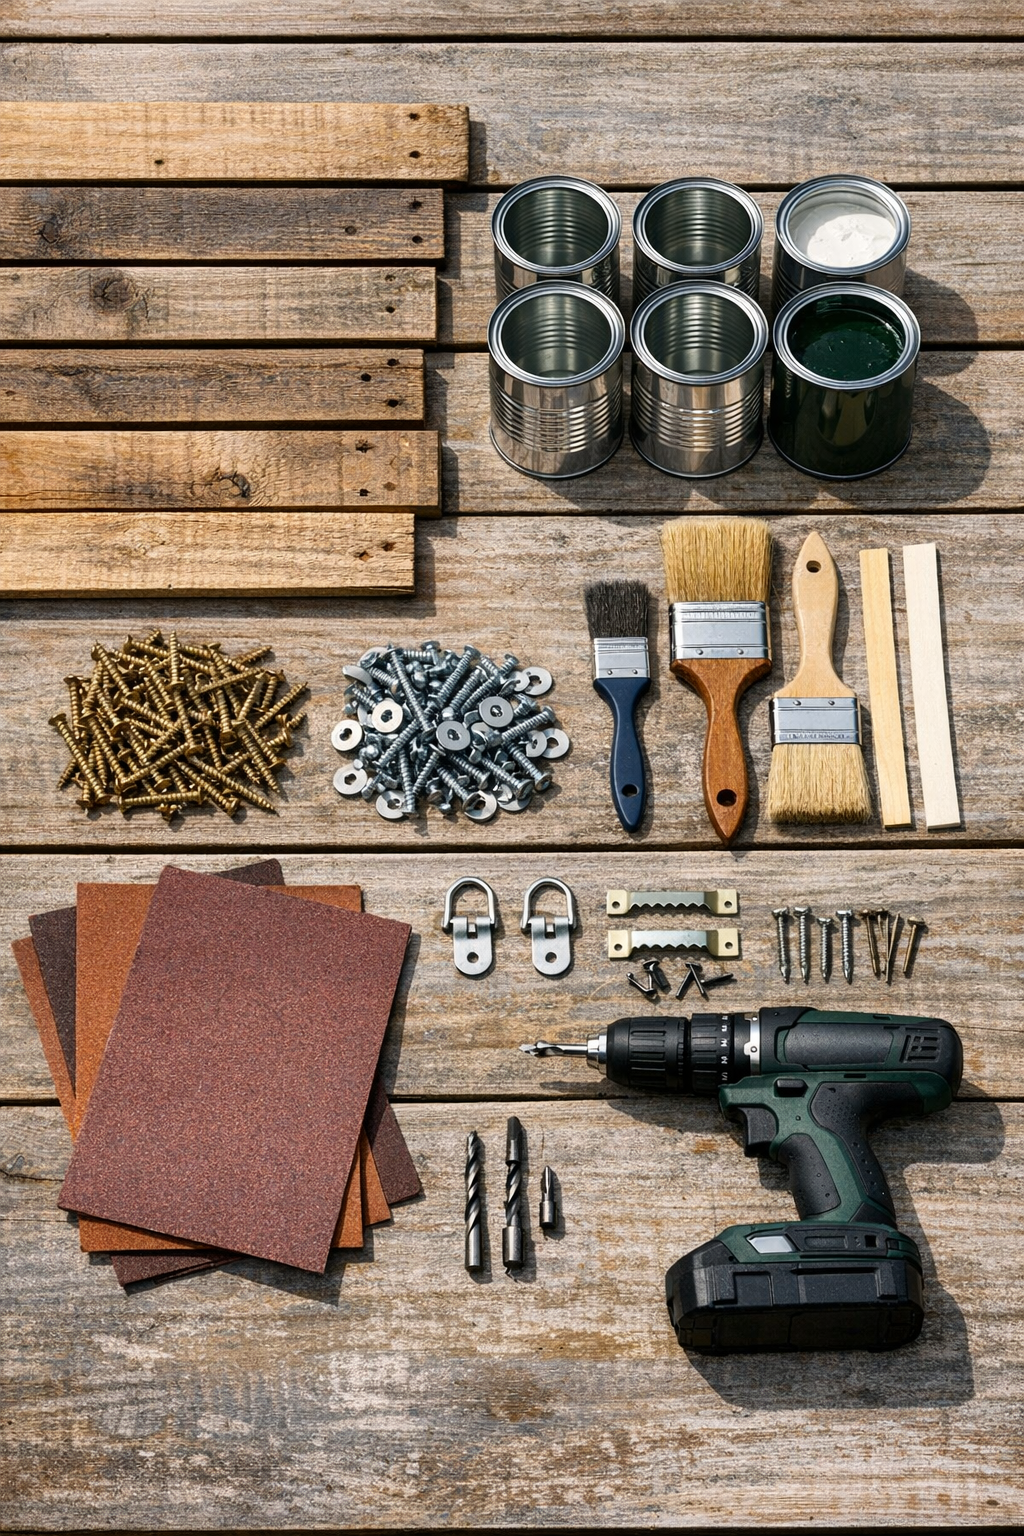
Materials
Instructions
1. Wash the tin cans with warm water and dish soap, remove all adhesive residue, and let them dry completely. Any leftover grease or glue will keep the paint from sticking well.
2. Disassemble or trim your pallet wood as needed and build a backing panel about 24 by 16 inches using three slats and wood screws. I like this size because it holds plenty of spices without feeling oversized next to the grill.
3. Sand the front, back, and edges of the pallet wood with 80-grit sandpaper first, then smooth it with 220-grit. Wipe away all dust with a clean rag so your finish goes on evenly.
4. Paint or stain the pallet wood and let it dry according to the product directions. For an outdoor kitchen, I prefer an exterior-rated finish that can handle sun and humidity.
5. Lightly scuff the outside of each can with sandpaper, then apply metal primer and let it dry fully. This extra step is worth it because outdoor pieces take more wear than indoor ones.
6. Paint the cans with two thin coats of exterior paint, drying between coats. You can use one color for a clean look or mix colors if you want a more playful patio style.
7. Arrange the cans on the pallet backing before attaching them, spacing them about 3 inches apart in two vertical rows of three. Once you like the layout, mark one screw point near the upper back side of each can and one near the lower back side.
8. Drill small pilot holes through the marked spots in each can. Work slowly so the metal doesn’t bend, and place a scrap piece of wood inside the can for support if needed.
9. Hold each can in place on the pallet wood, then drive a 1/2-inch metal screw with a washer through each pilot hole and into the wood backing. Two screws per can keeps them from twisting when you pull spices in and out.
10. Attach the D-ring or sawtooth hangers to the back of the pallet wood near the top edge. Make sure the hardware is centered and rated to hold the weight of the rack once filled.
11. If your rack will sit fully exposed outdoors, add a clear exterior sealer over the wood and painted cans, then let it cure completely. I always give outdoor storage pieces this last bit of protection because it saves maintenance later.
12. Mount the rack to a wall, fence, or post near your outdoor cooking area and fill the cans with spice jars, seasoning packets, or small herb snips. Keep the heaviest items in the lower cans for the most stable setup.
Variations & Tips
Add drainage: If you want to use a couple of the cans for fresh herbs instead of spices, drill a small hole in the bottom of those cans and add a few pebbles before planting.
Use matching jars: For the tidiest look, place your spices in short plastic or glass jars that fit down inside each can rather than pouring spices directly into the cans.
Choose the right pallet wood: I always look for pallet boards that are dry, solid, and free from cracks or splinters that are too deep to sand smooth.
Make it larger: If you cook for a crowd or keep a lot of rubs and blends on hand, use a wider pallet backing and add a third column of cans.
Protect it from weather: Even with exterior finishes, this rack will last longer under a covered patio or grill station than in constant direct rain and snow.
Keep it food-safe in practice: I use the cans as holders for spice containers, not for loose spices themselves, which makes everything easier to clean and keeps moisture out.