
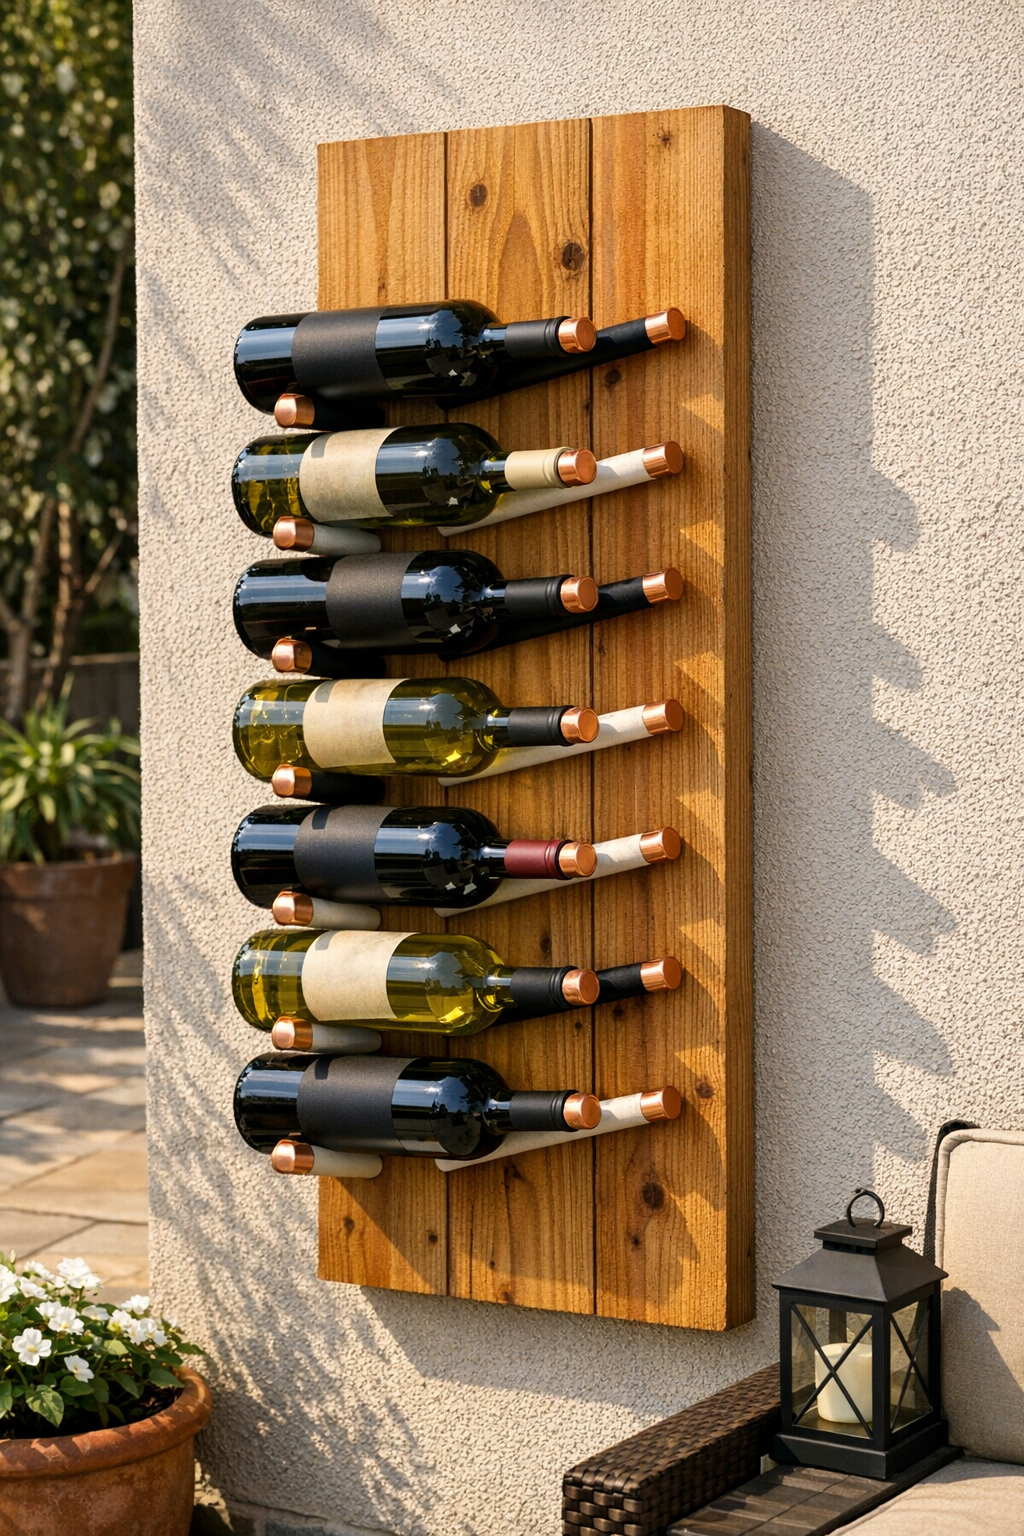
This outdoor wine rack is one of those backyard projects that looks far more expensive than it is, and I love that kind of build. The basic idea is simple: a cedar fence board becomes the backer, painted wooden dowels act as the bottle supports, and copper pipe caps finish the ends so the whole piece feels polished instead of pieced together. It’s compact, weather-friendly, and perfect for a patio, deck, or the little entertaining corner I’m always trying to make feel more put together by late spring.
If you want a beginner-friendly woodworking project that doesn’t require a full workshop, this is a great one. I’m a big fan of DIYs that can be finished over a weekend, and this checks that box while still giving you something genuinely useful for outdoor hosting.
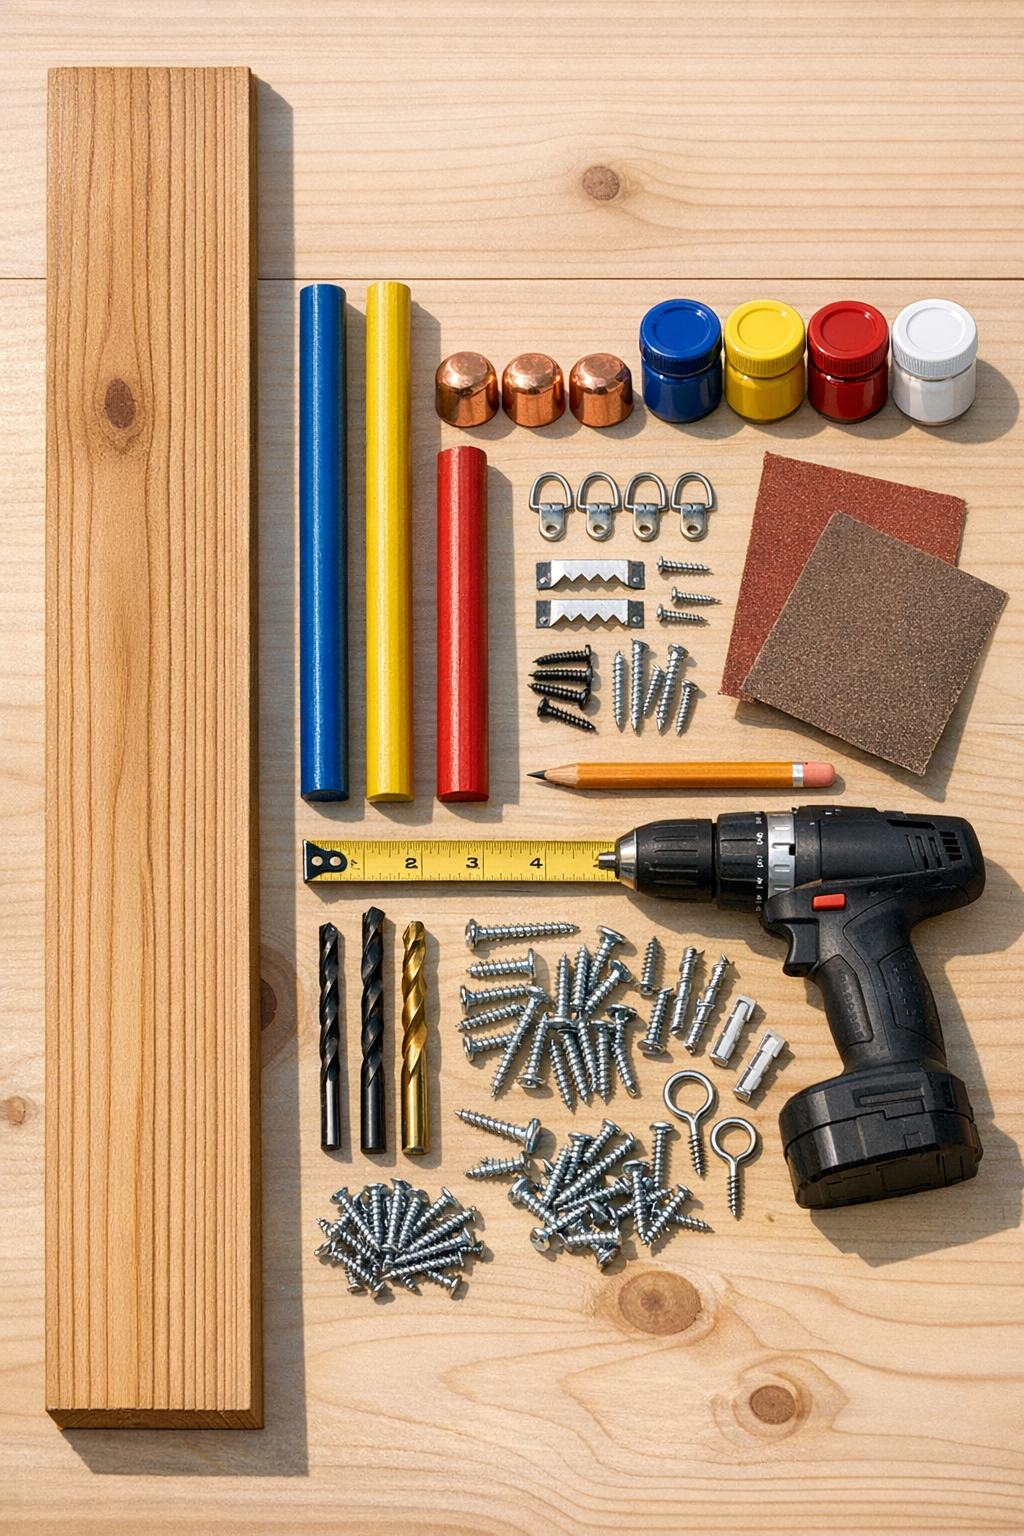
Materials
Instructions
1. Cut the cedar fence board to 60 inches long if needed, then lightly sand all faces and edges with 120-grit followed by 220-grit sandpaper.
2. Wipe away dust and apply your outdoor wood finish or clear sealer to the cedar board, then let it dry completely according to the product directions.
3. Paint the six dowels with exterior paint, covering all sides evenly, and let them dry fully before handling.
4. Mark the board for six bottle supports by drawing a vertical centerline and placing three paired dowel positions, with each pair set about 4 inches apart horizontally and each row spaced 12 inches apart vertically.
5. Drill 3/4-inch holes through the cedar board at each marked dowel position, keeping the drill as straight as possible so the dowels sit level.
6. Sand the inside edges of the holes lightly to remove splinters, then test-fit each dowel through its hole.
7. Slide one copper cap onto the front end of each dowel before inserting the dowel into the board, then push the dowel through until about 7 inches extends from the front and 1 inch remains at the back.
8. Add wood glue where each dowel passes through the board on the back side, then secure each dowel from the back with a #8 x 1 1/4-inch screw driven at a slight angle into the dowel.
9. Press a second copper cap onto the back end of each dowel to cover the exposed end and create a finished look on both sides.
10. Attach two D-ring hangers on the back of the board, positioning them evenly near the top and about 1 inch in from each side.
11. Mount the rack securely to an outdoor wall, fence post, or sturdy privacy panel using exterior screws and anchors as needed, making sure it is level before tightening fully.
12. Set one wine bottle across each pair of dowels so the bottle rests horizontally, then check that every pair feels stable before loading the full rack.
Variations & Tips
For a smaller space: Use a 36-inch cedar board and make just two rows instead of three. This is a great option if you only want room for four bottles near a grill station or small patio table.
Paint color choice: I like black or deep green on the dowels for a clean outdoor look, but soft white also works beautifully against cedar. If your patio already has a color scheme, matching the dowels to planters or cushions makes the rack feel intentional.
Bottle spacing tip: Before drilling all the holes, test one pair with an actual wine bottle. Bottle shapes vary a little, and I’ve learned the hard way that a quick test fit saves a lot of frustration later.
Outdoor durability: Cedar naturally holds up well outside, but an extra coat of exterior sealer will help the board age more evenly. If your rack gets direct weather, recoat it seasonally.
Copper finish option: If you want the copper to stay bright and shiny, apply a copper-safe clear sealer. If you like a more relaxed, lived-in patio style, leave it uncoated and let it develop a natural patina.
Mounting safety: Always attach this rack to something structurally solid, especially once bottles are added. I treat this like hanging a heavy shelf, not just a decorative sign.
Entertaining upgrade: You can mount a second matching board below this one with hooks for stemware or a small shelf for a corkscrew and glasses. That’s probably what I’d do, because once I finish one backyard project, I immediately start planning the next one.