
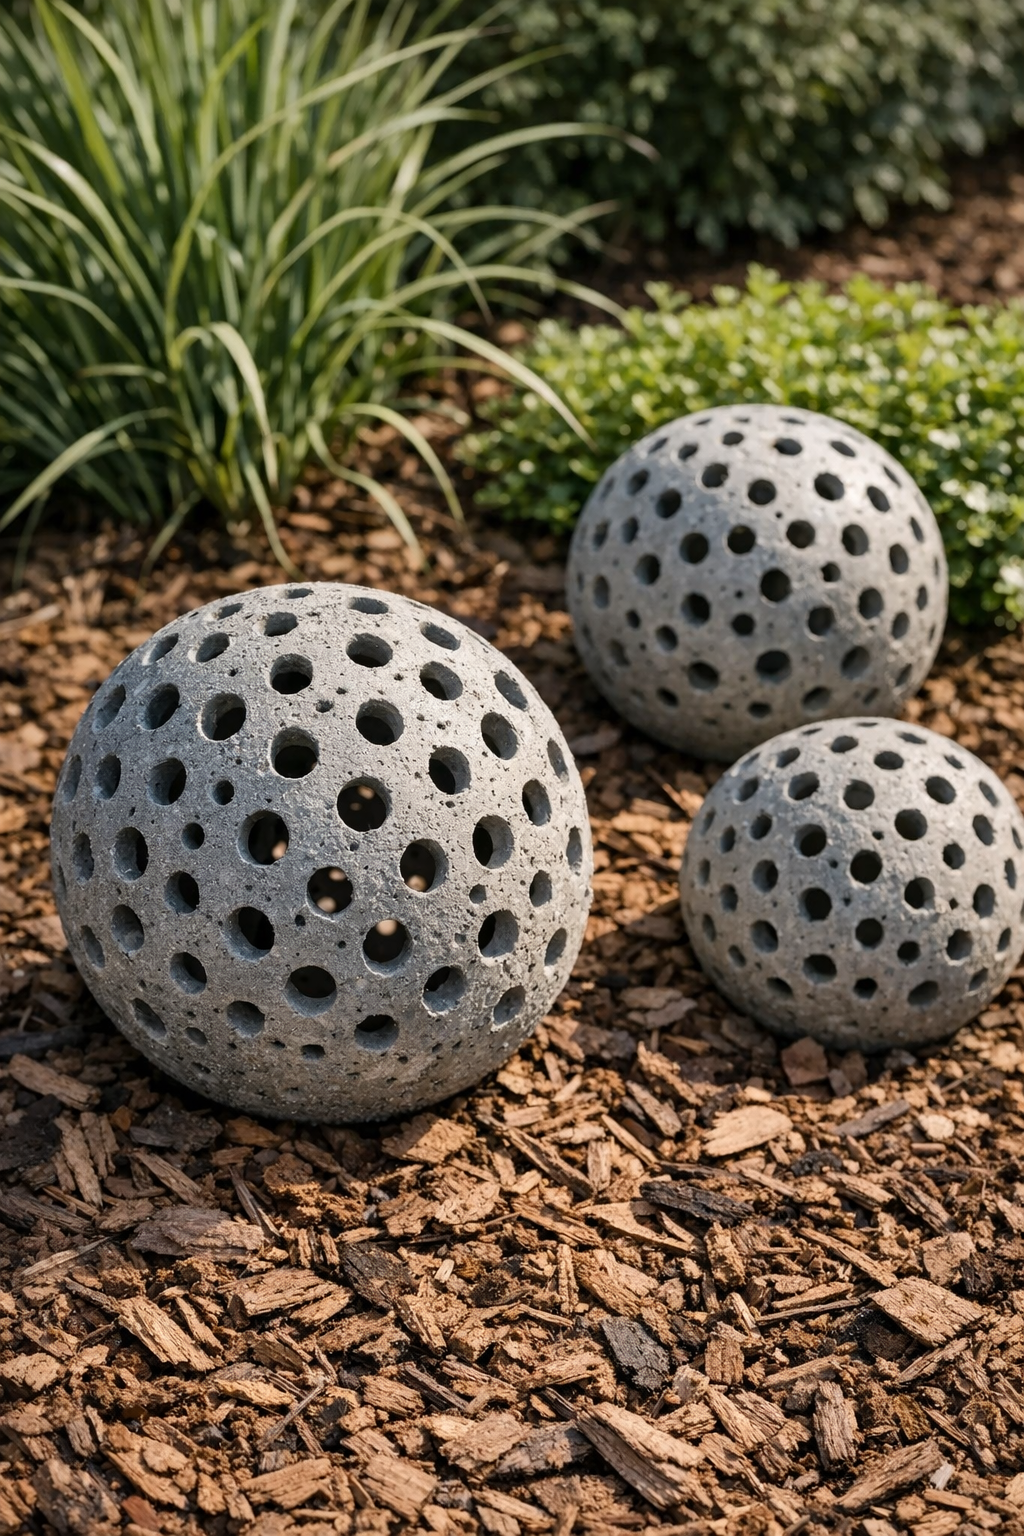
These cement yard orbs are one of those projects that look high-end in the garden but start with the kind of humble supplies most of us can grab on a quick errand. By using plastic kitchen colanders as the mold, you get that lovely perforated pattern built right in, and once the cement cures, the finished orbs feel sturdy and substantial in a flower bed, tucked beside a porch step, or grouped near a birdbath.
I love projects like this because they give you a big visual payoff without needing a workshop full of tools. If you enjoy simple weekend DIYs and don’t mind getting your hands a little messy, this is a very approachable garden project. It’s also a fun one to customize, especially if you like mixing sizes and finishes the way I do when I’m trying to make the yard feel a little more welcoming.
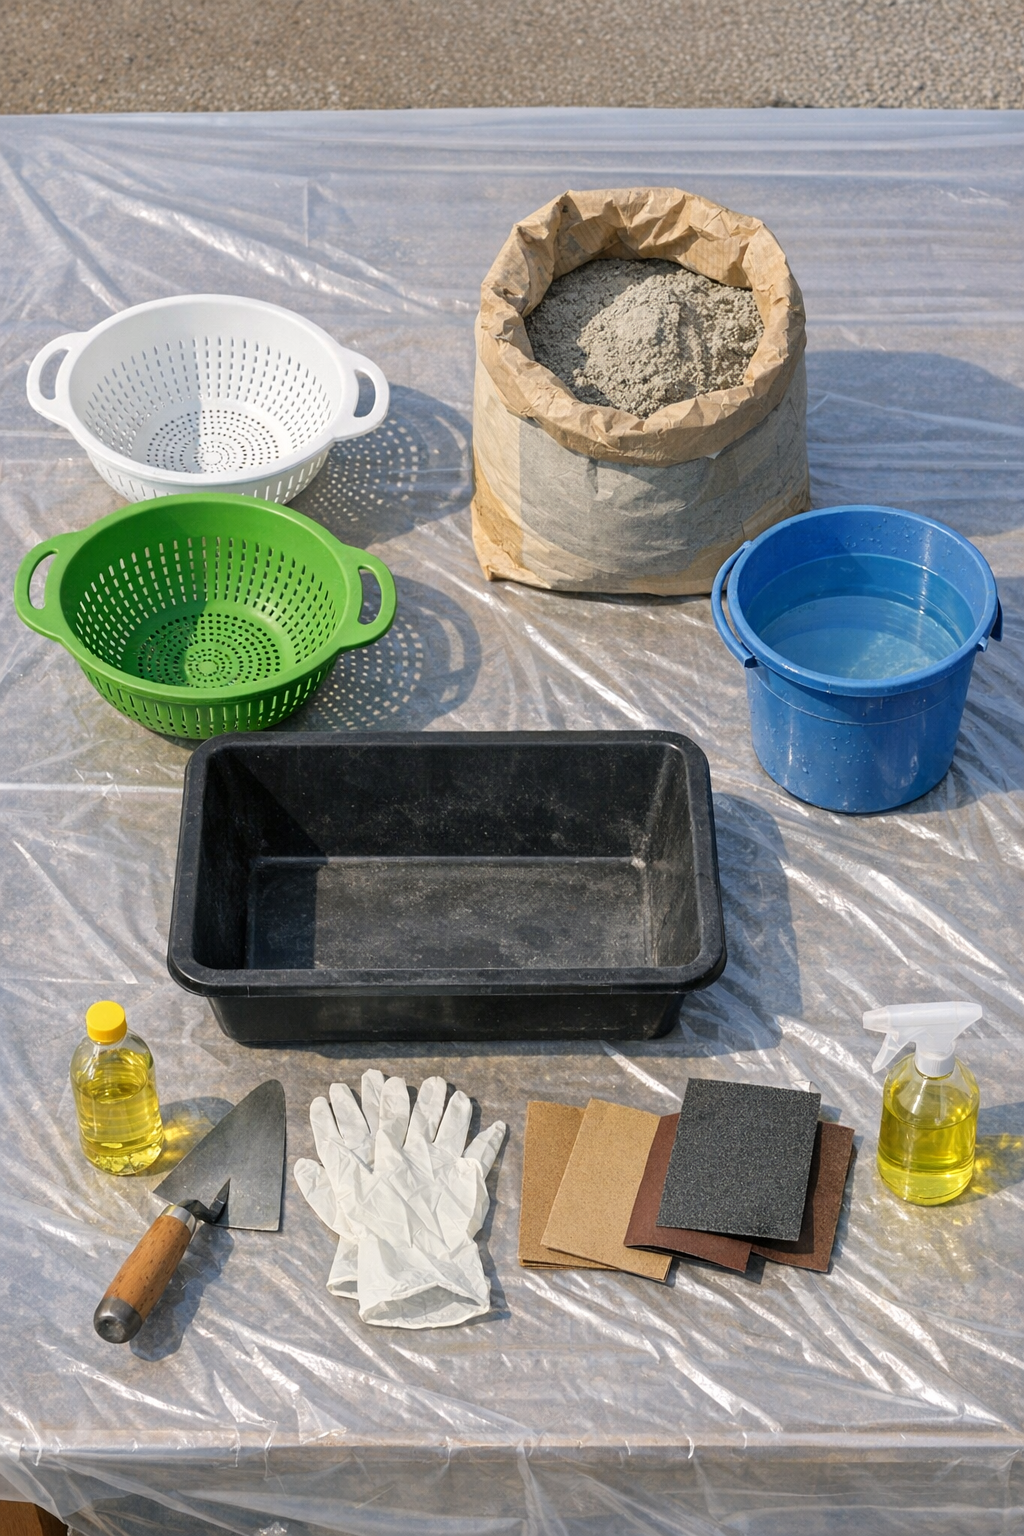
Materials
Instructions
1. Set up your work area on a flat outdoor surface and cover it with the plastic drop cloth. Put on gloves and place both colanders where they can sit level without tipping.
2. Lightly coat the inside of each colander with a thin film of cooking oil. This helps the cured cement release more cleanly and preserves the perforated pattern.
3. Pour the dry cement mix into the bucket or mixing tub, then add water a little at a time. Stir until the mixture is thick like peanut butter and holds its shape without slumping.
4. Scoop cement into one colander and press it firmly against the sides and bottom in an even layer about 1 to 1 1/2 inches thick. Smooth the surface with the trowel, leaving the outer shape rounded.
5. Repeat with the second colander, matching the thickness as closely as you can so the two halves will fit together neatly. Check that there are no thin spots around the rim.
6. Let the cement set until it is firm enough to hold its shape, usually 24 hours or according to the cement package directions. Keep the pieces in a shaded spot so they cure slowly and evenly.
7. Gently flex the plastic colanders and release the two cement halves. If any edges cling, tap the colander lightly and work around the rim instead of forcing it.
8. Press a small amount of fresh cement around the edge of one half, then place the second half on top to form a full orb. Align the perforations as best you can and smooth the seam with your fingers or trowel.
9. Let the joined orb cure completely for another 24 to 48 hours until very hard. Turn it gently once during curing if needed so the seam dries evenly.
10. Sand any rough patches or sharp bits along the seam and around the holes. Wipe away the dust, then place the orb in the yard, garden bed, or beside a container planting.
Variations & Tips
Different sizes: If you can find colanders in two or three diameters, make a small grouping instead of a single orb. I like clustering them the way I would group planters on a porch, because odd numbers usually look the most natural.
Smoother finish: For a cleaner, more polished look, take a little extra time smoothing the cement inside the mold before it sets. That small step makes a big difference in the finished orb.
Rustic garden style: If you prefer a weathered look, don’t worry about making the seam absolutely perfect. Once the orb is out in the garden, that handmade texture gives it charm.
Placement tip: These are heavy, so set them in their final spot before the soil is freshly watered and soft. I’ve learned the hard way that moving cement décor across a muddy flower bed is not nearly as fun as it sounds.
For picky style preferences: Just like serving dinner to a family with different tastes, you can make these fit different garden styles by changing the finish. Leave them plain gray for a classic look, dry-brush with outdoor paint for more contrast, or tuck them among ornamental grasses for a softer feel.
Better durability: Let the orb cure fully before exposing it to heavy rain or freezing temperatures. A patient cure gives you a stronger piece that will hold up much better outdoors.