
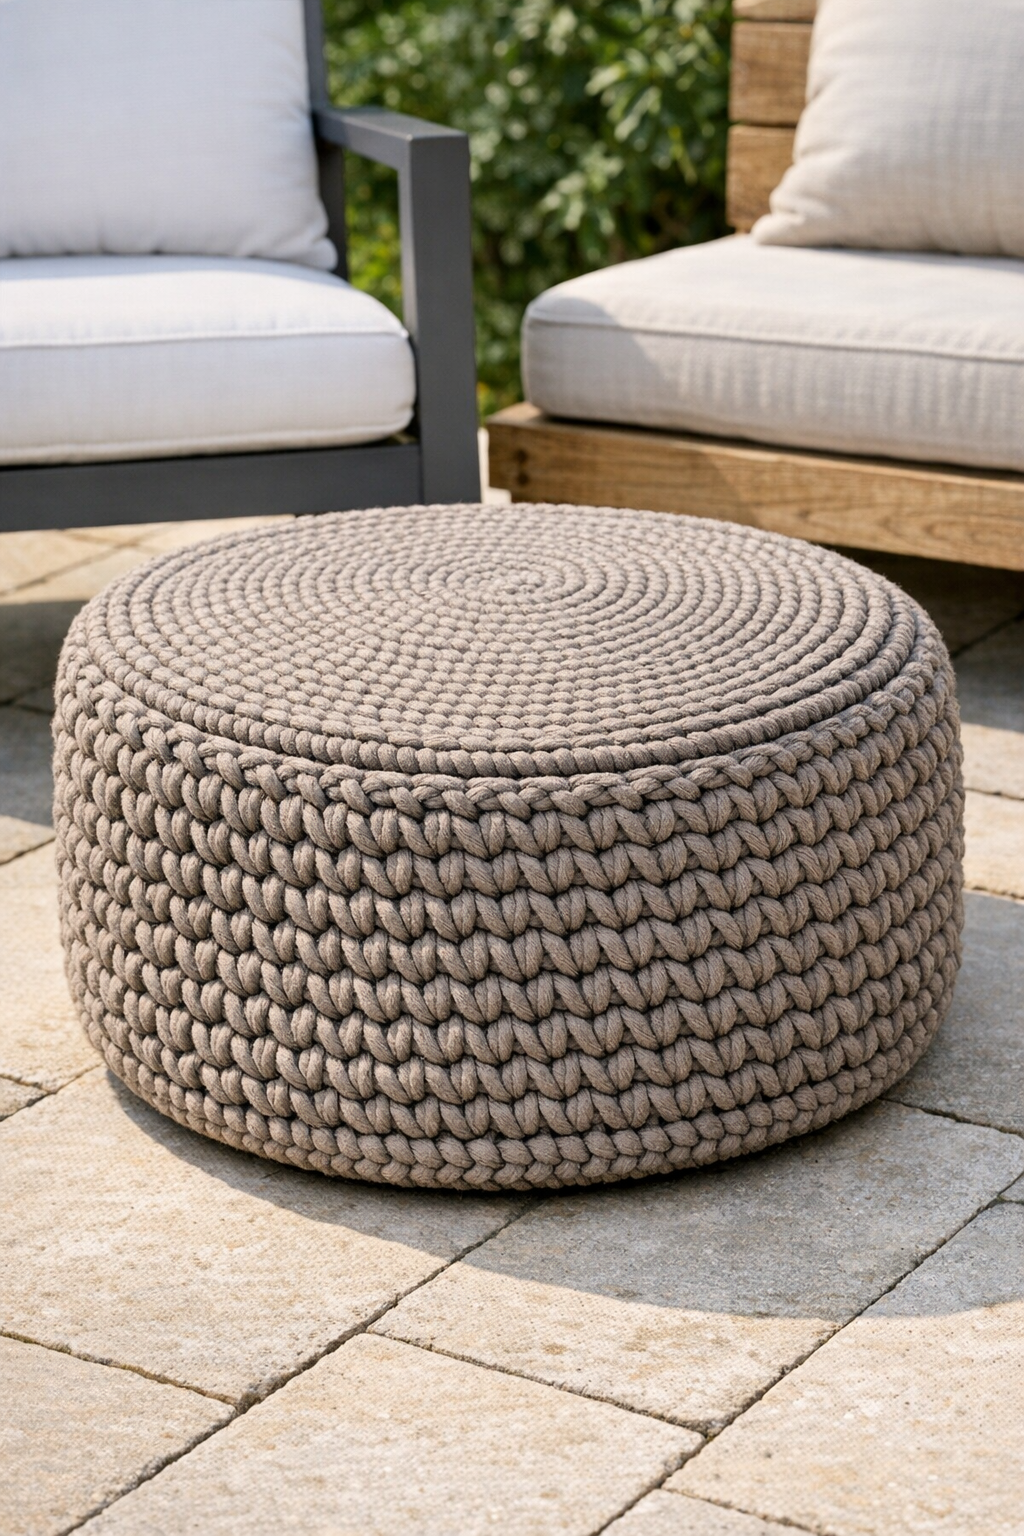
I love a project that turns something bulky and forgotten into a piece that actually looks polished on a patio, and this crochet tire ottoman does exactly that. You start with an old car tire, add simple plywood circles to give it structure, then crochet chunky taupe yarn right through and around the tire until it becomes a sturdy outdoor ottoman with tons of texture.
This is a great weekend project if you already know basic crochet stitches and want something more substantial than a basket or pillow cover. As someone who is usually squeezing creative projects in between work and making dinner, I really appreciate builds like this one: it feels ambitious when you start, but the steps are straightforward and the payoff is huge.
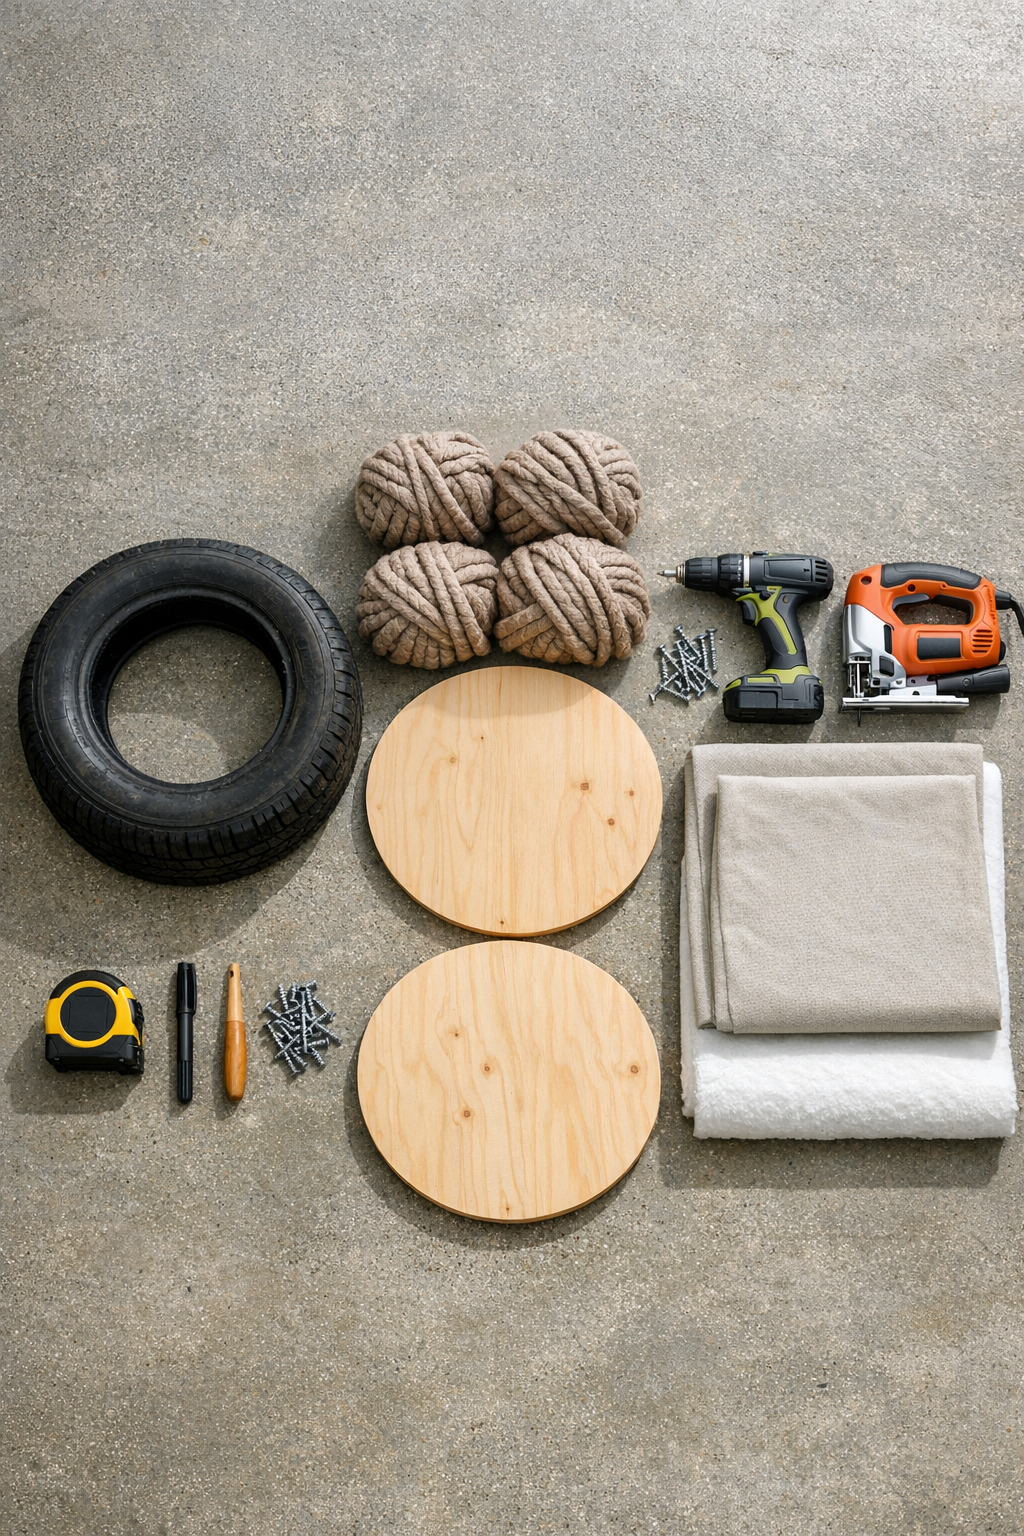
Materials
1 old car tire, standard passenger car size, cleaned and fully dry
Instructions
1. Wash the tire with mild soap and water, then let it dry completely so the yarn will stay clean and the wood will sit flat.
2. Measure the tire across from edge to edge and trace two matching circles onto the plywood, making each circle wide enough to fully cover the top and bottom openings.
3. Cut out both plywood circles with a jigsaw, then lightly sand any rough edges so the yarn will not snag later.
4. Center one plywood circle on the top of the tire and one on the bottom, then drill pilot holes through the wood into the tire at evenly spaced points.
5. Drive 12 screws into the top circle and 12 into the bottom circle, spacing them evenly so the ottoman feels solid and balanced.
6. If you want to hide the center opening inside the tire, staple a piece of outdoor fabric or landscape fabric across one side before crocheting around the body.
7. Start your crochet by anchoring the yarn through one opening in the tire, then work large single crochet or slip stitches through and around the tire edge to begin covering the sidewall.
8. Continue crocheting around the tire in tight, even rows, pulling the yarn snug as you go so the rubber disappears beneath the chunky taupe texture.
9. Crochet over the top edge and bottom edge of the tire so the transition between the side and the plywood looks finished and rounded.
10. For the top surface, work a flat crochet circle separately until it matches the plywood top, then stitch or lace it tightly onto the upper edge.
11. Repeat with a second flat crochet circle for the bottom, or keep the bottom simpler with tight rows if it will mostly sit on a patio or deck.
12. Weave in all yarn ends securely, check that the cover feels taut all the way around, and set the ottoman outdoors in a covered space for use as a footrest or casual extra seat.
Variations & Tips
Use outdoor-rated yarn: If the ottoman will live on a porch or patio, I strongly recommend synthetic yarn made for indoor-outdoor use because it handles moisture and fading much better than natural fibers.
Add a cushion top: For a softer seat, place a 2-inch foam circle on top of the plywood before attaching the crocheted top panel, then stretch the crochet neatly over it.
Keep stitches tight: Loose crochet will slide and show the tire underneath, so I always size up the yarn instead of loosening my tension.
Try a neutral palette: Taupe gives this piece that late-summer, goes-with-everything look, but warm gray, oatmeal, or soft olive would also be beautiful outdoors.
Seal the plywood first: If you expect humidity, brush on an exterior sealer before assembly to help the wood last longer.
Make it easier to clean: A removable crocheted top panel is handy if you have kids, pets, or the same unpredictable Midwest weather I do, because you can take it off for a deeper clean when needed.