
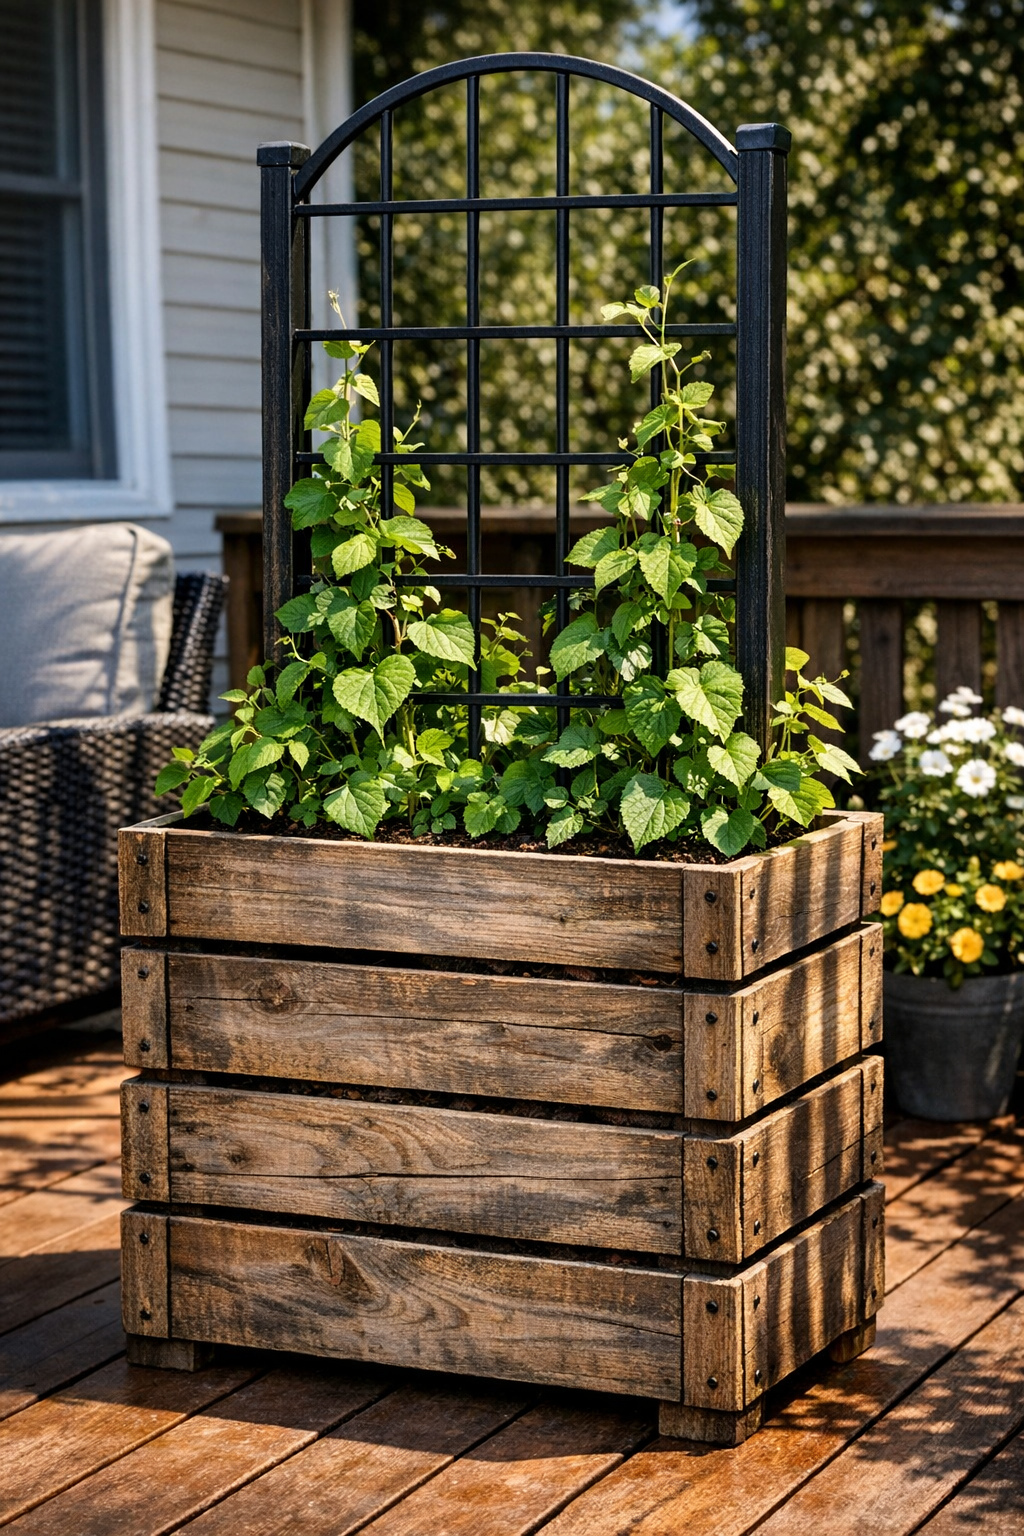
If your deck or patio feels a little too open, this stacked-crate privacy planter is one of those projects that gives you a big visual payoff without needing fancy carpentry. You’re essentially building a tall planter base from wooden crates, then adding a metal trellis insert so climbing plants can create a living screen over time. I love projects like this because they solve a practical problem and make an outdoor space feel finished and cozy.
As someone who is always trying to make our home feel more welcoming for family dinners and backyard get-togethers, I’m especially fond of this build because it works for small decks, apartment patios, and larger porches alike. If you can stack, screw, and plant, you can make this. It’s beginner-friendly, customizable, and much less expensive than putting up a full privacy wall.
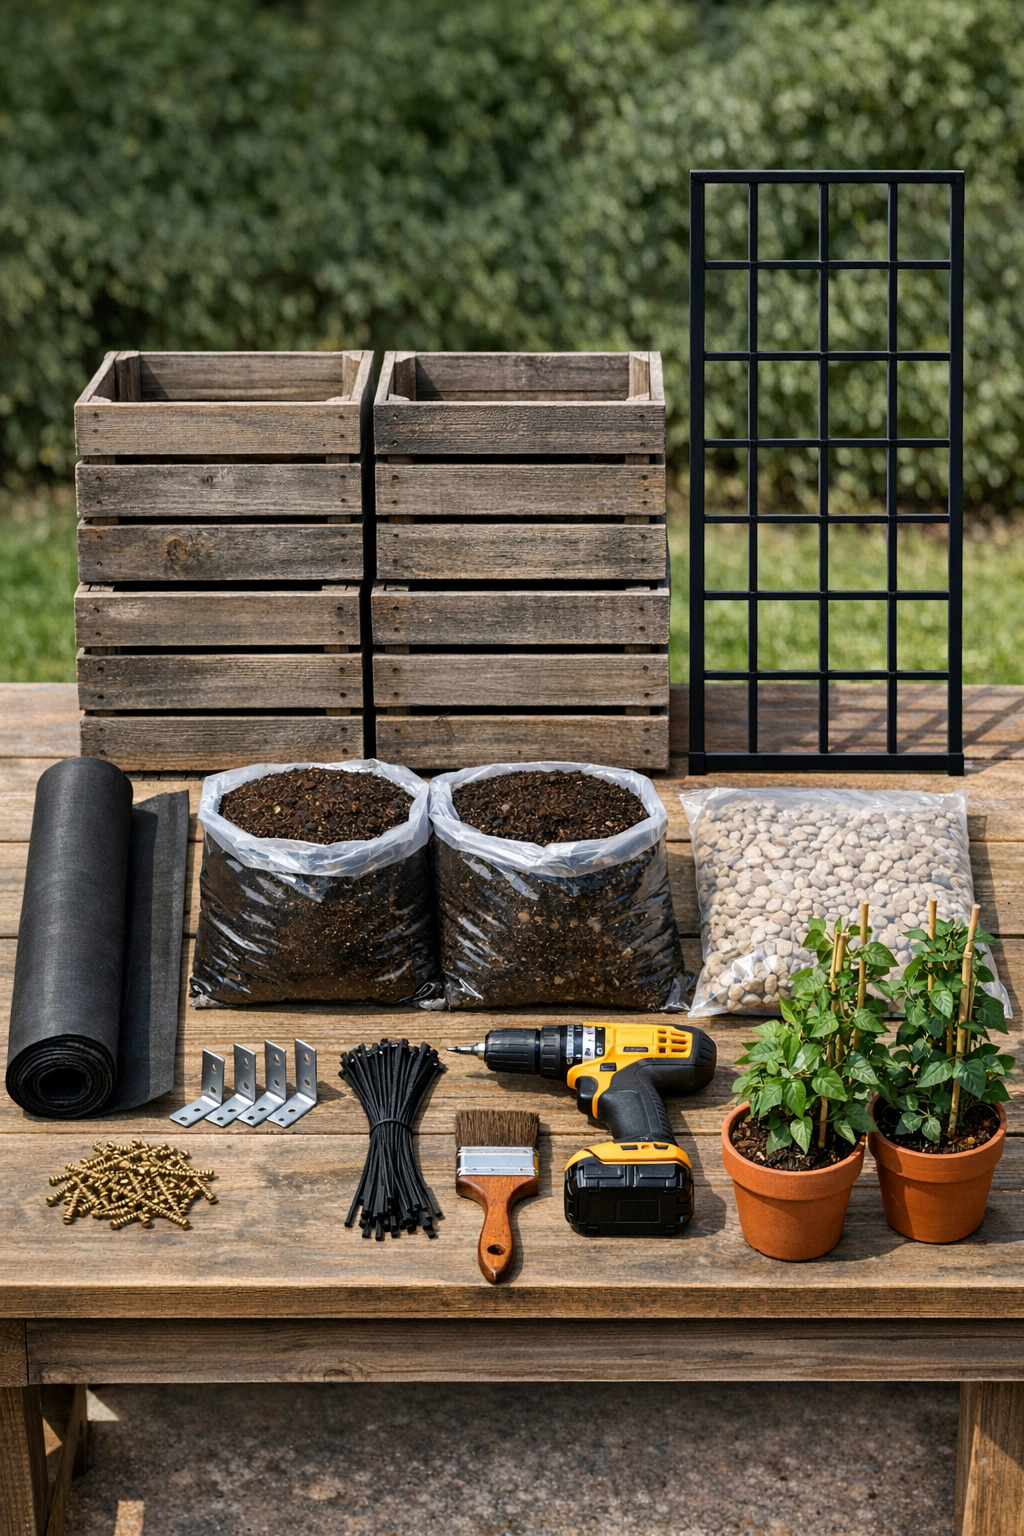
Materials
Instructions
1. Sand any rough spots on the crates, then apply exterior stain or sealer if you want extra weather protection; let everything dry fully before assembly.
2. Set two crates side by side with their open sides facing up, then stack the other two directly on top to create a tall rectangular planter base.
3. Clamp or hold the stacked crates in place and fasten adjoining sides together with 1 1/4-inch exterior screws, using at least three screws at each touching edge.
4. Reinforce the inside corners with galvanized L-brackets and 2-inch screws so the structure stays sturdy once it’s filled with soil.
5. Cut the landscape fabric to fit the interior planting area, then line the inside of the crates, overlapping edges by a few inches to help hold soil in place while still allowing drainage.
6. Add a 2-inch layer of pea gravel across the bottom of the lined planter to improve drainage and reduce soggy roots.
7. Stand the black metal trellis at the back center of the planter and position the two 1 x 2 boards vertically behind or alongside it as support rails.
8. Attach the trellis securely to the support boards and crate frame with zip ties or screws, making sure it stands straight and does not wobble.
9. Fill the planter with potting mix to within 2 inches of the top, packing lightly around the trellis supports so everything stays upright.
10. Remove the climbing plants from their pots, space them evenly across the planter, and backfill with more soil around the root balls.
11. Water thoroughly until moisture reaches the lower soil layers, then gently guide a few vines onto the trellis to help them start climbing in the right direction.
12. Move the finished planter into its final deck position, ideally where it gets the right light for your chosen plants and provides the privacy coverage you want.
Variations & Tips
For picky plant growers: If you want the easiest, fastest coverage, choose vigorous annual climbers like black-eyed Susan vine or mandevilla; if you’re patient, clematis gives a more classic cottage look.
For extra privacy: Build the planter slightly longer by using six crates instead of four, or place two finished units side by side to screen off a larger seating area.
For windy decks: Add a few bricks or pavers beneath the gravel layer for extra weight, and secure the finished planter to a railing or wall with safety straps if your space gets strong gusts.
For better drainage: Drill a few extra drainage holes through the lower crate slats if the wood is thick or tightly spaced, especially if your patio gets heavy rain.
For a more polished look: Paint the crates a solid color, or stain them all to match your deck. I think black planters with the black trellis look especially sharp next to outdoor dining furniture.
For family-friendly planting: If little ones or pets are nearby, skip anything thorny and choose non-spiky, soft-vining plants. I also like tucking in a few trailing flowers at the front so the planter looks full right away while the climbers catch up.
Maintenance tip: Check the zip ties, brackets, and soil level every few weeks during the growing season. Watering and settling can lower the soil more than you’d expect, so I usually top mine off once after the first couple of weeks.