
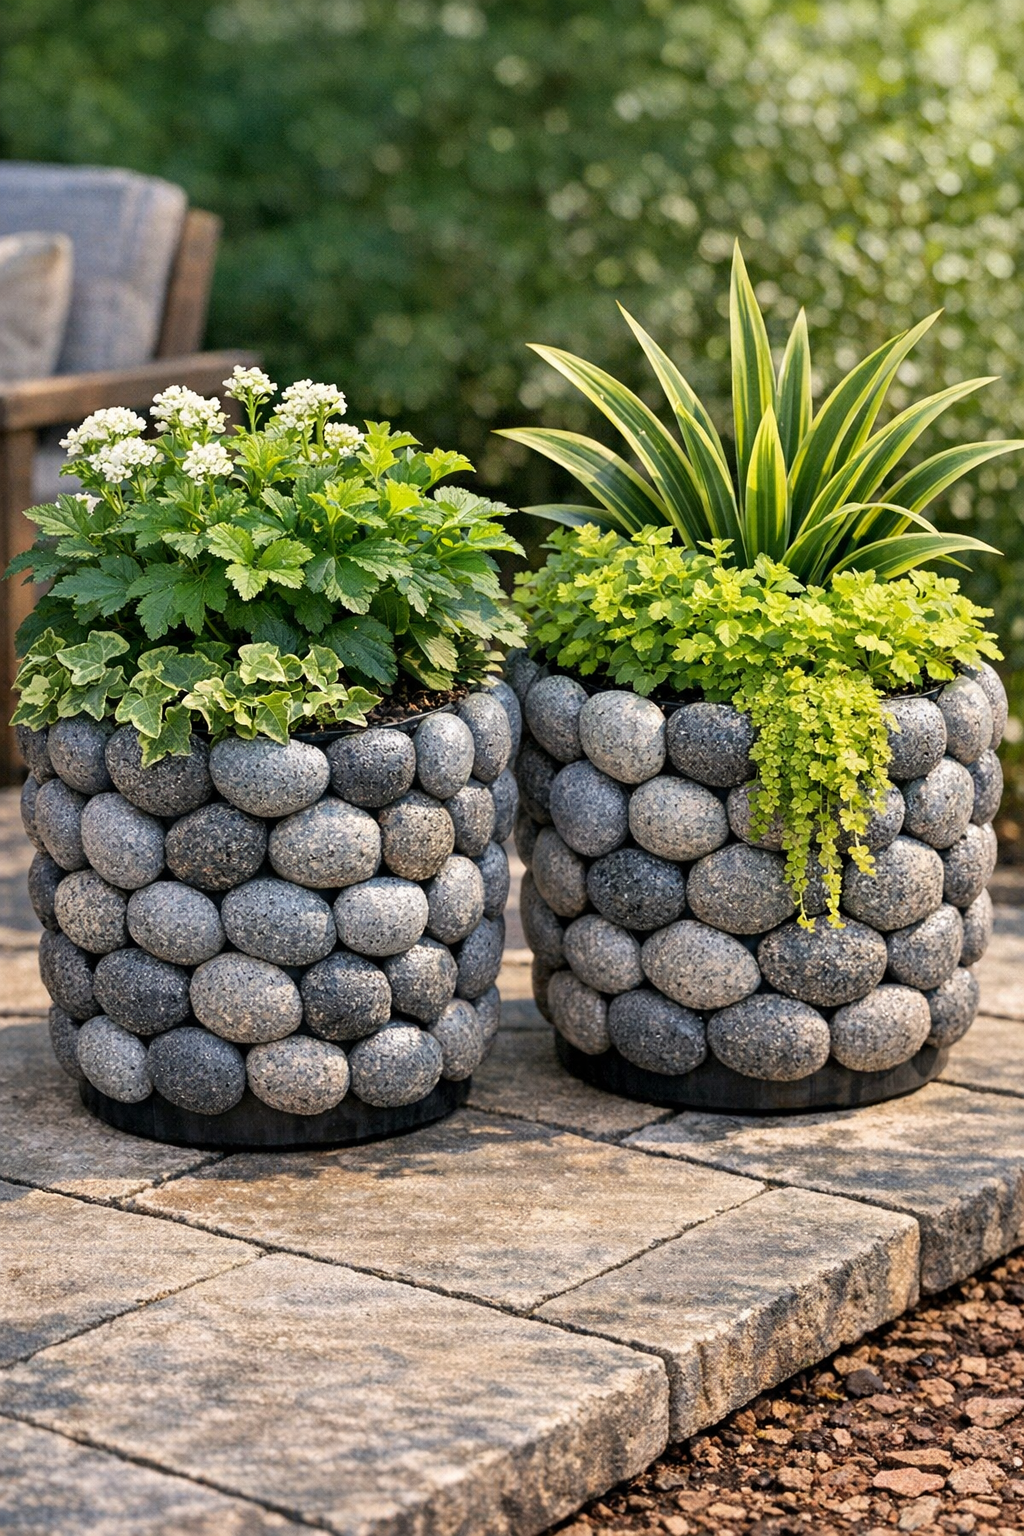
I love a project that makes something dollar-store simple look like it came from a garden center, and these faux stone patio planters absolutely do that. By spray painting plastic Easter eggs with a textured gray finish and attaching them around basic black nursery pots, you get a surprisingly high-end, pebble-stone look for a fraction of the price.
This is a great weekend DIY if you want to dress up a porch, patio, or front entry without committing to a big makeover. I’m always looking for easy projects I can squeeze in between work and the usual weeknight chaos, and this one checks all the boxes: inexpensive, fast, and dramatic once it’s planted up.
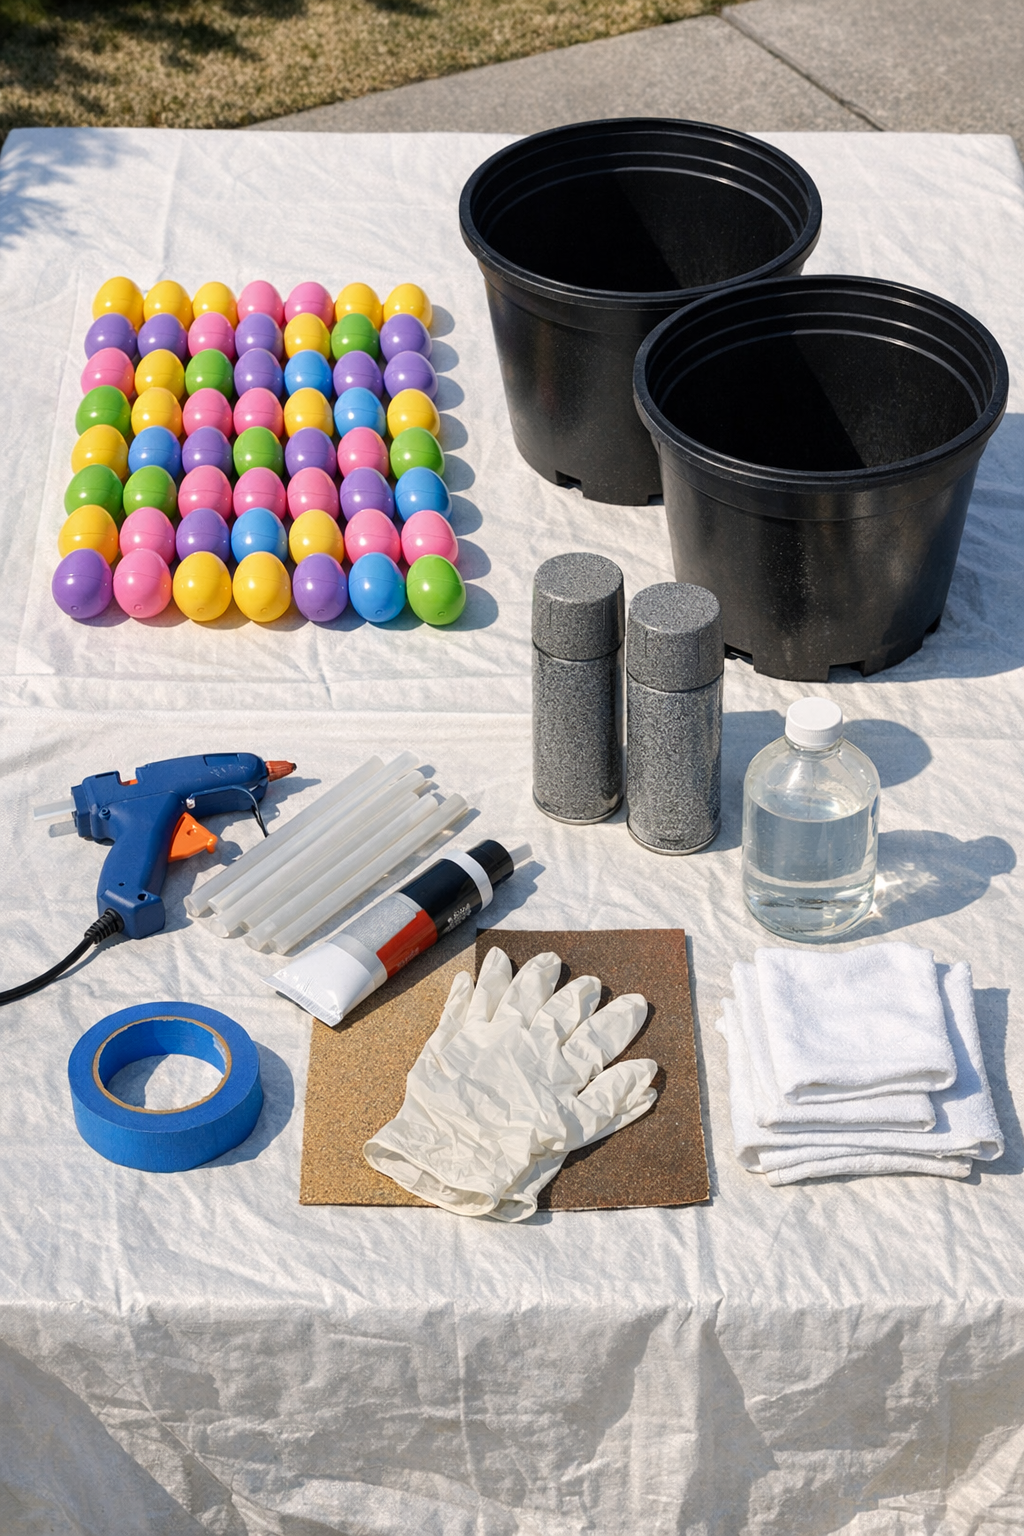
Materials
Instructions
1. Wash the plastic eggs and the outside of both nursery pots with rubbing alcohol or a degreaser, then let everything dry completely so the paint and glue stick well.
2. Lightly scuff the eggs and the outer sides of the pots with 120-grit sandpaper to dull the shiny plastic, then wipe away the dust with a clean cloth.
3. Set the eggs on the drop cloth, tape off the top inside rims of the pots if you want to keep them clean, and spray all egg surfaces plus the outer sides of the pots with textured gray stone paint in light, even coats.
4. Let the first coat dry according to the can directions, then add a second coat anywhere the plastic still shows through so the finish looks uniformly stone-like.
5. Arrange the painted eggs around one pot before gluing to decide on spacing; for 40 eggs per pot, make roughly 5 horizontal rows of 8 eggs, adjusting slightly for the taper of the pot.
6. Starting at the bottom of the first pot, apply a generous bead of adhesive to one egg half or whole egg and press it firmly onto the pot for several seconds, then continue around the base row.
7. Build the next rows upward in a staggered pattern so the eggs sit like rounded stones, checking every few pieces to keep the spacing even and the overall shape balanced.
8. Repeat the same process on the second pot, using the remaining 40 eggs and matching the row spacing so the pair looks coordinated when placed together.
9. Let the adhesive cure fully based on the product directions before moving the pots; if needed, touch up any visible glue spots or scuffs with leftover stone spray paint.
10. Fill each planter with potting soil and add your plants, keeping the soil level slightly below the top rim so the finished pots look polished and easy to water.
Variations & Tips
Use egg halves for less bulk: If your eggs snap apart easily, glue on the halves instead of whole eggs for a flatter, more realistic stone texture and a lighter finished pot.
Choose the right adhesive: Exterior construction adhesive will hold up better outdoors than standard craft glue. I’d only use hot glue for covered patios or short-term seasonal décor.
Mix paint tones: For a more natural stone look, lightly mist a few eggs with a darker gray or soft taupe after the first coat dries. That little bit of color variation makes the planters look much less “crafted.”
Keep drainage open: Don’t block the drainage holes at the bottom of the nursery pots with glue drips or excess material. Healthy patio plants will thank you later, especially in a rainy Midwest spring.
Work in small sections: I’ve learned with repetitive projects like this that it’s easier to glue one row at a time instead of coating the whole pot with adhesive at once. It keeps the layout tidy and a lot less frustrating.
Style them as a pair: These look especially good flanking a front door or sitting on either side of a patio seating area. I’d plant them with trailing ivy, ferns, or bright annuals for the biggest visual payoff.