
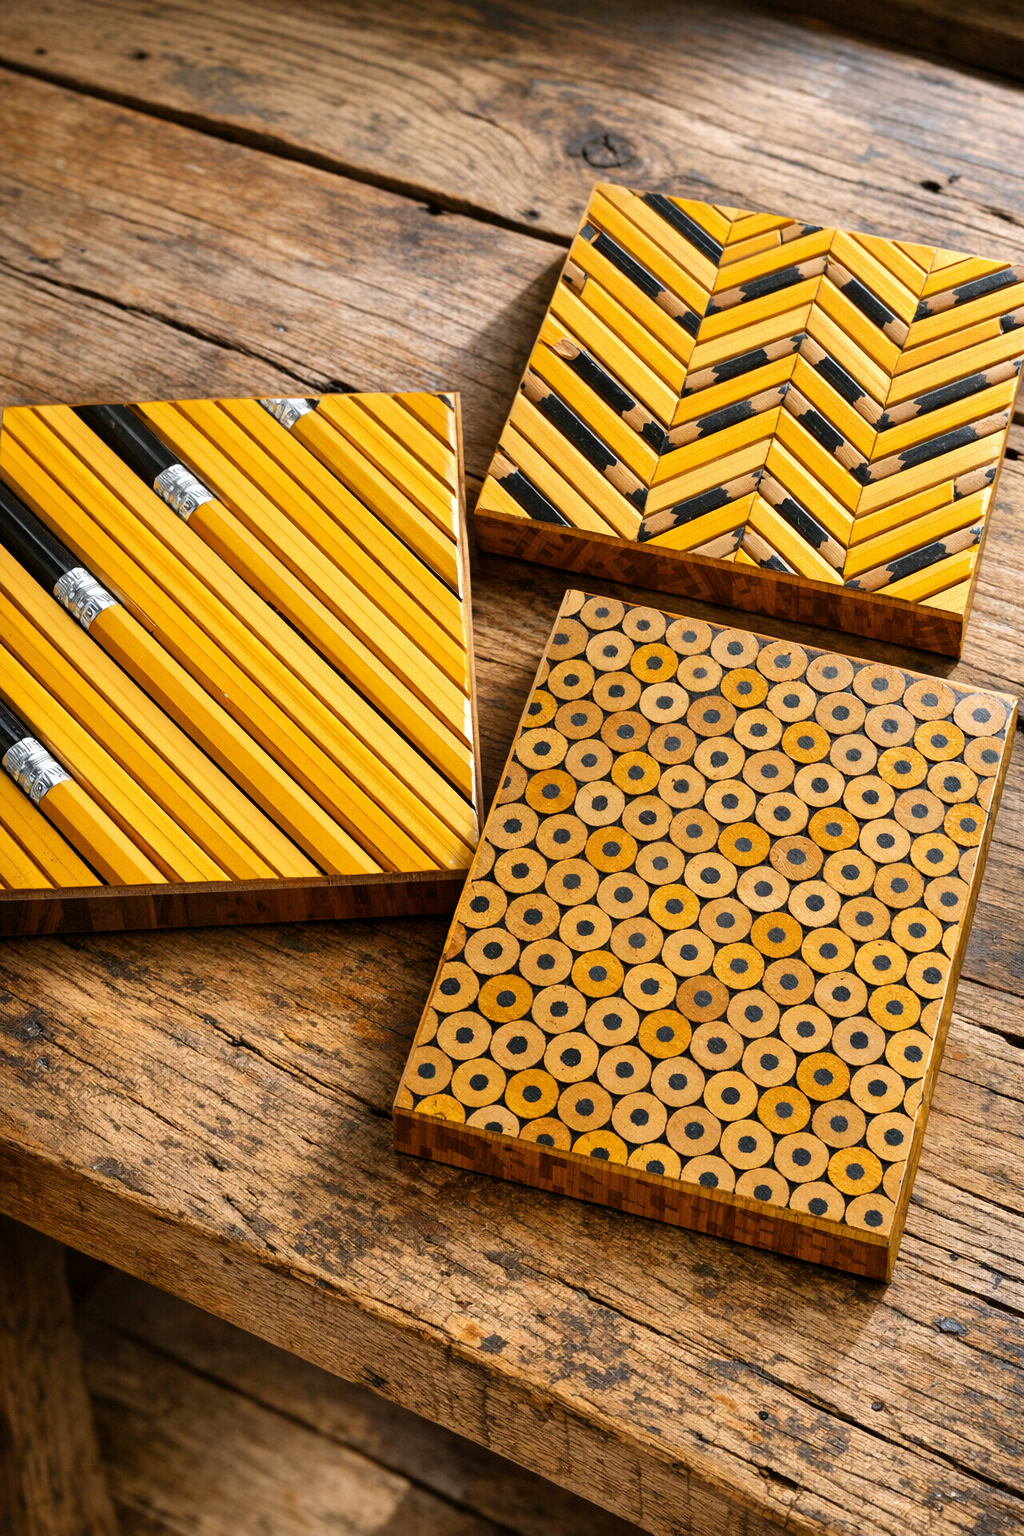
There’s something especially satisfying about taking the plainest everyday object and turning it into something that makes folks stop and lean in for a closer look. That’s exactly what happens with these patterned wood veneer panels made from yellow school pencils. Once the pencils are stacked, glued, sliced, and mounted, the finished surface no longer reads as “pencils” at all—it becomes a warm, geometric panel with little rings, stripes, and honey-colored patterns that look far more complicated than they really are.
I’m fond of projects like this because they use humble materials in a clever way, and that has always felt true to the way many of us learned to make things: use what’s common, use it well, and let patience do the fancy part. This project is a good fit for a careful beginner with a few basic tools, and it’s especially nice for anyone who enjoys woodcraft, upcycling, or making one-of-a-kind decorative panels for trays, box lids, wall art, or cabinet inserts.
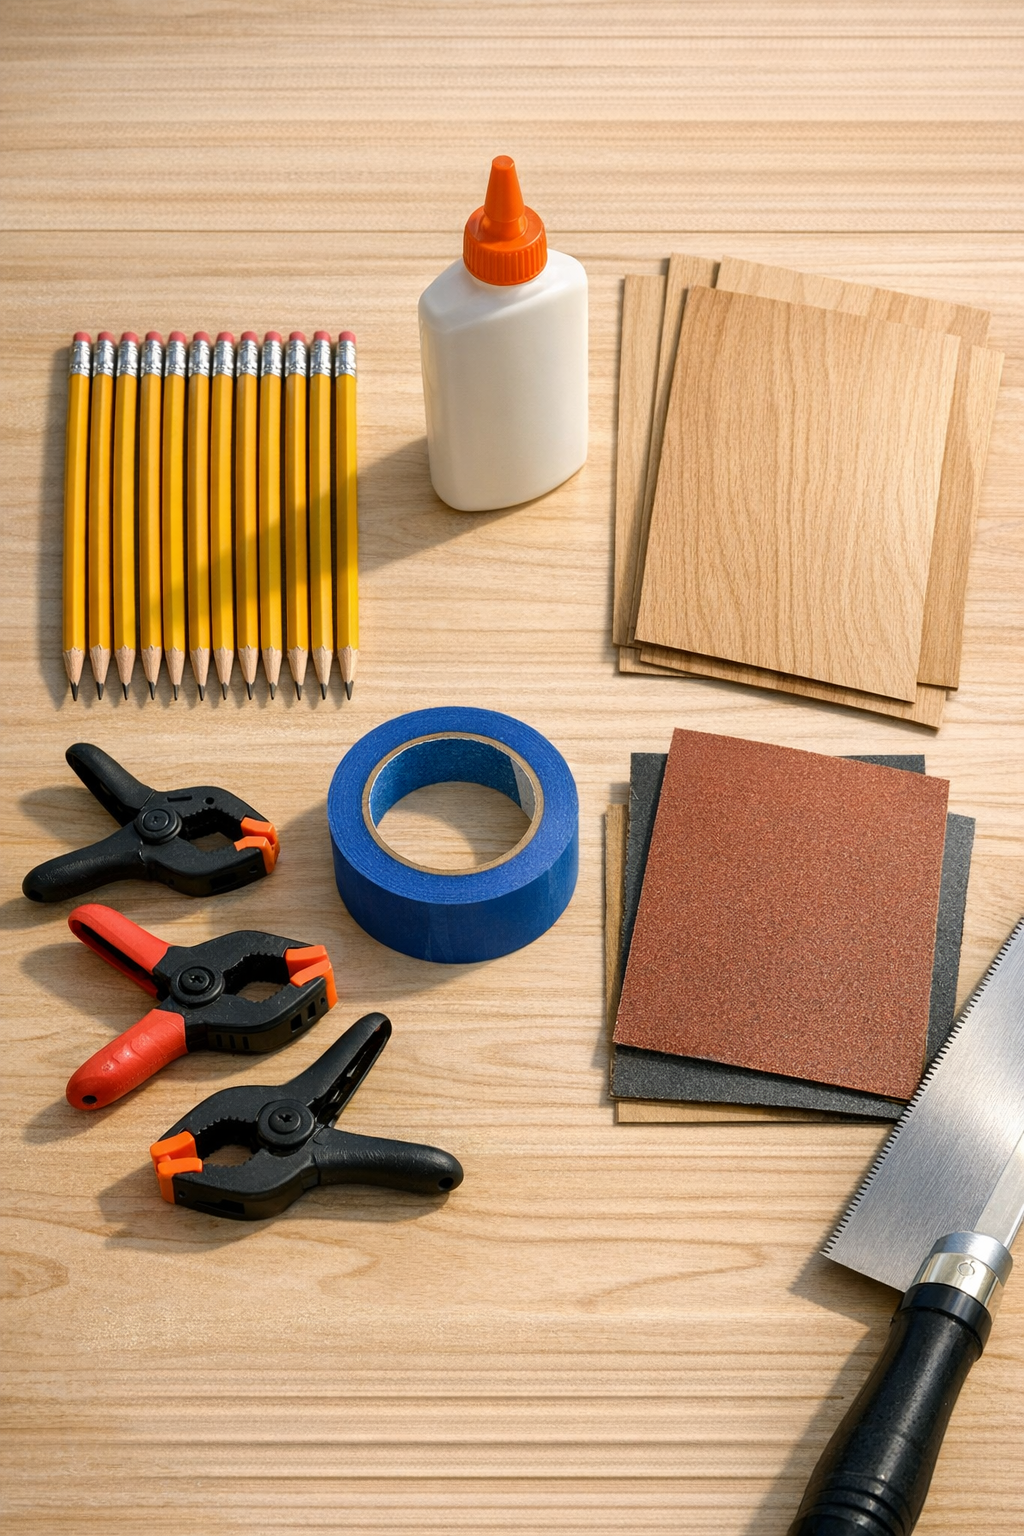
Materials
Instructions
1. Sort the pencils and set aside any with cracked paint, broken wood, or loose erasers so your finished pattern stays tight and even.
2. Wrap a band of painter’s tape around small bundles of 10 to 12 pencils to keep them from rolling while you arrange your glue-up.
3. Spread a thin, even coat of wood glue along the sides of the pencils, then press them together into one tight rectangular block with all pencil lengths running the same direction.
4. Place the pencil block between the scrap wood cauls and clamp it firmly from several sides, tightening just enough to close gaps without crushing the pencils.
5. Let the glued block cure flat for at least 24 hours so it becomes solid enough to cut into clean slices.
6. Remove the clamps and tape, then trim the ends if needed so the block is square and tidy.
7. Using a fine-tooth saw, cut the block into thin slices about 1/8 inch thick; these slices will become your patterned pencil veneer pieces.
8. Sand the back of each pencil slice lightly with 80-grit sandpaper so it sits flatter against the veneer panel.
9. Arrange the slices on the veneer panels in the pattern you like best, alternating directions or mixing the cut faces for a more decorative look.
10. Glue the pencil slices onto each wood veneer panel, pressing them down one by one so there are no raised edges or open seams.
11. Clamp or weight the panels flat and let the glue dry for another 12 to 24 hours.
12. Sand the surface gently with 120 grit, then 220 grit, and finish with 320 grit until the panel feels smooth and the pattern is crisp and even.
13. Wipe away all dust with a clean rag, then apply a thin coat of wipe-on polyurethane or clear wax to deepen the color and protect the surface.
14. Let the finish dry fully, and your patterned veneer panels are ready to use as wall art, drawer fronts, tray inserts, or box tops.
Variations & Tips
For a cleaner pattern: Unsharpened pencils give the most even block and the least waste, so use those if you can find them.
For stronger panels: If you plan to use these on a box lid or furniture insert, glue the pencil slices onto plywood instead of very thin veneer for extra stiffness.
For more visual contrast: Mix in a handful of colored pencils or alternate eraser ends with plain cut ends to create a more quilt-like pattern.
For easier cutting: A miter saw with a fine-finish blade or a small band saw can make more uniform slices than a hand saw, as long as you work slowly and keep the block supported.
For finishing: Polyurethane gives a clearer protective coat, while wax leaves a softer, more old-fashioned look that I find especially pretty on decorative panels.
My best tip: Don’t rush the glue curing time. In my experience, a patient glue-up is what turns this from a curious little experiment into a panel that truly looks polished and intentional.