
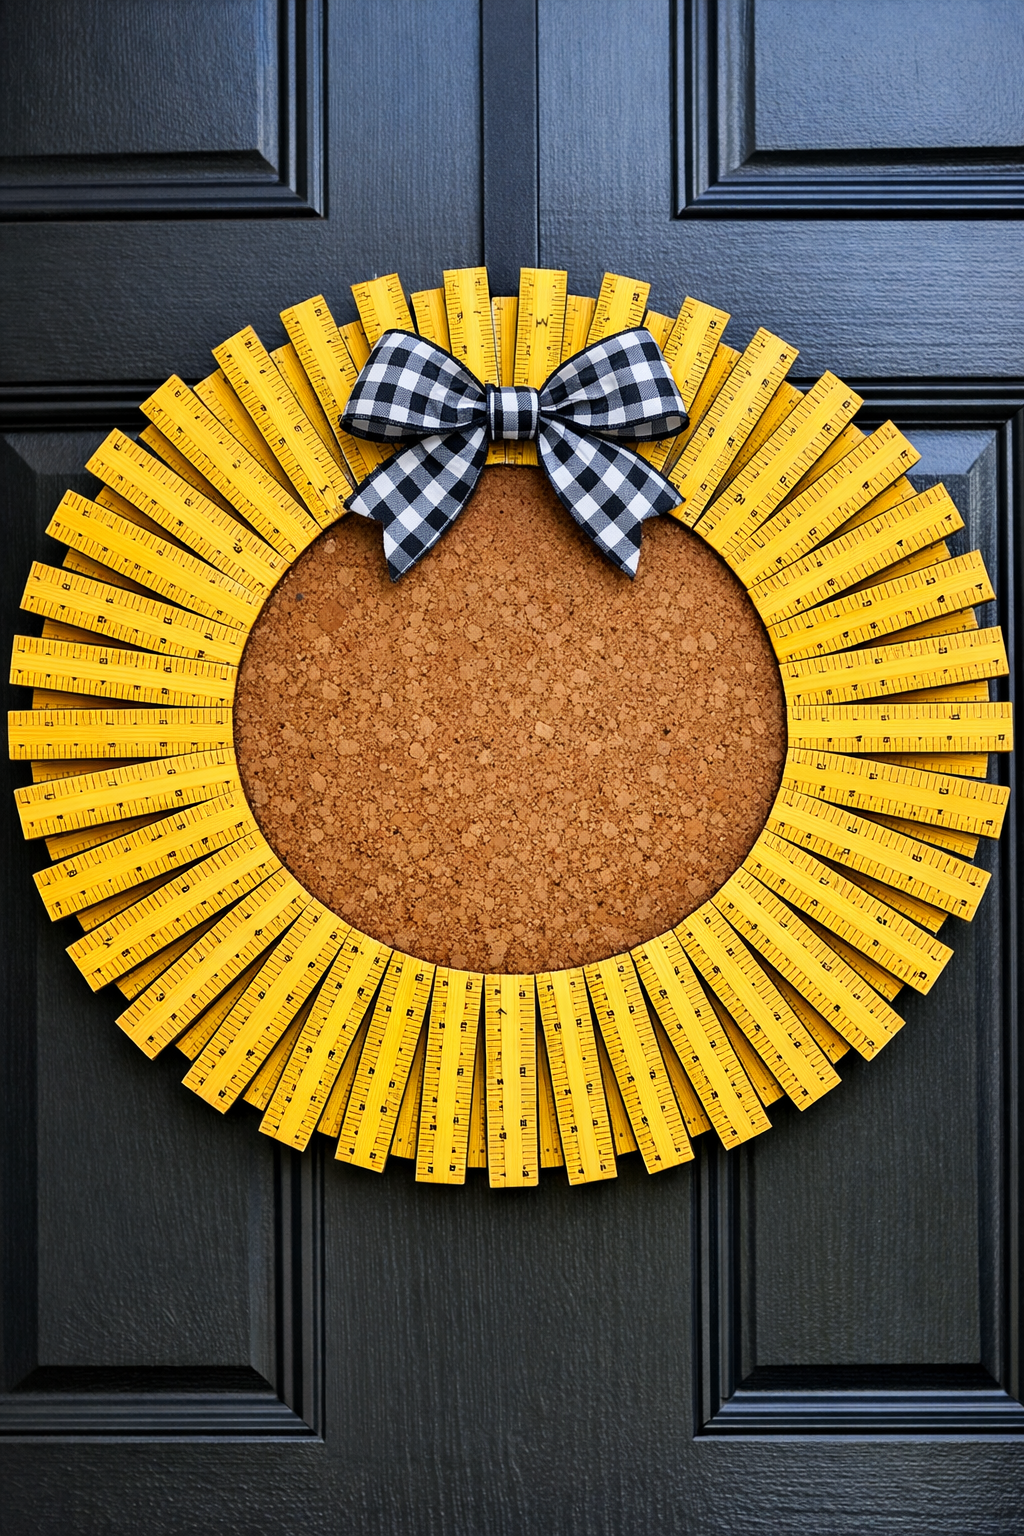
This oversized ruler wreath is one of those playful front-door projects that looks clever from the sidewalk and comes together with very simple materials. By arranging yellow wooden school rulers around a thick round cork board, you can make a bold back-to-school decoration that feels cheerful, nostalgic, and just a little bit unexpected.
I love projects like this because they borrow everyday objects from the kitchen drawer, office bin, or classroom supply aisle and turn them into something with real presence. If you enjoy easy seasonal decorating, teacher-inspired crafts, or making your entry feel more personal in late summer, this is a very manageable weekend project.
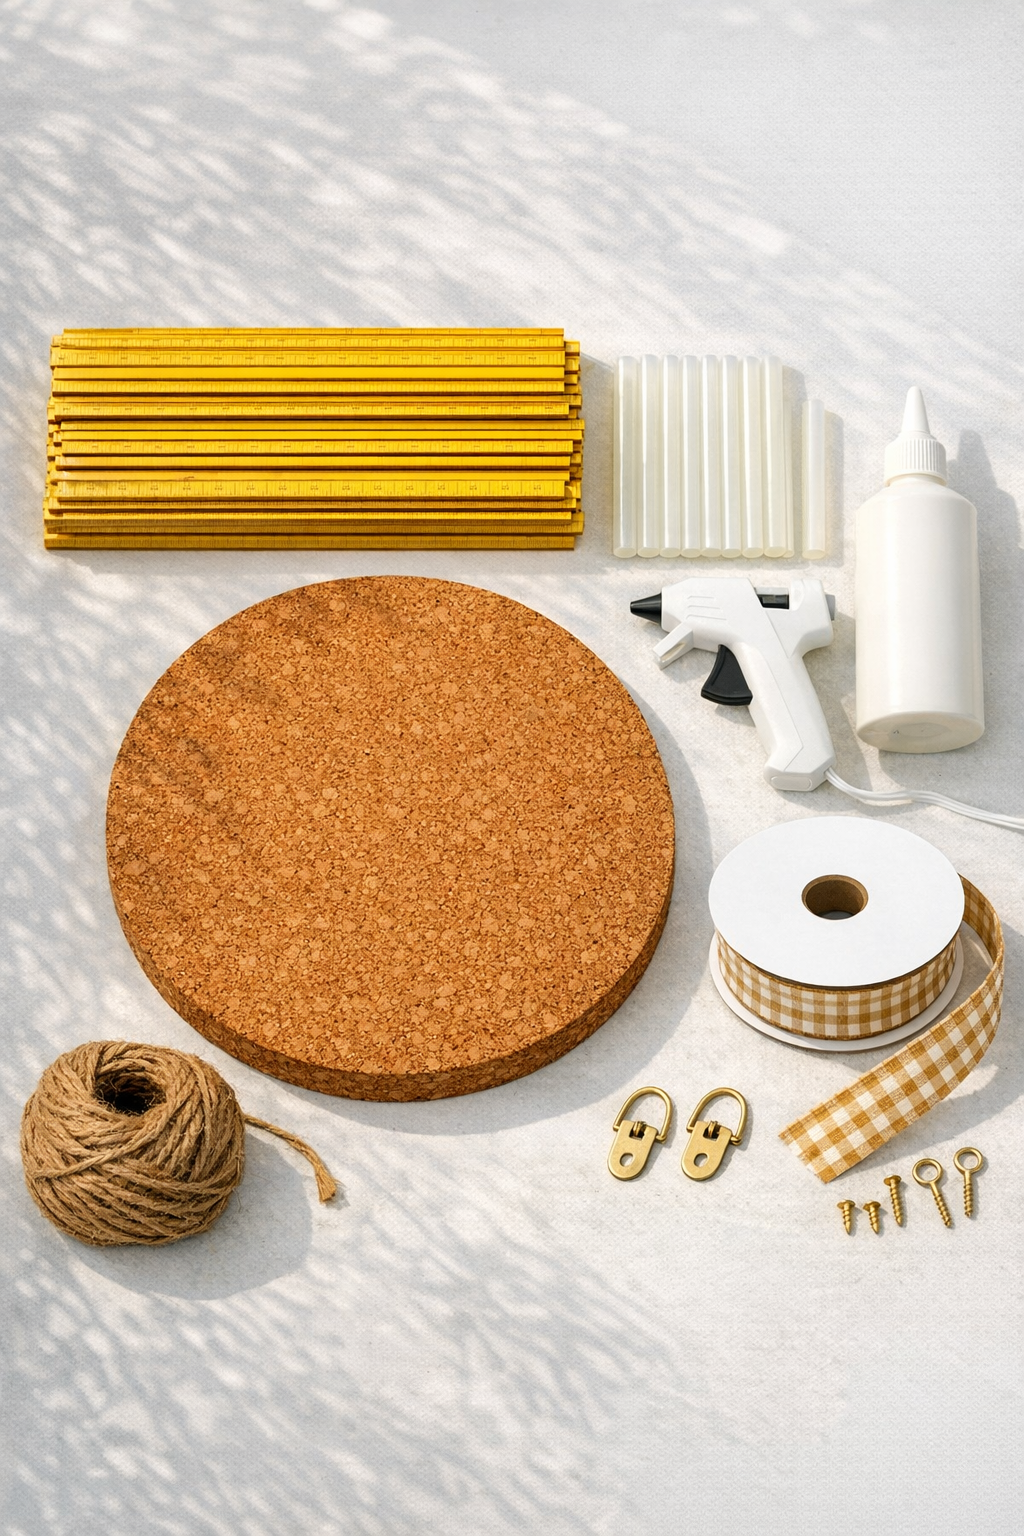
Materials
Instructions
1. Wipe the front of the cork board to remove dust and let it dry completely. Lightly sand any rough spots on the ruler edges so they sit flat.
2. Find the center of the cork board and lightly mark it with pencil on the back. Use that center point as a guide to keep your ruler placement even as you build the wreath.
3. Lay out the 50 rulers around the cork board before gluing, spacing them like sun rays with the inch-marked ends facing outward. Overlap the inner ends slightly on the cork so the outer circle looks full and balanced.
4. Start with four rulers placed at the top, bottom, left, and right positions to create visual anchors. Glue each one with a bead of hot glue plus a thin layer of craft glue where the ruler meets the cork.
5. Fill in between those anchor rulers, working in sections so the spacing stays consistent. Press each ruler into place for 10 to 15 seconds before moving to the next one.
6. Add a second pass anywhere the wreath looks thin, adjusting angles very slightly so all 50 rulers form a complete, rounded shape. Step back every few minutes and check for gaps from a distance.
7. Let the glued wreath rest flat for at least 30 minutes so the hot glue firms up and the craft glue begins to cure. If any ruler lifts, add a little more glue underneath and press it back down.
8. Attach the sawtooth or D-ring hanger to the back of the cork board near the top, following the hardware directions. If the cork is too dense for the hardware alone, loop and knot the jute twine securely around the hanger as a backup hanging loop.
9. Add the ribbon bow at the top or upper left side if you want a softer, more decorative schoolhouse look. Secure it with hot glue and reinforce the ribbon tails with glue dots if needed.
10. Hang the wreath on a covered front door or entry wall and make any final angle adjustments so the ruler points look evenly fanned out. Keep it in a sheltered spot to protect the wood and glue from rain and intense humidity.
Variations & Tips
Add a center accent: If you want to cover the visible cork center, glue on a small wooden apple cutout, a plain round wood disk, or a fabric bow in school colors.
Use a template first: I like to divide the circle mentally into quarters before gluing anything permanent. That little bit of planning makes the final wreath look much more polished.
Choose the right glue combination: Hot glue gives you immediate hold, while craft or wood glue adds longer-term strength. Using both together is especially helpful for a door decoration that may get some movement.
Keep it weather aware: This wreath is best on a covered door, enclosed porch, or indoor classroom door. Direct rain and harsh sun can loosen glue and fade the yellow finish over time.
Try color variations: You can swap in painted rulers in red, blue, green, or rainbow order for a classroom theme, but I think the classic yellow ruler look is what gives this project its instant back-to-school charm.
Make it teacher-friendly: For a classroom gift, tuck a small name plaque or monogram into the center so the wreath feels custom without changing the simple construction.