
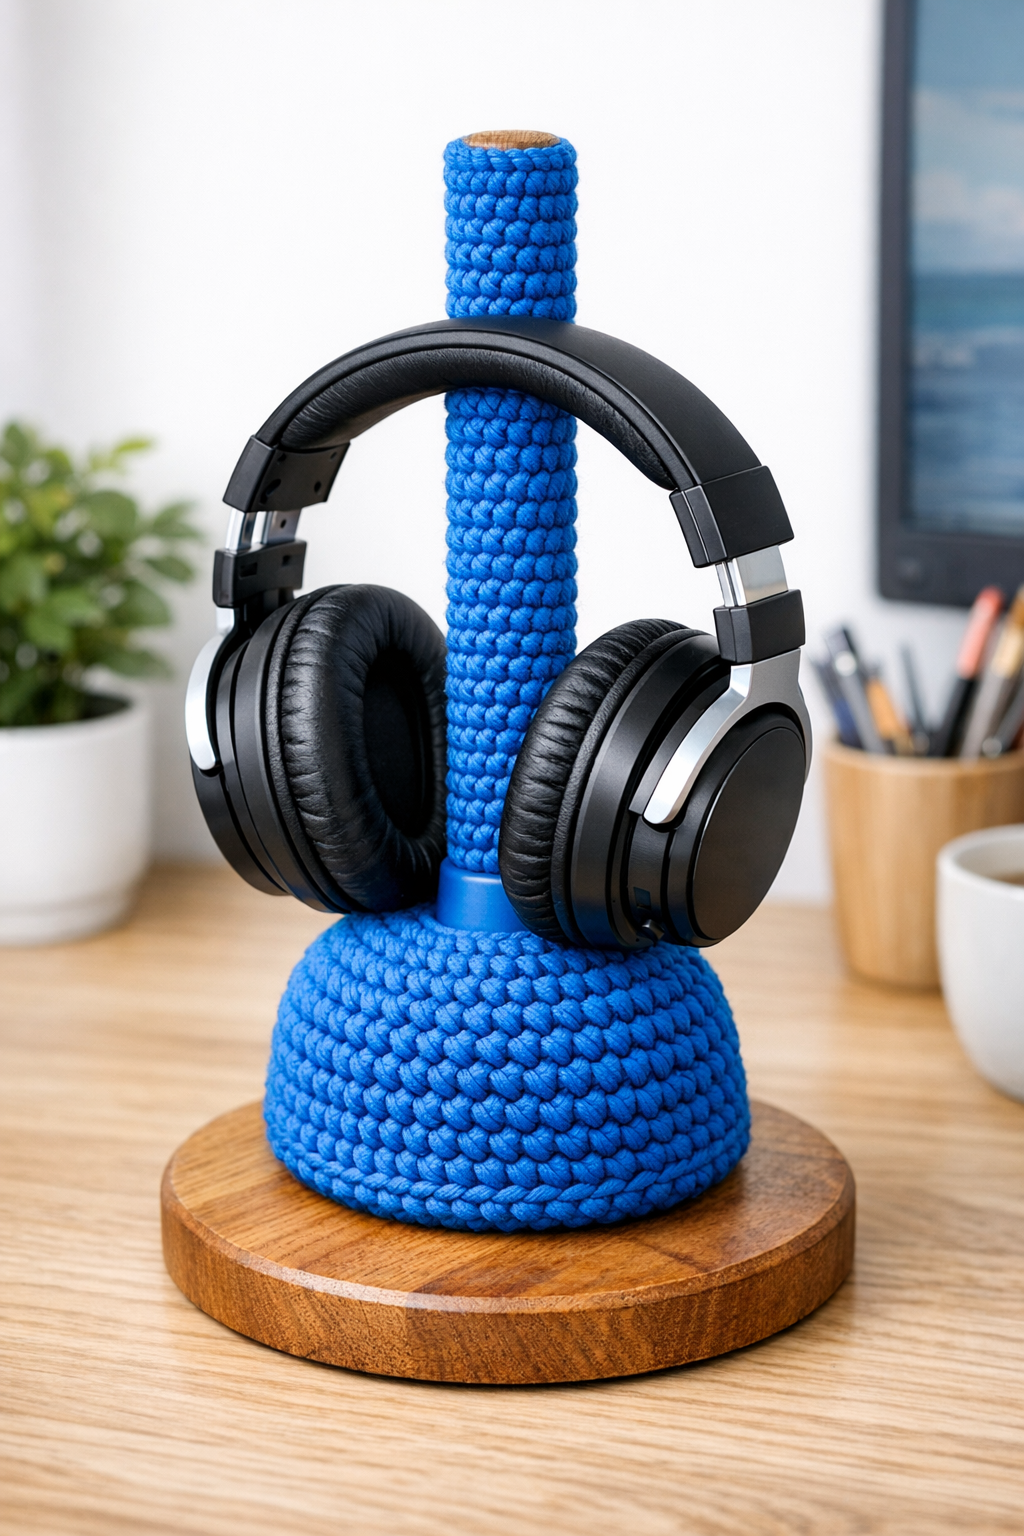
There is something especially satisfying about taking a plain household item and turning it into something useful enough to leave out on a desk every day. This headphone stand starts with an upside-down plastic toilet plunger, then gets dressed up with chunky electric blue crochet so it becomes a cheerful back-to-school organizer instead of something tucked away in a utility closet.
I have always had a soft spot for projects like this because they remind me of the old Midwestern habit of using what you have and making it prettier in the process. If you know basic crochet stitches and want a quirky, sturdy stand for over-ear headphones, this is a simple afternoon project that works well for students, teachers, dorm rooms, and homework stations.
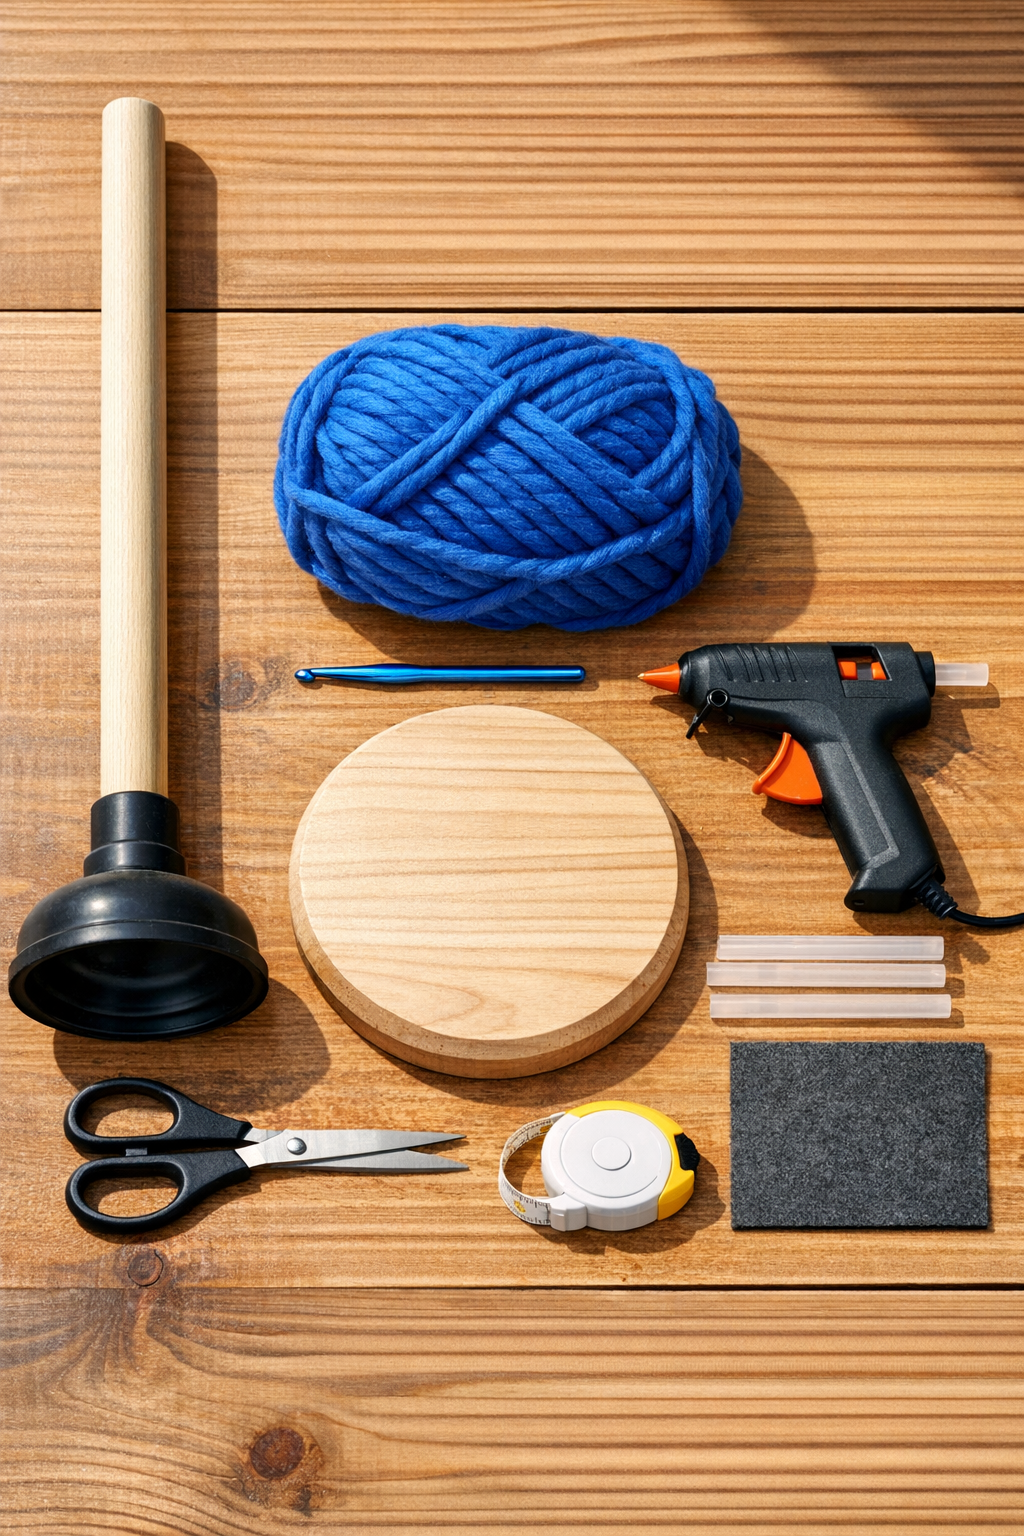
Materials
1 plastic toilet plunger with wooden handle, 18 to 20 inches tall, rubber cup about 5 to 6 inches wide
Instructions
1. Wash and dry the plastic plunger thoroughly, then make sure the handle is tightly attached and the rubber cup is clean and free of dust or soap residue.
2. Center the inverted plunger cup on the wooden base, trace around it lightly with pencil, and test the balance so the handle stands straight up.
3. Apply construction adhesive inside the traced circle and press the inverted plunger cup firmly onto the wooden base; let it set according to the adhesive directions so the stand is stable.
4. Cut a felt circle or ring to fit neatly around the plunger cup on the underside of the base if you want extra desk protection, then glue it in place and set the base aside to dry.
5. Make a slip knot with the electric blue yarn and chain enough stitches to wrap snugly around the wooden handle; join with a slip stitch to form a ring.
6. Work single crochet in joined rounds to create a narrow tube, checking the fit every few rounds so it slides over the handle without sagging.
7. Continue crocheting until the tube is long enough to cover the visible handle from top to just above the rubber cup, then fasten off and slide it into place.
8. Add a few small dabs of hot glue under the top and bottom edges of the crocheted tube to keep it from twisting, pressing the yarn gently into place.
9. Start the cup cover by making a magic ring and crocheting 6 single crochet into it, then increase evenly in rounds until the circle matches the width of the top center of the inverted plunger cup.
10. Keep crocheting with fewer increases so the piece begins to curve, then test-fit it over the plunger cup as you go until it cups the rounded shape neatly.
11. Work even rounds until the crochet reaches the lower edge of the cup, then fasten off with a 12-inch tail for securing.
12. Pull the cover snugly over the plunger cup and use the yarn tail plus a yarn needle if you have one, or careful hot glue if you do not, to secure the lower edge underneath where it will not show.
13. If there is a gap between the handle sleeve and cup cover, crochet a short joining band or wrap yarn neatly around the transition point and glue it down for a finished look.
14. Check the stand for wobble, add extra glue where needed, and let everything cool and cure fully before placing your headphones on top.
15. Set your over-ear headphones over the wrapped handle so the headband rests at the top and the ear cups hang evenly on each side of the crocheted stand.
Variations & Tips
Color change: If electric blue is not your style, school colors look especially nice on this project. I think this would be darling in black and gold, red and white, or even a striped version for a student desk.
No-crochet option: You can wrap the handle and cup with the same chunky yarn instead of crocheting fitted covers. Use hot glue in short sections and keep the wraps snug and even.
Stability tip: If your headphones are heavy, use a thicker wooden base or glue a second wood circle underneath. A little extra weight goes a long way toward keeping the stand steady.
Neater finish: Work the handle sleeve slightly smaller than you think you need because crochet relaxes a bit. A snug sleeve looks cleaner and stays put better over time.
Desk-friendly bottom: Felt under the base helps prevent scratches and keeps the stand from sliding around. That small touch makes it feel more polished and classroom-ready.
Gift idea: This makes a fun back-to-school gift when paired with headphones, a notebook, or a pouch of pens. Around my house, the best handmade projects are the ones that make everyday life just a little more cheerful.