
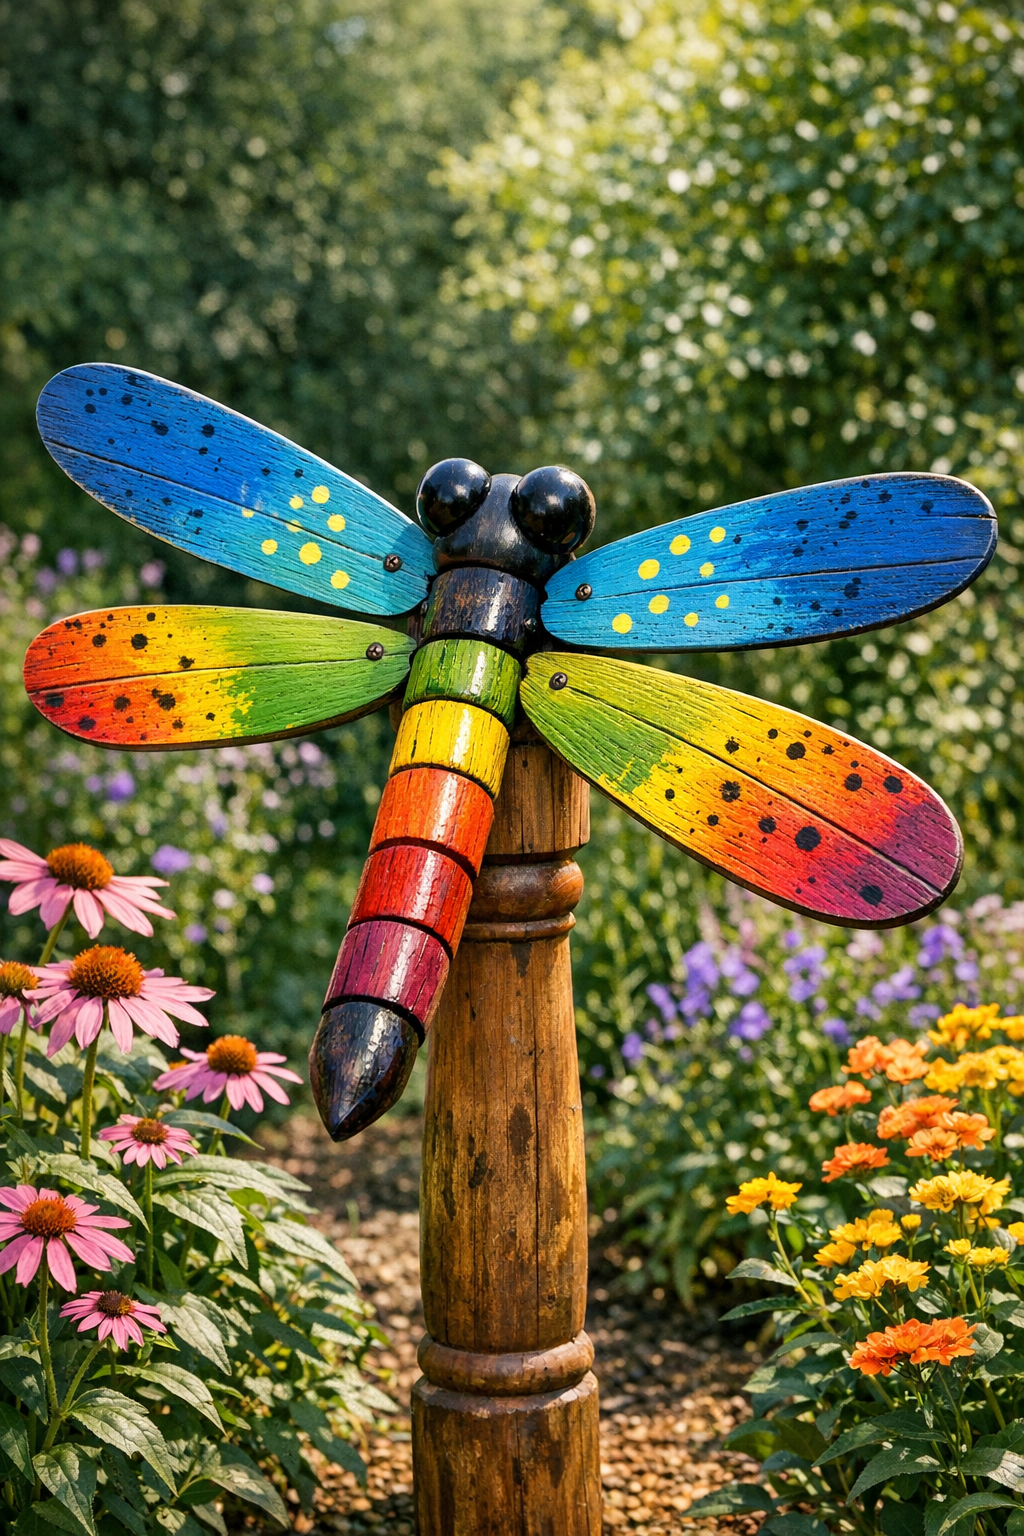
There’s something mighty satisfying about turning a pile of old house parts into a piece of garden charm, and this giant dragonfly does exactly that. With four old wooden ceiling fan blades for wings and one thick round table leg for the body, you can make a cheerful backyard decoration that looks right at home tucked into the flowers or leaning near a porch. It’s the sort of project I love because it uses what you may already have in the shed, and once the paint goes on, those castoffs look downright magical.
Out here, we’ve always believed in giving sturdy old things a second life, and this one feels especially sweet. If you’re comfortable with basic painting and a little hammer work, you can make this in an afternoon. It’s a good project for anyone who likes rustic garden décor, upcycling, and those handmade touches that make a yard feel personal.

Materials
Instructions
1. Lay out the four fan blades and table leg on a drop cloth, and check that all the wood is sound and dry. Pick the prettiest side of each blade to face forward, because that will become your dragonfly wings.
2. Sand the fan blades and table leg with 120-grit sandpaper to remove loose finish and rough spots, then smooth everything with 220-grit. Wipe all the dust away with a rag or tack cloth.
3. Fill any deep screw holes or chipped spots with wood filler if needed, and let it dry fully. Sand those patched areas smooth so the paint will sit evenly.
4. Brush on a coat of exterior primer over all surfaces, including the blade edges and both ends of the table leg. Let the primer dry according to the product directions.
5. Paint the table leg in your body color, using one or two thin coats for even coverage. I like deep black, dark brown, or a weathered green because it helps the wings stand out nicely.
6. Paint the four fan blades as wings, keeping two matching pairs if you want a balanced look. You can use soft blues, greens, white, yellow, or even a distressed finish; just let each coat dry before adding another.
7. Arrange the blades into a dragonfly shape before attaching them, with two wings angled upward on each side of the table leg and the narrower blade ends pointing toward the body. Adjust the spacing until the shape looks even from left to right.
8. Mark the wing placement on the table leg, centering the top pair about 6 to 8 inches below the top end and the lower pair about 2 to 3 inches beneath them. This small gap helps the finished dragonfly look layered instead of flat.
9. Add a thin bead of exterior wood glue where the first blade will sit, hold it in place, and nail it securely into the table leg with 2 or 3 galvanized finishing nails. Repeat with the remaining three blades, checking often that both sides stay balanced.
10. Let the glue set, then gently lift the piece and inspect it from the front to make sure the wings are secure and sitting at similar angles. If needed, tap in one more nail on any blade that feels loose.
11. Brush a clear outdoor sealer over the entire dragonfly, especially the blade edges, nail areas, and both ends of the table leg. Let it dry completely, then add a second coat if your garden gets strong sun or steady rain.
12. Display the dragonfly by leaning it in a flower bed, mounting it to a fence, or slipping the base over a garden stake or rebar for extra stability. Stand back a spell and admire it, because old wood seldom gets a prettier second chapter than this.
Variations & Tips
Weathered farmhouse look: Dry-brush a little white or gray over the painted wings after the base coat dries, then lightly sand the edges for an aged finish that looks lovely in cottage gardens.
Bright butterfly colors: If you enjoy a more playful yard, paint each wing a different cheerful shade. I’ve seen blues and sunny yellows look especially pretty against green summer plants.
Extra sturdy assembly: Pre-drill small pilot holes before nailing if the wood is old and hard. That little extra effort helps prevent splitting, especially near the blade ends.
Easy mounting option: If you want the dragonfly standing upright in the garden, fasten the table leg to a metal garden stake or piece of rebar with outdoor-rated clamps on the back side where they won’t show much.
Seal it well: Outdoor pieces last longer when the cut ends, old screw holes, and blade edges get special attention with primer and sealer. Those spots soak up moisture first.
Make it your own: You can glue on wooden beads for eyes, paint stripes on the body, or add subtle veining lines to the wings with a small brush. Handmade yard art ought to carry a little of your own personality, same as a well-loved kitchen recipe.