
There’s something especially satisfying about turning an ordinary household item into something useful and unexpectedly sweet, and this little outdoor pet water station does exactly that. By crocheting thick ocean teal yarn through a plastic kitty litter scoop, then flipping the scoop so the bowl faces up, you end up with a sturdy holder that cradles a small water dish for porch days, garden afternoons, and those hot August stretches when pets seem to wander in and out all day long.
I’ve always had a soft spot for practical make-dos like this. It reminds me of the kind of clever project folks around here have always loved—using what’s on hand, dressing it up a bit, and giving it a second life. If you know a few basic crochet stitches and want a quick project with a cheerful finish, this one is simple to follow and charming when it’s done.
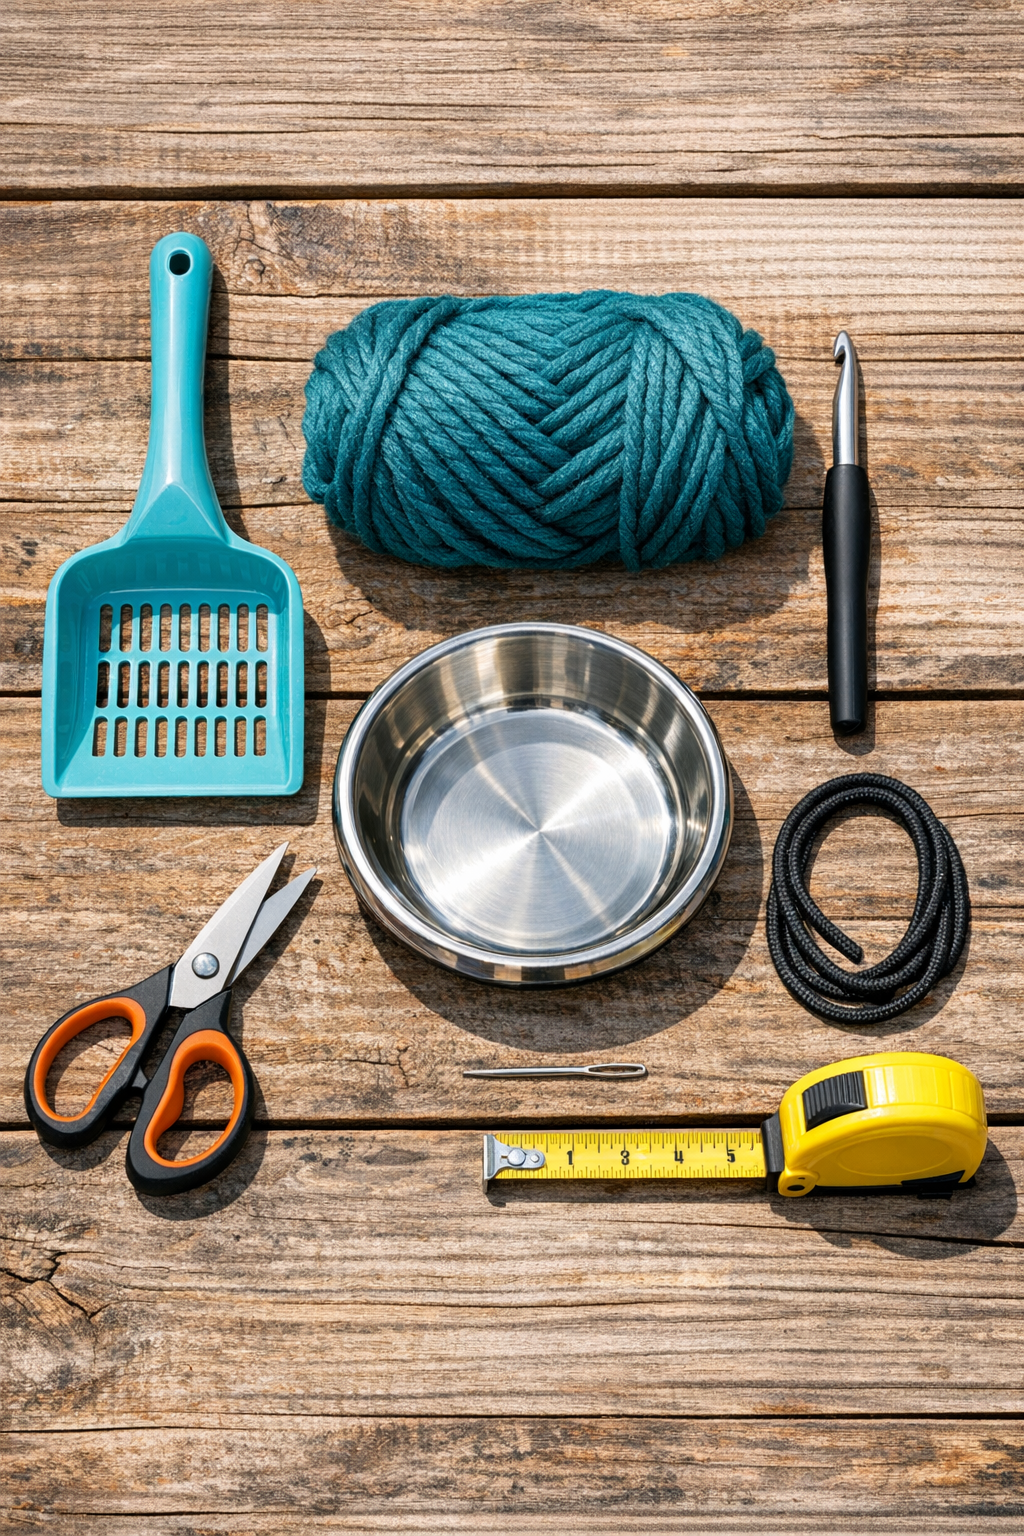
Materials
Instructions
1. Wash and dry the plastic kitty litter scoop thoroughly so the yarn stays clean and the stitches grip the surface well. Check that the scoop bowl is wide enough to support your small pet bowl when turned upward.
2. Tie a starting loop of yarn around the base of the handle, leaving a 4-inch tail, and single crochet tightly around the handle to begin a wrapped grip. Keep the stitches snug so the plastic doesn’t show through too much.
3. Continue wrapping and crocheting down the full handle until it is covered, then slip stitch the final stitch and weave in the tail with the yarn needle. This makes the handle softer to hold and gives the piece a finished look.
4. Turn your attention to the slotted scoop bowl and insert the hook through one opening near the rim, pulling yarn through to anchor it. Work single crochet stitches through the openings all around the edge, using the slots like built-in anchor points.
5. Add a second round of stitches around the scoop bowl rim, placing one or two stitches into each opening as needed to create an even border. The goal is a firm crocheted edge that softens the plastic and helps hold the bowl in place.
6. Flip the scoop over so the bowl faces up like a shallow platform and test your stainless steel bowl on top. If it slides, crochet a short raised ring or three small bumpers on the rim where the dish rests.
7. Make the raised ring by chaining enough stitches to fit around the base of the bowl, usually 18 to 24 inches depending on bowl size, then join and single crochet one round. Stitch or tie this ring securely onto the upturned scoop bowl so it acts like a nest for the water dish.
8. Attach the weather-resistant cord or zip tie through a hole near the handle end if you want to hang or secure the station to a porch rail, fence post, or garden hook. Keep it low enough for your pet to reach comfortably.
9. Fill the bowl with water and set the station in a shaded outdoor spot to test its balance. Adjust the bowl placement or add a few extra securing stitches if anything tips or shifts.
10. Trim any loose yarn, weave in the last ends, and give the whole piece a final check for snug stitching. Once it feels stable, your outdoor pet water station is ready to use.
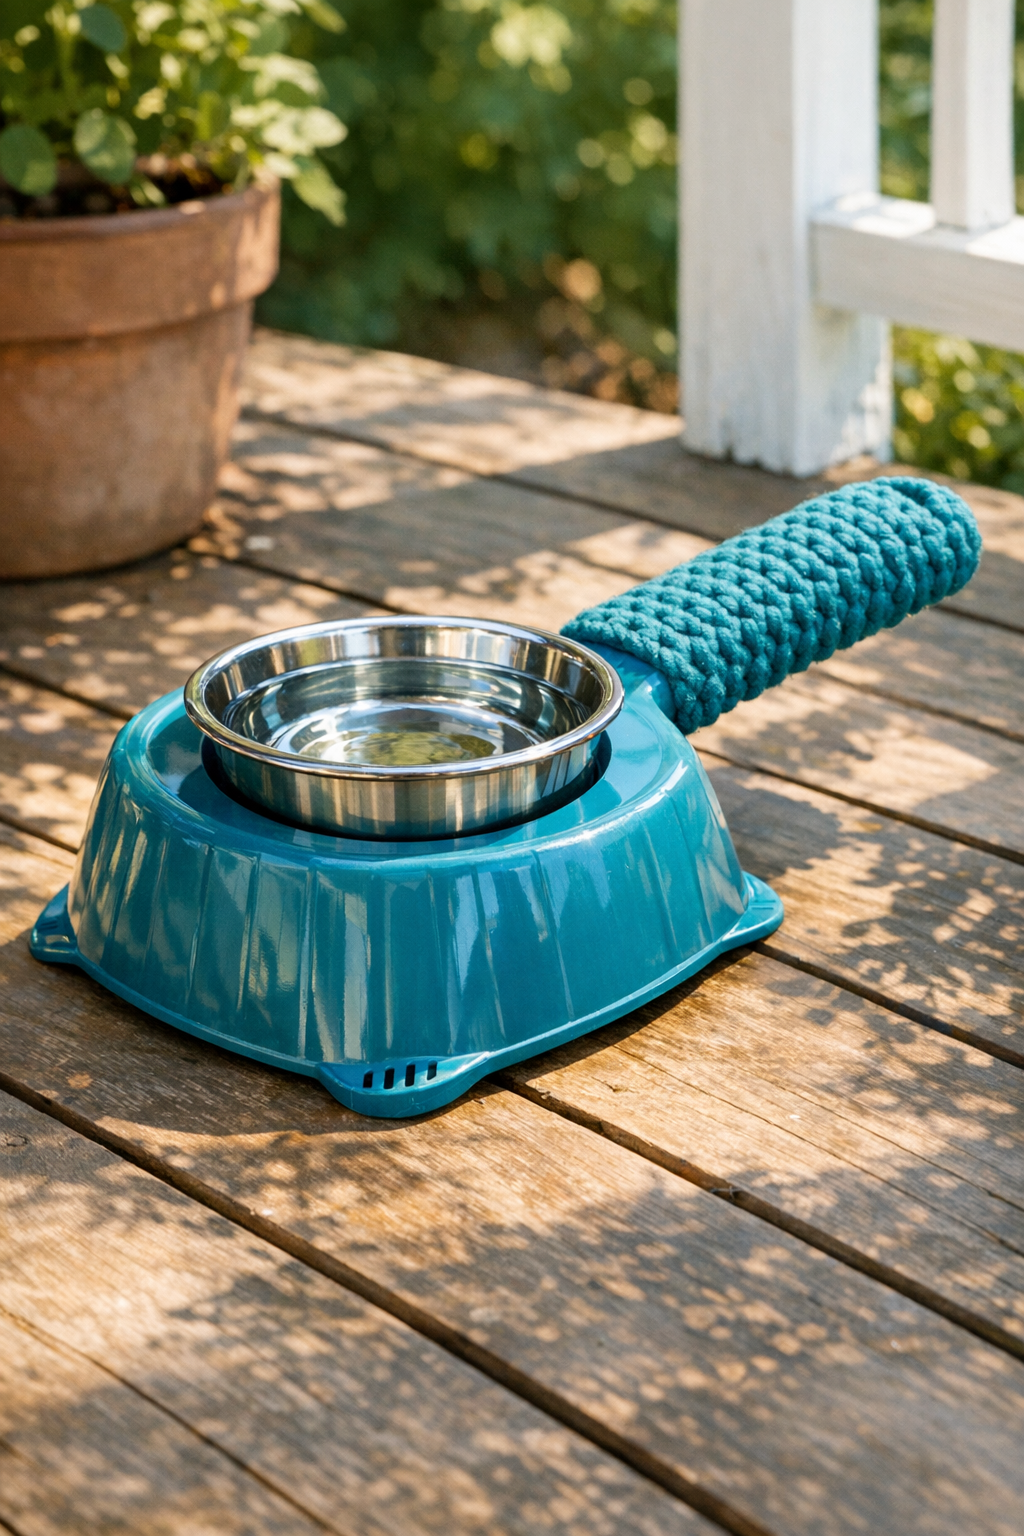
Variations & Tips
For smaller pets: Use a lighter plastic scoop and a 4 to 5 inch bowl so the station stays properly balanced for cats, kittens, or toy-breed dogs.
For outdoor durability: If the station will live on the porch all season, choose synthetic bulky yarn rather than wool, since it handles splashes and humidity better.
Add a non-slip base: A strip of outdoor grip tape or a dot of hot glue under the underside edges can help the scoop stay put on smooth concrete or decking.
Make it decorative: You can add a scalloped crochet edge, a contrasting stripe, or even a little loop at the handle end. I think ocean teal is lovely for August because it looks cool and fresh in the heat.
Keep cleaning easy: Use a removable stainless steel bowl rather than filling the scoop itself. That way you can wash and refill it daily, which is always best in hot weather.
Check safety first: Before putting it outside for regular use, tug gently on every stitched area and make sure there are no loose strands for a pet to chew. Around my house, I’ve learned that the prettiest project still has to be a sturdy one.