
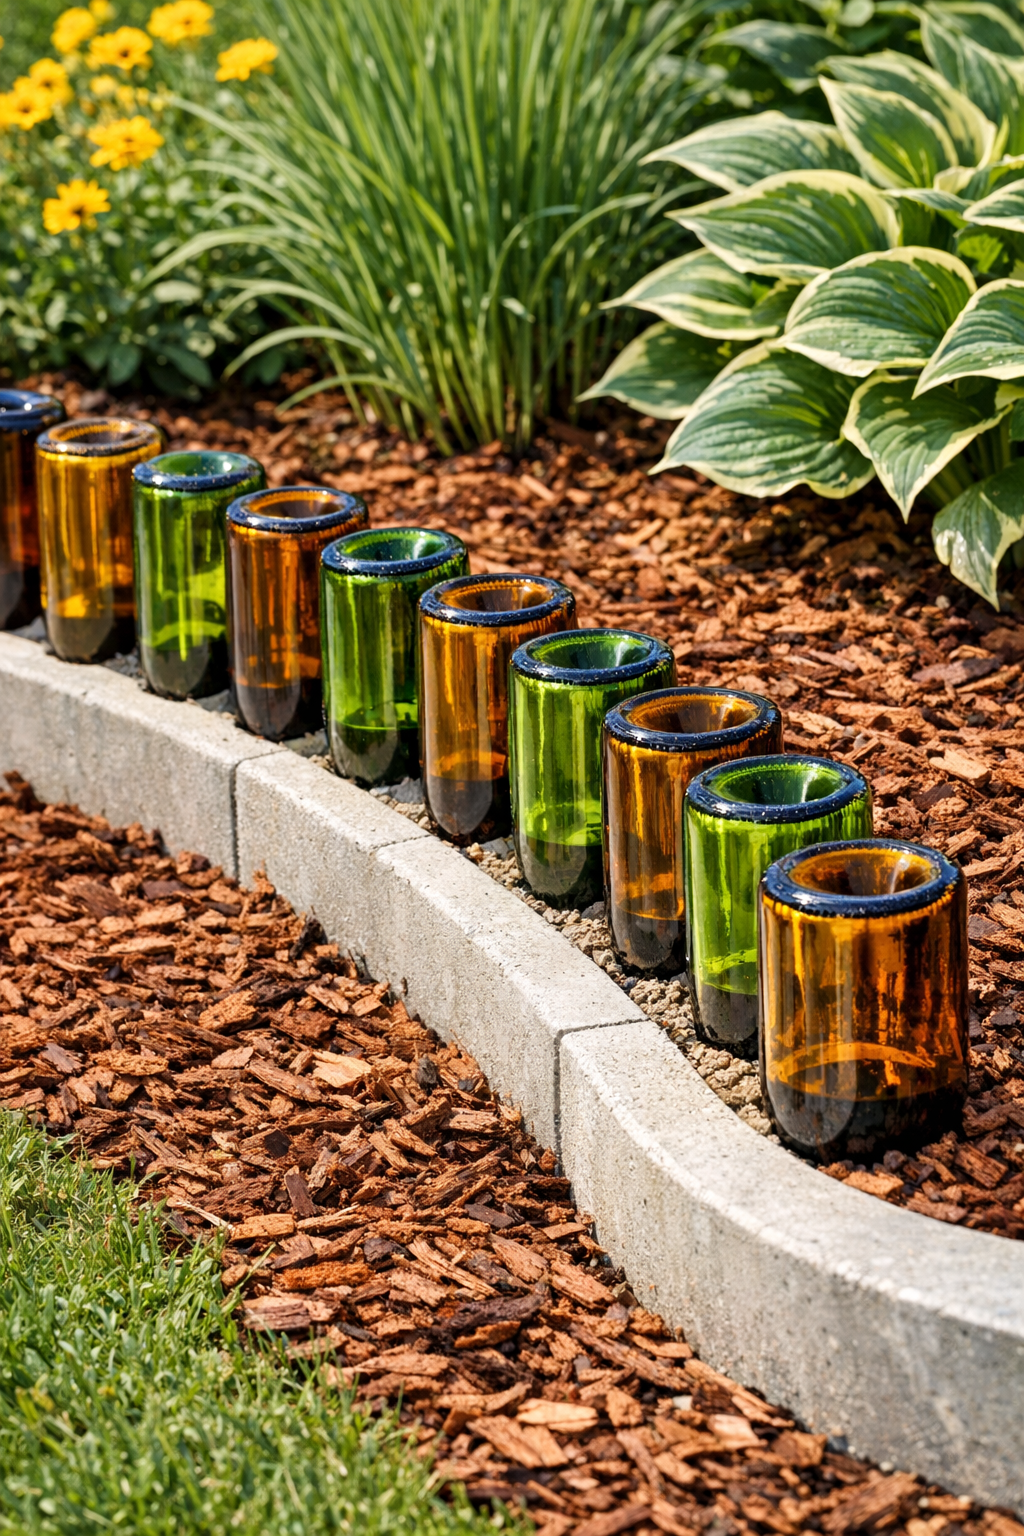
I love a garden project that looks custom and high-end without actually blowing the budget, and this bottle-and-concrete border is exactly that kind of weekend win. By pressing amber and green wine bottles upside down into fresh concrete edging, you get a sculptural border that catches the light, defines the bed beautifully, and adds a little vintage character to an ordinary planting area.
This is a great project if you want something more polished than basic plastic edging but still doable with simple materials and a little patience. As someone who is usually squeezing yard projects in between work deadlines and figuring out dinner, I appreciate anything that gives a big visual payoff in a day or two, and this one really does.

Materials
18 clean empty wine bottles, mixed amber and green, standard 750 mL size
Instructions
1. Mark the shape of your garden border with mason line or a garden hose, keeping the curve smooth and the finished edging about 4 inches wide. I like to step back from the bed and check the line from a few angles before digging, because small layout tweaks make a huge difference in the final look.
2. Dig a trench along the marked line 8 inches deep and 6 inches wide, then tamp the bottom until firm. This gives the concrete a stable base so the bottles stay even over time.
3. Add 2 inches of compactable gravel to the trench and tamp it flat. Check that the gravel base follows the same curve and stays level from one section to the next.
4. Set the form boards along both sides of the trench to create a 4-inch-wide channel, then stake them every 18 to 24 inches. Use screws to fasten the forms to the stakes and adjust until the top edges are level or have a very slight intentional slope for drainage.
5. Wash the bottles thoroughly with warm soapy water, remove labels, and let them dry completely. Wrap a band of painter's tape around each bottle at the same height so you have a quick visual guide for how deep to press them into the concrete.
6. Mix the concrete in small batches according to the package directions until it reaches a thick peanut-butter consistency. Work in sections of 2 to 3 feet so the concrete stays wet long enough for placing the bottles.
7. Shovel concrete into the form to just below the top edge, then smooth it lightly with a trowel. Tap the outside of the forms with the trowel to release trapped air and settle the mix.
8. Press the bottles upside down into the wet concrete, spacing them about 1 to 2 inches apart and alternating amber and green for a balanced look. Push each bottle down to the tape line so the heights stay consistent and the border looks intentional instead of random.
9. Check alignment every few bottles with a small level or by sighting across the tops, then adjust before the concrete starts to firm up. If concrete squeezes up too high around a bottle, trowel a little away so the glass shape still shows.
10. Continue filling, smoothing, and setting bottles section by section until the entire border is complete. Clean wet concrete smudges off the bottles right away with a damp sponge for a much easier finish later.
11. Let the concrete cure undisturbed for at least 24 to 48 hours, or longer in cool weather. Once cured, remove the forms carefully and backfill soil against the outside edges of the border.
12. Rinse the bottles one more time and touch up the garden bed with mulch or fresh plantings. When the sun hits the amber and green glass, the whole border gets that expensive garden-room feel that makes it look far more custom than it really cost.
Variations & Tips
Color mix: If you want a softer look, use all green bottles; if you want more contrast, alternate amber and green evenly all the way down the line. I like laying the bottle pattern out on the grass first so I can see the color rhythm before I commit.
Height control: Painter's tape is the easiest way to keep the bottles uniform, especially if you're working quickly. If a few bottles still sit unevenly, adjust them while the concrete is still soft rather than trying to fix it after curing.
Bottle prep: Soaking bottles in warm water with a little dish soap makes label removal much easier. A plastic scraper helps with stubborn adhesive without scratching the glass.
Cold-weather timing: Avoid pouring concrete on freezing days or right before heavy rain. On busy weeks, I try to prep the bottles and forms one evening, then mix and place the concrete the next day when I have a solid uninterrupted block of time.
Safety tip: Discard any chipped or cracked bottles before using them. Even though the bottles are embedded, starting with intact glass is safer and gives the finished border a cleaner look.
Shape option: This border looks best with gentle curves, but it also works for straight beds and around small circular planting islands. Just keep the width consistent so the bottle spacing looks deliberate.
Low-maintenance finish: Add mulch right up to the concrete edge after everything cures. It helps the border look finished and cuts down on weeds, which is always a bonus in my book.